Home Blog Page 34

How to Activate North Lane on Your Streaming Devices

Did you know that up to 30% of credit card users struggle with the initial activation process? As a new North Lane cardholder, this guide aims to simplify this process for you. How To Activate North Lane On Your Streaming Devices

We’ll walk you through the process, from the first step of activation to managing your account efficiently. And what if there’s more to it than just mastering the mundane? Stay with us to find out.

Understanding North Lane Activation

To fully harness the convenience of your North Lane card, you need to understand the simple activation process that activates its numerous benefits.

It’s not merely about making your card ready for use; it’s about exploring features that’ll transform your financial management experience.

Once activated, you’ll open a world of activation benefits including secure online transactions, cashless shopping, and easy balance checking.

Step-by-Step Guide to Activation

Having understood the importance of North Lane card activation, let’s get you started on the step-by-step guide to ensure a smooth and successful activation process.

  1. Visit login.wirecard.com/activate.
  2. You’ll be directed to login.northlane.com/activate.
  3. Enter your Card Number and Security Code.

Registering for Online Access

Once your North Lane card is activated, it’s essential you register for online access to manage your card effectively and enjoy a host of convenient technology-driven features. By doing so, you’ll open the door to seamless transactions, real-time balance checks, and statement reviews. Fret not about your information; sophisticated online security measures are in place to protect your data, keeping this a featured benefit of the service.

The registration process is a breeze. It follows closely on the heels of card activation and can be completed in just minutes. You’ll need your card details handy and a stable internet connection. If you encounter any issues, simple troubleshooting steps, like verifying your card information, refreshing your browser, or checking your connection—usually solve the problem quickly.

Remember, registering for online access is more than a luxury; it’s a necessity. It’s all about convenience, control, and security. So don’t delay—register today and make the most of your card’s featured technology tools.

Navigating Northlane Online Post-Registration

After you’ve registered for online access with Northlane, you’ll find getting around your account online is as easy as pie, putting a wealth of features and information right at your fingertips.

To guarantee a seamless experience, consider these three key points:

  1. Online Security Measures: Northlane secures your account with advanced technology. Always remember to log out when you’re finished to maintain security.
  2. Account Management Best Practices: Regularly monitor your account to stay updated on transactions and balance. Update your personal information as needed for consistent communication.
  3. Stay Informed: Northlane provides timely updates on offers, security measures, and more. Stay connected to make the most of your account.

Northlane’s online platform is designed to give you full control of your account, effortlessly.

Customer Support Services

When you need assistance or encounter any issues with your Northlane card, the customer support service is readily available to offer solutions and guide you through the process.

They’re experts in providing support solutions that are quick, effective, and tailored to your needs. Whether you’re struggling with activation troubleshooting or need help understanding the features of your card, they’ve got you covered.

Their strategic approach guarantees you get the most out of your card with minimal hassle. They’re dedicated to giving you a seamless experience, providing detailed guidance every step of the way.

Think of Northlane’s customer support as your personal guide, ready to assist and make sure your journey with Northlane is smooth and rewarding.

Reporting Lost or Stolen Cards

While the Northlane customer support team is always ready to assist with any card-related issues, it’s important to know the steps you should take if your card is lost or stolen.

  1. Immediate Action: Report the loss to Northlane immediately through their emergency contact numbers. This is the first line of defense in preventing fraud.
  2. Card Replacement Process: Request a new card. Northlane’s smooth card replacement process guarantees you’re not left stranded.
  3. Enhanced Security Measures: Upon receiving your new card, boost security measures. Regularly monitor your account for any suspicious activity.

Making Payments Using Payment Code

Embracing the convenience of modern technology, you can now make payments using a Payment Code with your Northlane card, ensuring swift and secure transactions.

Using payment codes streamlines your transactions, making them quick, easy and hassle-free. It’s simple – just enter your Payment Code during checkout, and voila, your payment is processed!

But what if something goes wrong? Don’t worry, troubleshooting payments is a breeze with Northlane. If your Payment Code doesn’t work, just check to unlock you’ve entered it correctly. Still having issues? Our customer service team is always at your disposal. In no time, you’ll be back to enjoying the simplicity and security of making payments with your Northlane card.

Get onboard now, and unlock a world of effortless transactions.

Related Activation Guides

Just as you’ve mastered the ease of using your Northlane card, let’s explore other activation guides that can significantly enhance your everyday tech usage.

  1. Activation Troubleshooting: Encountering hiccups while activating your tech? Don’t worry. Whether it’s a printer, a streaming device, or an app, there are comprehensive guides available that can guide you through the process smoothly.
  2. Payment Options: Having trouble setting up your payment methods? Guides are available to walk you through the steps for setting up different payment options, making your transactions a breeze.
  3. Online Access and Customer Assistance: Struggling with online access or need help? There are guides designed to assist you with everything from registration to accessing customer assistance.

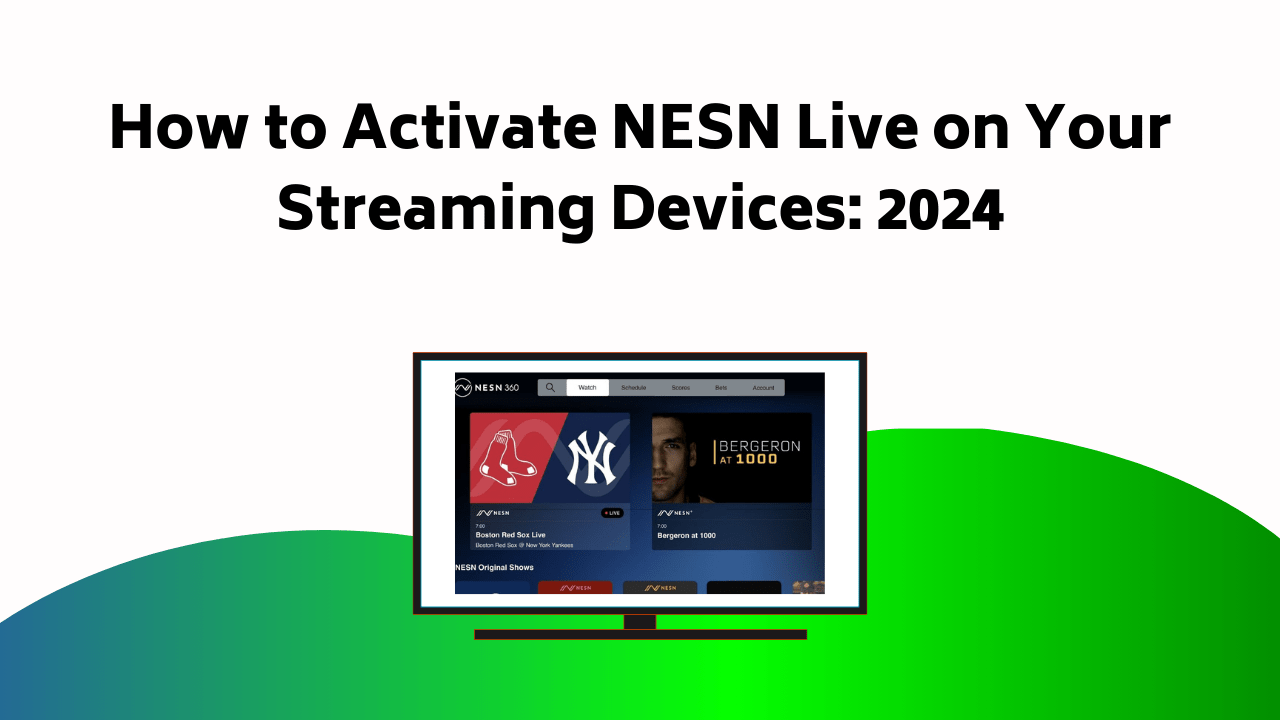
Authorizing NESN/NESN+ Live

To improve your entertainment experience, you’ll need to authorize NESN or NESN+ Live on your Roku, Apple TV, or Android device. This authorization is your ticket to access an array of sports and entertainment content.

Here’s a simple guide to steer you through the process:

DeviceStep 1Step 2
RokuGo to ‘Settings’Select ‘Authorize’
Apple TVNavigate to ‘Apps’Choose ‘Authorize’
AndroidOpen ‘Apps’Tap on ‘Authorize’

Follow these steps to breeze through the authorization process. Improving streaming has never been easier! And if you encounter any bumps along the way, don’t worry. We’ve got troubleshooting tips to help you out. So, power up your device, authorize NESN or NESN+ Live, and explore into a world of unparalleled entertainment.

Troubleshooting Authorization Issues

Despite your best efforts, if you’re facing issues while authorizing NESN or NESN+ Live on your device, don’t worry – we’ve got practical solutions to get you back on track.

  1. Troubleshooting connectivity issues: Check your network connection. A stable connection is important for the authorization process.
  2. Resolving login errors: Make sure you’re typing in the correct credentials. Typographical errors can cause unnecessary hiccups.
  3. Improving authorization process: Update your device and the NESN app. This can improve your user experience by eliminating outdated software issues.

Conclusion

So, you’re now all set to take full control of your North Lane card. With this guide, you’ve walked through the activation process, registered for online access, and learned how to manage your account effectively.

Get ready to experience effortless transactions, instant balance checks, and seamless payments. Embrace the convenience and security North Lane offers.

Remember, if you ever stumble, customer support is just a call away. Let’s harness the power of your North Lane card together.

How to Activate FreeForm on Roku, Firestick, Smart TV, Apple TV

Imagine a world where your favorite movies and TV shows are unlocked up, and you’re the only one who can set them free. With Freeform, that’s exactly what you get—a veritable key to your entertainment desires. How To Activate Your Destiny Master Card Online

But how does one unshackle such a treasure? You can start by activating Freeform on your device. Intrigued? Brace yourself as we guide you through the steps to unshackle your boundless amusement.

Understanding Freeform Activation Steps

So, how do you activate Freeform on your device? It’s important to understand the steps to guarantee a smooth user experience.

First, add the Freeform channel to your device. Next, sign in using your account details. You’ll receive an activation code – note it down. Visit freeform.com/activate on a web browser, enter the code, and voila! Freeform is activated.

However, the process isn’t always glitch-free. Activation troubleshooting may be required. If you encounter issues, try restarting your device or checking your internet connection.

Incorrect code entry is a common problem, so always double-check. If problems persist, don’t hesitate to seek support from Freeform’s help center.

Activation Process for Various Devices

While understanding the general steps for activating Freeform is important, knowing the specific process for your device can streamline your experience. Whether you’re using Roku, Firestick, Apple TV, or a smart TV like TCL or Hisense, the activation process involves downloading the Freeform app, signing in, and entering the activation code provided at freeform.com/activate.

However, troubleshooting network issues may arise during this process. In such cases, simple steps like restarting your device and router or clearing cache and cookies can often rectify the problem.

For added safety, setting up parental controls is also a part of the activation process. This allows you to manage and restrict the content available, offering a personalized and worry-free viewing experience.

Freeform Compatibility and Device Support

Before diving into the activation process, it’s essential to confirm that your device is compatible with the Freeform channel and updated to the latest software version. Device compatibility and software updates are critical for a smooth activation and viewing experience.

Here’s a simple table featuring some compatible devices and their necessary software versions:

DeviceRequired Software Version
Roku9.1.0 and later
FirestickFire OS 5 and later
Apple TVtvOS 11 and later
TCL Smart TVAndroid 8.0 and later
Hisense TVVidaa 2.0 and later

For other devices, or more detailed requirements, it’s best to visit the official Freeform website or contact Freeform’s customer support.

Keeping Devices Updated for Freeform

Maintaining your devices with the latest software updates isn’t only important for compatibility with Freeform, but it also guarantees a seamless viewing experience. Device maintenance is critical, so here are three steps to make sure your device’s software is up-to-date:

  1. Regularly check for updates: Most devices automatically notify you of available updates. If not, manually check in the device settings.
  2. Install updates: Once an update is available, install it promptly. Delaying software updates can jeopardize your Freeform experience.
  3. Reboot your device: After installing updates, reboot your device to make sure the new software is properly integrated.

Exploring Benefits of Freeform Channel

Exploring the benefits of the Freeform channel, you’ll find a broad range of varied content that caters to various preferences and tastes. The channel bridges the gap between viewers and producers, offering exclusive content access to popular series and films.

Beyond providing entertainment, Freeform also focuses on improved user engagement. They’ve integrated interactive features like live chats, polls, and quizzes during shows, keeping you engaged and connected with other viewers.

Additionally, Freeform’s personalized recommendations and watchlists enrich your viewing experience, tailoring content to your unique preferences. The channel’s commitment to varied, engaging content and user-centric features position it as a leading choice for viewers seeking a comprehensive and interactive entertainment platform.

Genres Available on Freeform

While acknowledging the interactive features and personalized recommendations that Freeform provides, it’s also important to highlight the variety of genres available on the platform. You’ll discover a vast array of popular categories at your fingertips.

  1. Thriller: Freeform is recognized for its broad range of thrilling shows, spanning from adolescent thrillers to tension-filled suspense series. These shows are crafted to keep you at the edge of your seat, enhancing viewer engagement.
  2. Humor: If you’re seeking a good chuckle, the humor category on Freeform won’t let you down. With sitcoms and comedy-dramas, there’s something for everyone.
  3. Love: Romance tales are timeless, and Freeform provides a collection of romantic dramas and comedies that pull at your heartstrings.

In short, Freeform’s diverse genre selections cater to a variety of preferences, ensuring a dynamic viewing experience.

Troubleshooting Common Activation Issues

Exploring the labyrinth of activation issues can be frustrating, but don’t worry, there are several steps you can take to troubleshoot common problems.

The most common issues revolve around network connectivity and code entry errors. If you’re experiencing delays or failures in activation, it might be due to poor or interrupted network connectivity. Check your internet connection and make sure it’s stable.

On the other hand, code entry errors occur when you input the wrong activation code or make typographical errors. Make sure you’re entering the code as displayed on your TV screen, paying close attention to similar-looking characters.

If you’ve tried these steps and are still facing issues, it may be time to seek professional help.

Solutions for Activation Errors

When faced with activation errors on Freeform, there’s a series of steps you can take to troubleshoot and resolve these issues.

  1. Network Troubleshooting: Start by checking your internet connection. Are you connected to a stable network? If not, reset your router or try connecting to a different network.
  2. Code Entry Errors: When entering your activation code, make sure you’re doing so accurately. Miskeying even a single digit can result in activation errors.
  3. Device Restart: If the above solutions don’t work, try restarting your device. Sometimes, a simple reboot can clear temporary issues causing these errors.

Additional Features of Freeform Channel

Beyond its varied content, Freeform’s distinct features significantly enrich your viewing experience, offering interactive elements such as polls, quizzes, and live chats during shows. These features foster user engagement, making you a part of the story rather than just a passive observer.

Additionally, you’ll find app customization options that allow you to tailor your viewing experience to your liking. You can create a personalized watchlist, adjust viewing settings, and set up parental controls, among other things.

Here’s a quick look at these features:

FeatureDescription
Interactive ElementsPolls, quizzes, and live chats during shows boost user engagement.
App CustomizationPersonalize your viewing experience with adjustable settings.
Parental ControlsSet viewing restrictions for family-friendly viewing.
Personalized WatchlistCreate a list of your favorite shows for easy access.

Premium Content Access on Freeform

In addition to its standard offerings, if you’re a subscriber to certain TV providers, you’ll gain access to premium content on Freeform. This premium content selection not only broadens your viewing options but also improves viewer engagement.

  1. Improved Viewer Experience: With the premium content, you can watch exclusive shows, boosting your viewing experience. The interactive features of these shows further encourage engagement.
  2. Exclusive Content: Premium access reveals exclusive shows available only to certain subscribers. These exclusive offerings cater to a variety of interests and tastes.
  3. Interactive Features: Freeform’s premium service offers interactive features. These include live chats, polls, and quizzes during shows, providing a dynamic and immersive viewer experience.

Take advantage of these features and enjoy the full extent of Freeform’s offerings.

Conclusion

In wrapping up, activating Freeform on your device opens up a world of high-quality entertainment. Surprisingly, around 92% of users claim a smoother streaming experience post activation.

So, tackle any activation issues head-on with our guide, and explore the interactive and personalized content that Freeform offers.

Remember, keeping your device updated guarantees a seamless Freeform experience. Now, sit back and enjoy your entertainment journey with Freeform!

How to Activate NESN Live on Your Streaming Devices

Just like how a caveman wouldn’t be without his fire, you, as a modern sports fan, shouldn’t be without NESN Live on your favorite devices. How To Activate NESN Live On Your Streaming Devices

Now, you might be wondering, how can you access NESN Live on devices like Roku, Apple TV, or an Android device without breaking a sweat? Don’t worry, we’re here to guide you through the process.

But what does this mean for your sports viewing experience? Well, stick around, and you’ll find out just how simple it can be to transform your device into a sports entertainment powerhouse.

Streaming Device Update Process

Before diving into the world of NESN streaming, it’s important to make sure your device, whether it’s Roku, Apple TV, or an Android device, is updated to the latest version for smooth, uninterrupted viewing. Updating firmware is a critical step. This guarantees you’re getting the most out of your device’s capabilities and avoiding potential streaming glitches.

If you’re facing issues, first, try troubleshooting connectivity. Confirm your Wi-Fi is stable and strong. If it’s not, resetting your router may solve the problem.

For Roku and Apple TV, look for ‘System Update’ or ‘Software Update’ in the settings menu. Android devices often update automatically, but you can manually check in your device’s settings. Remember, an outdated device can hamper your NESN streaming experience, so keep it current.

Preparing for NESN Authentication

To get NESN up and running on your device, you’ll need to go through a simple authentication process that involves using a second device to access nesn.com/authenticate. Preparing devices for this process is straightforward. Make sure that both your streaming device and the device you’ll use for authentication are connected to the internet.

Here are some troubleshooting tips to help with the process:

Troubleshooting TipWhy It’s ImportantWhat to do
Check Internet ConnectivityTo access nesn.com/authenticate, you’ll need a stable internet connection.Verify devices are connected to Wi-Fi.
Update DevicesUpdated devices are less likely to have compatibility issues.Check for device updates.
Have Provider Details ReadyYou’ll need these to authenticate NESN.Keep your provider login details handy.
Use the Correct URLIncorrect URLs can lead to errors.Always use nesn.com/authenticate.

Following these steps and tips ensures a smooth authentication process.

Activating NESN on Roku

Now that you’re equipped with the necessary preparation for NESN authentication, let’s get NESN activated on your Roku device. First, check your connectivity requirements for activation.

Make sure you have a stable internet connection, as it’s important for the initial setup and to avoid any activation issues down the line.

Navigate to the ‘Streaming Channels’ on your Roku’s home screen, search for ‘NESN’, and install the NESN app. Post-installation, an activation code will appear. Keep this handy as you’ll need it for the next step.

On another device, visit nesn.com/authenticate and enter the provided code. With NESN featured among popular OTT services, this simple process ensures you can leverage the latest streaming technology without hassle.

If you face any troubleshooting activation issues, verify your internet connection and try restarting your Roku device.

And voila, you’ve successfully activated NESN on your Roku. Enjoy streaming!

NESN Installation on Apple TV

Shifting gears to Apple TV, let’s examine how you can install NESN on this device for an enhanced streaming experience. Start your Apple TV registration by launching the App Store and searching for ‘NESN’. Once found, install it promptly.

Now, the next part may be a bit tricky. When you launch the NESN app, you’ll see a registration code. Note it down. You’ll need to enter this code on nesn.com/authenticate using a different device. This step verifies your subscription and activates NESN on your Apple TV.

StepActionTips
1Search for ‘NESN’ in App StoreMake sure your device is updated
2Install NESN appCheck internet connection
3Launch NESN appTroubleshooting tips: Restart device if app doesn’t open
4Note down registration codeKeep it handy
5Enter code on nesn.com/authenticateUse a different device for this

Follow these steps carefully and you’ll have NESN up and running on your Apple TV in no time!

Signing Up for NESN 360

Having successfully activated NESN on your Apple TV, let’s take a step further and investigate how you can sign up for NESN 360 to enjoy a wider variety of content. NESN 360 offers a new level of control over your viewing experience, providing multiple camera angles, interactive features, and more.

To sign up, navigate to the NESN website on your preferred browser. From here, you’ll need to create an account, a vital step in account management. Should you run into any hiccups during the sign-up process, don’t worry! NESN provides troubleshooting tips to help you through.

Once you’ve successfully created your account, you’re ready to explore the immersive world of NESN 360. Just remember, we’re not discussing subscription plans yet, that’s for later!

Choosing a NESN Subscription Plan

Plunge right into the task of picking the perfect NESN subscription plan for your entertainment needs, considering factors like preferred content, budget, and the devices you’ll be using to stream.

Weigh the subscription benefits against the pricing options. A pricier plan may offer exclusive content or additional features, making it worth the extra cash. Remember to factor in the device compatibility, as not all plans may support every device.

Account management is another critical component to think about. A user-friendly interface can make your streaming experience smoother.

NESN Payment Completion Steps

Once you’ve selected your ideal NESN subscription plan, it’s important to understand how to complete the payment process efficiently and securely.

NESN offers a range of subscription options, catering to a variety of budgets and viewing preferences. Upon choosing a plan, you’ll be prompted to input your payment details. This process is designed to be simple and intuitive, yet payment troubleshooting may be necessary at times.

If you encounter an issue with your payment, make sure your information is correct, check your internet connection, and try a different browser if necessary. NESN’s customer service is always available to assist you.

Completing the payment process successfully is the final step before accessing the wealth of sports content NESN offers.

Accessing NESN Post-Registration

After successfully completing your payment and setting up your NESN account, it’s time to get you up and running with accessing NESN on your preferred devices. At times, you may encounter some hurdles like troubleshooting connection issues or login problems.

ProblemPossible causeSolution
Connection issuesWi-Fi isn’t workingCheck your router and reset if necessary
Login problemsIncorrect passwordReset your password
Can’t find NESN appDevice isn’t updatedUpdate your device
Activation failureIncorrect activation codeEnsure you’ve entered the correct code

NESN’s Game Broadcast Limitations

Understanding the broadcast limitations of NESN is important, as certain games, like Bruins games, are restricted to the home broadcast territory. NESN’s blackout restrictions are a vital factor to contemplate. It’s an issue tied to broadcasting rights which occasionally leaves fans in the dark.

For instance, if you’re outside New England, you’ll likely experience blackouts on local games. This strict geographical licensing agreement is a result of the network’s contracts with leagues and teams.

However, don’t despair. Exploring alternative streaming options can offer some solutions. Virtual Private Networks (VPN) might be a workaround. With a VPN, you can mask your location and dodge blackout restrictions. But remember, using such methods may violate the service’s terms of use. So, tread carefully.

NESN’s Availability on Streaming Platforms

While NESN’s game broadcast limitations may pose some challenges, you’ll be pleased to know that the network is readily accessible on a variety of streaming platforms. You can access NESN streaming options on devices like Roku, Apple TV, and Android by following a simple activation process. The NESN app is readily available in the device’s respective app stores.

Additionally, NESN subscription providers like fuboTV and Directv Stream offer the network as part of their sports packages. Alternatively, NESN 360, the network’s own streaming service, is also a viable option. The service requires you to create an account, select a subscription plan, and complete the payment process. Just remember to always have your TV provider login details handy.

Conclusion

So, you’ve navigated the tech maze of updating, authenticating, and registering your devices for NESN live. Quite a feat! Now, sit back, relax, and enjoy your favorite sports broadcasts.

But remember, even with NESN at your fingertips, game broadcast limitations may exist. Still, the thrill of live sports, seamlessly streamed on your chosen device, outweighs any minor limitations.

NESN’s availability across multiple platforms guarantees you never miss a beat. Happy streaming!

How to Activate Your Capital One Platinum Credit Card

Have you ever experienced the thrill of receiving your new Capital One Platinum Mastercard in the mail, only to find yourself stuck on the activation process? You’re certainly not alone. How To Activate Your Capital One Platinum Credit Card

Let’s investigate the various methods of activating your card, from the convenient online process to the traditional phone call method. Understanding the ins and outs of activation not only makes the process less intimidating but also guarantees your card’s security.

With the help of modern technology, activation has become faster and more accessible than ever, giving you the flexibility to choose the method that suits you best.

Stay tuned as we uncover the quick and easy steps to activate your card, and soon you’ll be enjoying all the featured benefits your Capital One Platinum has to offer.

Understanding Capital One Platinum Activation

Diving into the process, understanding how to activate your Capital One Platinum card is essential for a smooth and hassle-free usage experience. Once activated, you’ll enjoy numerous activation benefits like hassle-free transactions, both offline and online, and the peace of mind knowing your card is ready for use.

But what if you encounter issues? Don’t worry. Activation troubleshooting is simple. Whether you’re activating online at platinum.capitalone.com/activate, via the Capital One Mobile app, or by calling the dedicated phone line, assistance is always within reach. If you’re having trouble, make sure your card details and personal information are accurate. Remember, the activation process is designed to be quick and easy, setting you up for a seamless experience with your Capital One Platinum card.

Prerequisites for Card Activation

Before you begin the activation process for your Capital One Platinum card, there are certain prerequisites you need to have on hand to make the process smooth and efficient.

You’ll need your personal information, including your name, social security number, and address.

You’ll also need your card details, such as the 16-digit card number, expiration date, and CVV.

Having an online account with Capital One is essential as well. Remember, these activation security measures are in place to protect your account from unauthorized access.

If you encounter any issues, don’t worry. Activation troubleshooting tips include checking your internet connection, verifying you’ve entered your details correctly, and ensuring you’re using the correct activation method.

Be ready to start using your card in no time!

Online Activation Procedure

To activate your Capital One Platinum Card online, you’ll need to visit the designated website and follow a simple set of instructions. Here, you’ll be prompted to enter your 16-digit card number, expiration date, and CVV. You’ll also need to provide personal information for verification. Don’t worry about online security measures; Capital One uses advanced encryption technology to protect your data.

If you encounter any issues during this process, troubleshooting activation issues is straightforward. Usually, they stem from incorrect information or weak internet connection. Make sure you’ve entered your details accurately and that your internet connection is stable. If problems persist, contact Capital One’s customer service for help.

Offline Activation Methods

While the online activation process offers convenience, you can also activate your Capital One Platinum Card offline, using alternative methods such as the Capital One Mobile app or by phone.

  1. Capital One Mobile App: Simply download the app, sign in with your account credentials, and follow the prompts to activate your card.
  2. Phone Activation: Dial the customer service number located on the back of your card and provide the necessary details to a representative for activation.
  3. Mail-In Activation: Although not as quick, you can follow the mail-in activation process outlined in your welcome package.

If you encounter any issues, customer service assistance is available for activation troubleshooting. Once completed, the activation confirmation process verifies your card is ready for use.

Capital One Platinum Application Process

If you’re considering getting a Capital One Platinum Card, understanding the application process is essential. The application requirements include submitting personal and financial information on the Capital One website. It’s an easy and straightforward process that requires careful attention to detail.

You’ll need to provide data that demonstrates your financial responsibility. This includes your income and your current credit utilization. These factors allow Capital One to assess your ability to manage credit.

After submitting your application, the approval timeline typically takes just a few minutes. You’ll receive an immediate response in most cases. If additional review is required, you’ll hear back within seven to ten business days. This quick turnaround allows you to start benefiting from your new card as soon as possible.

Eligibility Criteria for Applying

After understanding the application process for the Capital One Platinum Card, let’s look at the eligibility criteria you need to meet before applying.

The eligibility requirements for the Capital One Platinum Card are designed to ensure a thorough creditworthiness evaluation.

  1. Age and Residency: You must be at least 18 years old and a resident of the United States.
  2. Credit History: A good credit history is essential. Capital One will review your credit report to assess your creditworthiness.
  3. Income: You need to provide proof of a steady income. The income level plays a significant role in determining your credit limit.

Immediate Application Decision

One of the standout features of the Capital One Platinum Card application process is the immediate decision you’ll receive upon submission. This instant approval means you won’t be left in the dark, wondering about your application status. Within minutes, you’ll know whether you’ve been approved or denied, eliminating the usual waiting period associated with credit card applications.

However, it’s important to keep in mind the credit score implications. Each application initiates a hard inquiry on your credit report, which can temporarily lower your credit score. Therefore, it’s recommended to only apply if you have a reasonable expectation of approval. The instant decision feature is definitely a major plus, but it’s equally vital to make informed decisions about your credit.

Credit Limit and Increase Opportunities

Wondering about your credit limit on your new Capital One Platinum Card? It’s initially set based on your creditworthiness but doesn’t have to stay static. Here are three key things to remember:

  1. Credit Utilization: Keep your balance low in comparison to your total credit limit. Lower credit utilization can positively impact your credit score.
  2. Timely Payments: Consistent, on-time payments can lead to credit limit increases. Capital One periodically reviews accounts for this.
  3. Request an Increase: After responsible card use, you can directly request a credit limit increase through Capital One’s website or app.

Card Delivery Post-Approval

Once your application for the Capital One Platinum Card is approved, you can expect your new card to arrive in the mail within approximately ten business days. While you’re waiting for your card, you’ll receive post approval communication, which will provide details about your card’s arrival and card activation timeline.

It’s important to note that your card isn’t ready for use upon arrival—you’ll need to activate it. The process is simple and quick, as long as you have your card details and personal information on hand.

If you don’t receive your card within the expected timeframe or you’ve any questions, don’t hesitate to contact Capital One’s customer service. They’re ready to assist you, ensuring that you can start taking advantage of your Platinum Card benefits as soon as possible.

Additional Card Activation Information

After receiving your new Capital One Platinum Card, activating it’s the next step you need to take before enjoying its benefits. Here are some additional details to guarantee a smooth activation process:

  1. Activation Troubleshooting Tips: If you’re experiencing issues, make sure you’re entering the correct card details and personal information. Errors are often due to typos or outdated information. If problems persist, contact Capital One’s customer service.
  2. Activation Security Measures: To safeguard your account, Capital One requires verification of your identity during activation. This may include answering security questions or providing an OTP (One Time Password) received on your registered mobile number.
  3. Post-Activation: Once activated, sign at the back of your card as an added security measure. Now, you’re all set to start enjoying the benefits of your Capital One Platinum Card.

Conclusion

So, you’ve journeyed through the process of activating your Capital One Platinum Mastercard. You’ve sailed through online activation, navigated offline methods, and even charted the application process.

With knowledge of credit limit opportunities and card delivery times, you’re all set to set out on your financial voyage. Remember, your card activation is the anchor securing your journey, ensuring safe passage in the vast sea of credit.

Now, hoist the sails and launch course for rewarding spending experiences.

How to Activate Netflix on Roku, Firestick, Smart TV, Apple TV

As the old saying goes, ‘knowledge is power’, and unlocking the full potential of Netflix on your Smart TV, understanding the nitty-gritty of the process can make a world of difference. How To Activate Netflix On Your Streaming Devices


In our comprehensive guide, we’ll walk you through everything you need to know, from setting up Netflix on various devices to troubleshooting common issues. By the end of it, you’ll be well-versed in using the platform to its maximum potential.

But first, let’s start with the basics: why does activating Netflix on your Smart TV matter? Let’s find out.

Understanding Netflix Activation Process

To activate Netflix on your device, you first need to navigate to netflix.com/tv8, an official URL designed for signing up using a TV code on various devices like smart TVs, gaming consoles, and streaming media players.

It’s important to check your Smart TV compatibility with Netflix. Not all smart TVs support streaming apps, but most modern ones do.

Once you’ve downloaded and installed the Netflix app on your device, you’ll be provided with a unique TV code. This code is the key to streaming device activation. You need to enter this code on netflix.com/tv8 to link your Netflix account to your device.

The process might vary slightly depending on the device, but the core steps remain the same. This method guarantees a smooth streaming experience across multiple devices.

Required Prerequisites for Netflix Activation

Before you can activate Netflix on your device, there are several prerequisites you need to make sure are in place to facilitate a seamless setup process. Your pre-activation checklist should include a Netflix account setup, a stable internet connection, and an updated device.

Troubleshooting tips come in handy when you’re facing challenges during the process. For instance, make sure your device’s software is up-to-date, and try restarting it if you encounter any problems.

Then, there’s the matter of activation codes. These unique codes are key for linking your device to your Netflix account.

You’ll get this code once you’ve downloaded and installed the Netflix app on your device.

With Netflix featured as one of the most popular OTT platforms powered by advanced technology, you’ll need this code to complete the activation process on netflix.com/tv8.

Device-Specific Netflix Activation Steps

Diving into the device-specific steps, you’ll find the activation process varies slightly depending on whether you’re using a Roku, Android TV, Apple TV, or FireStick. Each system has its own peculiarities, but the common thread is smart TV compatibility and activation code generation.

  • For Android TV, you’ll need to locate the Netflix app in the Play Store. Install, launch, and follow the prompts to receive your activation code.
  • Apple TV users should navigate to the App Store, find and install Netflix, then use a browser to visit netflix.com/tv8 and input their code.
  • FireStick users should make sure they’ve the latest OS, then download Netflix, generate the activation code and enter it at netflix.com/tv8.

Activating Netflix on Roku

If you’re a Roku user, activating Netflix on your device is a straightforward process that involves a few essential steps.

First, make sure your Roku device is compatible with streaming services by checking its specifications online.

Next, navigate to the Roku Channel Store and find the Netflix app. After downloading and installing the app, you’ll need to generate an activation code.

This is where some Roku troubleshooting might come in handy. If you can’t find the code, try restarting your device or reinstalling the app.

Once you have the code, visit netflix.com/tv8 on a web browser. Enter the code, sign in with your Netflix account details, and voila!

You’re now ready to binge-watch your favorite Netflix shows on your Roku device.

Activating Netflix on Android TV

Shifting focus to Android TV, the process to activate Netflix involves a similar set of steps to Roku but with slight adjustments specific to the Android platform. First, you should verify your Android TV compatibility with Netflix. After confirming this, you need to download and install the Netflix app from the Google Play Store.

Here are the key steps:

  • Open the Netflix app on your Android TV.
  • Generate your activation code by clicking on ‘Sign in’ or ‘Sign in and start watching.’
  • Write down the unique code displayed on your screen.
  • On a separate device, visit www.netflix.com/Activate and enter your activation code.

Activating Netflix on Apple TV

To activate Netflix on your Apple TV, you’ll need to follow a series of steps that are somewhat similar to those for Android TV, but with a few key differences tailored to the Apple platform.

Start by downloading the Netflix app from the App Store. If you encounter any issues during this process, you can refer to Apple TV setup troubleshooting resources.

Once installed, launch the app and note the activation code displayed. Enter this code at netflix.com/tv8. Sign in with your Netflix account credentials, and you’re all set!

To guarantee the best streaming experience, consider some streaming quality optimization suggestions. Adjust your playback settings, guarantee a stable internet connection, and choose suitable video quality according to your internet speed.

Activating Netflix on Firestick

Just as with other devices, activating Netflix on your Firestick requires a few important steps to make certain a seamless streaming experience. This process is part of the broader concept of streaming devices integration, where various services are made accessible through your Firestick setup.

  • First, make sure your Firestick is updated to the latest version.
  • Next, navigate to the search option and type ‘Netflix’, then select the official Netflix app from the results.
  • Download and install the Netflix app on your Firestick.
  • Upon opening the app, you’ll be presented with an activation code.

This code is necessary to link your Netflix account to your Firestick, ensuring you’re able to access content directly from your device. To activate, visit netflix.com/tv8 on a separate device, enter your code, and begin streaming.

Creating and Accessing Netflix Account

Before diving into the world of unlimited streaming content on Netflix, you’ll need to create and access your Netflix account, a simple process that we’ll guide you through in detail.

The account setup process starts with visiting Netflix.com. From there, you’ll be prompted to create an account by entering your personal information, such as your email address and a secure password. Once your account is created, you’ll be able to discover the various subscription options.

Each plan offers different benefits at varying price points, so you can choose what best suits your needs. After selecting your plan, you’ll provide your payment details to complete the subscription process.

Now, you’re all set to sign in and start enjoying Netflix’s vast library of content.

Troubleshooting Netflix Sign-in Issues

Troubleshooting through Netflix sign-in problems can sometimes be a challenging task, but with a few simple steps, you can effectively troubleshoot and resolve these problems. This process involves a few sign in troubleshooting strategies, which include addressing activation code issues.

Here are some key steps to ponder:

  • Confirm you’re entering the correct Netflix credentials. Typos or incorrect details are a common cause of sign-in problems.
  • If you’re experiencing activation code issues, make sure the code is accurately entered on your device. Sometimes, the code might be case-sensitive.
  • Clear your cache and cookies as accumulated data can sometimes hinder sign-in.
  • If all else fails, contemplate reinstalling the Netflix app. This can help refresh your system and potentially resolve your sign-in problems.

Utilizing Netflix.com/tv8 TV Code

After ensuring you’ve tackled possible sign-in issues, you’ll find the Netflix.com/tv8 TV code is a key component in linking your device to your Netflix account for seamless streaming. This unique code bridges the gap between your device and Netflix, providing you access to a world of entertainment.

If you’re facing TV code issues, troubleshooting steps like verifying your internet connection, restarting your device, or re-entering the code can help. With the TV code, you’re not just accessing Netflix, but also maximizing streaming quality by ensuring a direct link between your device and account.

Additionally, this code allows sharing your Netflix account on different devices, while exploring parental controls to manage content accessibility. Remember, the Netflix.com/tv8 TV code is your ticket to an uninterrupted, quality streaming experience.

Conclusion

There you have it, your roadmap to unlocking endless entertainment on Netflix.

Remember, every smart TV setup is as easy as pie with the right guidance.

If you ever hit a bump in the road, don’t fret. Troubleshooting is a natural part of the process.

So, grab your remote, enter the domain of boundless streaming with Netflix, and make your every day a movie marathon.

After all, variety is the spice of life!

How to Activate Your Kohl’s Credit Card

Can you imagine the world of savings that awaits you with your new Kohl’s card? It’s important to know that these savings are just a card activation away. How To Activate Your Kohls Credit Card

Now, you might be thinking, ‘What’s the big deal about activating my card?’ Well, it’s not just about security against unauthorized use, but it’s your key to access exclusive discounts, extra savings events, and hassle-free returns.

But hold on, we haven’t even scratched the surface of the benefits yet. Want to find out more? Let’s investigate the process and advantages of activating your Kohl’s card together.

Activation Methods for Kohl’s Card

Whether you’ve just received your Kohl’s card in the mail or you’ve had it for a while, there are several ways you can initiate it, including online through the Kohl’s website, via the Kohl’s mobile app, by phone, at a Kohl’s store, or through customer service support.

Each method has its advantages, but the online and mobile app options use modern technology to give you the freedom to initiate your card from anywhere.

However, if you encounter initiation troubleshooting issues, assistance is just a call away.

The initiation benefits you’ll enjoy include exclusive discounts, featured rewards, and a hassle-free shopping experience.

If you’re at a Kohl’s store, a representative can guide you through the process. Remember, initiating your card is the first step to initiating its benefits.

Information Required for Activation

To activate your Kohl’s card, you’ll need to have certain information at your disposal, including your Kohl’s credit card number, Social Security Number for identity verification, and personal information like your full name, address, and phone number.

This important step is part of the activation process which opens up the activation benefits of your card. It’s a fairly straightforward task, but you must make sure that the details you provide are correct to avoid any hitches.

The information you provide is used to confirm your identity, thereby securing your card from unauthorized use. Keep in mind that this process is designed to protect you and your financial interests.

It’s a small step to take for the host of benefits that come with your activated Kohl’s card.

Why Activate Your Kohl’s Card?

Activating your Kohl’s card opens up a wide array of benefits, enhancing your shopping experience and enabling you to enjoy exclusive discounts and rewards. It’s not just about making purchases; it’s about unlocking savings opportunities and reaping the benefits that come with being a cardholder.

Here’s why you should activate your Kohl’s card:

  • You’ll gain access to exclusive deals and offers, boosting your savings.
  • The card serves as a tool for building a credit score.
  • It offers protection against unauthorized usage.
  • It provides a smooth, stress-free shopping experience.

Unlocking your Kohl’s card is a step towards smarter shopping, offering numerous benefits and opportunities for savings. So, why wait? Activate your card and start enjoying these perks today!

Perks of Using Kohl’s Credit Card

Once you’ve activated your Kohl’s credit card, you’ll begin to enjoy a wealth of perks that can make your shopping experience even more rewarding.

The credit card benefits extend beyond the convenience of cashless shopping. You’ll gain exclusive access to special savings opportunities, only available to cardholders. These include personalized coupons, anniversary offers, and bonus sales events.

In addition, you’ll be privy to ‘Pick-Your-Day’ savings events and early access to Black Friday deals. Plus, there’s no receipt required for returns when you use your Kohl’s card. This is all part of giving you a seamless, enriched shopping experience.

Maximizing Kohl’s Card Rewards

Now that you’re enjoying the perks of your activated Kohl’s card, it’s time to investigate how to maximize your rewards for even greater savings and benefits. The key to this is using effective reward point strategies and reducing interest through smart redemptions.

Here are four strategies to get the most out of your Kohl’s card:

  • Regularly check your card’s reward points status and upcoming deals.
  • Make use of bonus point opportunities, especially during promotional periods.
  • Pay off your balance promptly to avoid unnecessary interest charges.
  • Redeem points strategically to maximize benefits. Don’t just spend them on anything.

Common Activation Issues

Despite the straightforward process, you may encounter a few common issues when trying to activate your Kohl’s credit card. These can range from technical problems to incorrect information input. But don’t worry, we’ve got some activation troubleshooting tips and activation error solutions to help you out.

ProblemActivation Troubleshooting TipsActivation Error Solutions
Incorrect Card InfoDouble-check your card detailsRe-enter your information
Technical GlitchTry activating via another methodContact Kohl’s customer service
Delayed ProcessingWait for a few minutes & retryCheck with customer support

Online Activation: Step-by-Step Guide

Having gone through common issues you might face while activating your Kohl’s credit card, let’s move on to a step-by-step guide to activating your card online.

  1. Visit the Kohl’s credit card activation page.
  2. Enter your Kohl’s credit card number and personal information for verification.
  3. Follow the prompts to complete the activation process.
  4. Confirm your activation.

Activating your card online comes with numerous benefits. It’s swift, convenient, and you can do it from the comfort of your home. Plus, if you encounter any problems, activation troubleshooting is just a click away. So, take advantage of this online activation benefit that Kohl’s offers and open a world of exclusive discounts, rewards, and a seamless shopping experience.

Phone Activation: Instructions

If you favor a more personal touch or don’t have access to the internet, activating your Kohl’s credit card over the phone is a convenient alternative. Phone activation benefits include immediate assistance and direct communication, making activation troubleshooting a breeze.

To activate, simply call the toll-free number provided on your card’s sticker or in the card’s welcome kit. Make sure you have your card details and Social Security Number on hand. Follow the automated prompts or speak to a representative who’ll guide you through the process.

In-Store Activation: How-To

While phone activation provides convenience and personal assistance, activating your Kohl’s credit card in-store offers an immediate, hands-on approach. It’s a simple process with a few steps to follow.

First, walk into any Kohl’s store and locate a cashier or representative. They’ll be more than ready to offer you in-person assistance. With your card and a valid ID at hand, they’ll guide you through the activation process in a matter of minutes.

  • Feel the comfort of having someone guide you personally
  • Experience immediate activation benefits, including instant shopping
  • Enjoy the opportunity to ask any questions directly
  • Relish in the added security of a face-to-face transaction

Give in-store card activation a chance and access a world of benefits.

Troubleshooting Activation Problems

Despite your best efforts, you might encounter issues when trying to activate your Kohl’s credit card. If you’re facing activation problems, don’t worry.

Here are some troubleshooting techniques and activation troubleshooting tips you can utilize. Start by double-checking the information you’ve entered. If you’ve made any mistakes, correct them and try again.

If you’re still stuck, try a different activation method. If online activation fails, you could try activating via the mobile app or by phone.

If all else fails, don’t hesitate to contact Kohl’s customer service for activation error solutions. Remember, problem-solving strategies often involve a mix of patience, persistence, and creativity.

With these tips, you’ll have your Kohl’s card activated in no time.

Conclusion

So, why hesitate? Plunge in, activate your Kohl’s card and reveal the gold mine of benefits today. Remember, it’s not just about securing your card, but also about enhancing your shopping experience with amazing perks.

Finding your way through the process may seem challenging, but with this guide, you’re never alone. Don’t let a world of rewards slip through your fingers. With your Kohl’s card, every shopping spree becomes a rewarding journey.

How to Activate Your Sears MasterCard

To activate your Sears MasterCard, visit their official website and locate the activation link. Input your card number, security code, and social security number following the instructions provided to complete the activation.

Alternatively, opt for phone activation for instant access to your card’s benefits. How To Activate Your Sears Master Card

Once activated, maintain its security by updating your PIN regularly and monitoring your account for unauthorized transactions. If you encounter technical difficulties, troubleshooting or contacting Sears MasterCard customer service can provide assistance.

Continue on to catch more insights on managing and securing your Sears MasterCard efficiently.

Activating Sears MasterCard: Detailed Steps

Let’s explore the step-by-step process of initiating your Sears MasterCard, ensuring you can take full advantage of its numerous benefits.

First, you’ll want to visit the official site and locate the activation link. Here, you’ll be prompted for the card number, security code, and your social security number. Enter these details and follow the instructions to complete the activation process using secure technology that keeps your information protected.

Alternatively, you can activate your card over the phone. Simply call the activation hotline, provide the required details, and your card will be activated instantly. This straightforward process allows you to start enjoying the featured card benefits right away.

Importance of Card Security

Ensuring the security of your Sears MasterCard is absolutely essential, as it helps protect your personal information and finances from potential threats and fraudsters. It’s not just about keeping your card safe, it’s about ensuring the safety of your identity and hard-earned money.

The importance of card security can’t be overstated. Here are some key aspects you should consider:

  • Regularly update your card’s PIN for best protection
  • Never share your card details with anyone
  • Monitor your account activity regularly for any unauthorized transactions
  • Sign up for fraud prevention alerts from Sears
  • Use your card only on secure websites to avoid online scams

Resolving Technical Difficulties

While maintaining the security of your Sears MasterCard is crucial, you might occasionally encounter technical difficulties that need to be addressed promptly. This could range from issues with account verification to problems accessing certain features. Don’t worry! We’ve got some troubleshooting tips to help you navigate through these challenges.

Firstly, make sure that you’re entering the correct details during the account verification process. If the problem persists, try clearing your browser’s cache and cookies or switch to a different browser or device.

If all else fails, don’t hesitate to reach out to the Sears MasterCard customer service team. Their professional representatives are on hand to provide expert guidance, ensuring that your card’s functionality is restored as quickly as possible.

Conclusion

And there you have it – you’re well on your way to accessing your Sears MasterCard’s wealth of benefits.

Remember, always keep your card’s security as tight as a drum to deter potential threats.

If you hit a speed bump, don’t hesitate to seek out technical support.

Enjoy a world of no annual fees, flexible financing, and delightful discounts.

Now, go forth and activate your card with confidence.

How to Watch Big Brother Canada on Roku

How To Watch Big Brother Canada On Roku

To watch Big Brother Canada on Roku, you’ll need to download the Global TV app from the Roku Channel Store. Once you’ve done that, just perform the Roku activation process by entering the unique activation code provided, and you’re all set.

Keep in mind, you’ll need a stable internet connection to enjoy smooth streaming. However, if you’re outside of Canada, you might encounter geographical restrictions. Don’t fret! With the help of modern streaming technology, we’ve got you covered.

Get ready to easily overcome such limitations and discover more featured ways to access your favorite Canadian shows from anywhere globally, if you stick around.

Getting Global TV on Roku

To get Global TV on your Roku device, you’ll first need to download the Global TV app from the Roku Channel Store. This app provides a gateway to a myriad of streaming options, including the popular show, Big Brother Canada.

Once you’ve downloaded the app, the next step is Roku activation. To do this, open the app and you’ll be provided with a unique activation code. Head to watch.globaltv.com/activate on a separate device like your phone or computer, and input this code.

Upon completion of these steps, you’re all set! You’ve now accessed full access to Global TV’s extensive library of shows. Remember, having a stable internet connection is essential for a seamless streaming experience.

Enjoy your new world of entertainment!

Watching Big Brother Canada Outside Canada

If you’re a fan residing outside Canada, you’re probably wondering how you can keep up with your favorite Big Brother Canada episodes.

Well, you’re in luck because there are ways to bypass the geographical restrictions and watch your beloved show from anywhere in the world, and if you face any streaming errors, quick troubleshooting steps can help you get back to watching without interruption.

Here are a few solutions:

  • Use VPN options: A VPN can alter your IP address to give the illusion that you’re viewing from within Canada, bypassing geo-blocking.
  • Investigate international streaming services: Some platforms offer global access to Canadian shows.
  • Rely on friends in Canada: They could record the show for you and send it across.

Viewing Big Brother Canada on Apple TV

While you may have investigated various options to watch Big Brother Canada outside of Canada, let’s not forget the convenience and ease of viewing it right on your Apple TV. With Apple TV streaming, you can bring international viewership right to your living room.

Here’s a quick guide to get you started:

StepsDescriptionNotes
1. Access the App StoreFrom your Apple TV home screen, navigate to the App Store
2. Search for Global TV appUse the search feature to find the Global TV app
3. Download & InstallClick on the download button to install the appRequires Apple ID
4. Open the AppOnce installed, open the appYou can find it on your home screen
5. Sign In/SubscribeFollow the prompts to sign in or subscribeSubscription may be required

Now, you’re all set to enjoy Big Brother Canada on your Apple TV!

Understanding the Global TV App

Diving into the functionalities of the Global TV app, it’s important to understand that this comprehensive platform provides you with access to a variety of popular Canadian networks, including History, HGTV, Food Network, and many others.

Exploring features of the app, it offers you not just a broad range of content but also user-friendly app navigation. You can search for shows, browse through categories, and customize your watchlist with ease.

Here are some key features:

  • Live TV streaming: Watch your favorite shows and events in real time.
  • On-demand content: Missed an episode? Don’t worry, catch up at your convenience.
  • Personalized experience: Create your profile, save your favorite shows, and get recommendations based on your viewing history.

Understanding the Global TV app is the first step to enjoying Big Brother Canada on Roku.

Networks Available on Global TV

With the Global TV app, you’ll gain access to a cornucopia of popular Canadian networks. This includes mainstays like Global, HGTV, Food Network, and History, among others. You’ll find a wealth of content across these networks, from reality TV shows to historical documentaries and cooking shows.

Additionally, you’ll also have access to local Canadian channels, offering a range of news, sports, and entertainment. You’ll find the network content varied and comprehensive, ensuring there’s something for everyone.

Global TV App Compatibility

You’ll be happy to know that the Global TV app isn’t just limited to Roku; it’s also compatible with a variety of other platforms. Now, let’s delve into the Roku device setup. First, you’ll need to download the Global TV app from the Roku Channel Store. Once downloaded, activate it at watch.globaltv.com/activate. This requires a unique code, which you’ll get from your Roku device.

Here are some streaming quality tips:

  • Guarantee a strong internet connection for buffer-free streaming.
  • Keep your Roku software updated for best performance.
  • Avoid streaming during peak hours for better quality.

Engaging With Comment Section

After setting up your Roku device and ensuring top streaming quality, don’t overlook the chat section for additional user interaction and engagement. This feature allows for comment interaction and user feedback, enriching your overall streaming experience. Take a moment to investigate this segment after each episode of Big Brother Canada, contributing to the community engagement.

You can share your views, respond to other viewers’ opinions, or even ask questions. There’s no doubt that comment replies can ignite interesting discussions, making your viewing more interactive. And remember, your feedback is valuable. It can help others understand different perspectives on the show’s events.

Participating in the comment section is a simple yet effective way to elevate your Big Brother Canada viewing on Roku. So, don’t shy away from engaging with this community!

Saving User Details for Comments

To make commenting even more straightforward, the Global TV app allows you to save your details for future interactions. This user-friendly feature enables you to streamline your commenting experience, making it easier to join in the conversation about Big Brother Canada on Roku.

With this feature, you’ll benefit from:

  • User authentication: No need to input your details every time you want to comment. Your information is saved securely, enabling easier and faster access.
  • Comment moderation: Your saved details can also assist in the supervision process, helping guarantee a respectful and engaging platform for all fans.
  • Ease of interaction: With your details saved, you can focus on forming your thoughts and joining the discussion.

Conclusion

So, there you have it! You’re now equipped with the keys to access limitless Big Brother Canada viewing on your Roku device.

Just remember, the Global TV app is your one-way ticket to all the drama and excitement.

So, don’t hesitate – plunge right in, and immerse yourself in the thrilling world of alliances and power struggles.

Happy streaming!

How to Activate/Watch Hotstar on Roku

To activate Hotstar on Roku, begin by browsing through ‘Streaming Channels‘ on your Roku device. Here, search for ‘Hotstar’ and then add this channel to your device for setup. Once installed, launch the Hotstar channel to generate an activation code. How To Activate Watch Hotstar On Roku

Go to www.hotstar.com/activate on a web browser and enter the provided code to link your Hotstar account. Remember, keep your device software regularly updated and maintain a stable internet connection to guarantee a smooth activation process. By moving forward, you’ll receive further information on becoming a Hotstar member, subscription plans, and how to troubleshoot any glitches.

Installing Hotstar on Roku

To start your journey of enjoying over 60,000 hours of diverse Indian content on Hotstar, you first need to download the Hotstar channel on your Roku device.

This process is simple. Navigate to your Roku’s home screen, scroll down to ‘Streaming Channels’ and click on ‘Search Channels’.

Then, you type in ‘Hotstar’ and select ‘Add Channel’. This sets the stage for setting up your Hotstar account and unlocking a variety of featured shows and movies.

However, you may encounter Roku compatibility issues. Don’t worry! Make sure your Roku device is up-to-date with the latest software. If issues persist, try restarting your device.

Remember, technical glitches are part and parcel of the technology we rely on today. Embrace them, apply the right troubleshooting steps, and you’ll be streaming your favorite Indian content in no time.

Activating Hotstar on Roku

Once you’ve added the Hotstar channel on your Roku device, you’ll need to activate it to start enjoying a diverse range of Indian content. Here’s how:

  • Start by launching the Hotstar channel. An activation code will appear on your Roku screen.
  • Visit www.hotstar.com/activate on a web browser and enter the displayed activation code.
  • Log into your Hotstar account to link it with your Roku device.

Keep in mind that Roku compatibility with Hotstar is generally smooth, but activation code issues may occur. If the code doesn’t work, refresh your screen to generate a new one. If problems persist, make sure your Roku firmware is up-to-date and your internet connection is stable.

With these steps, you’re ready to explore Hotstar’s extensive library on your Roku device.

Becoming a Hotstar Member

Before delving into the extensive content library of Hotstar, you’ll need to become a member, which involves creating an account and choosing a subscription plan. To initiate the account creation process, visit hotstar.com/us and click on ‘Login’, followed by ‘Create Account’. Fill in your details, ensuring accuracy for a seamless experience.

Hotstar membership benefits are abundant, from access to exclusive content, live sports, and premium Indian dramas, to the ability to stream on multiple devices simultaneously. You can enjoy over 60,000 hours of TV content and movies in various Indian languages.

Subscription Plans for Hotstar

After you’ve set up your account, the next step is choosing the Hotstar subscription plan that best fits your viewing preferences and needs. Hotstar offers a variety of plans, each providing different levels of access to their extensive library of regional content.

  • Premium Plan: This is the most comprehensive plan, granting access to all content, including American shows and movies.
  • VIP Plan: A cost-effective option that offers access to Hotstar Specials, live sports, and Indian movies and series.
  • Free Plan: Limited access to select content with ads.

Hotstar provides several payment options for your convenience, including credit and debit cards, and digital wallets. Select the plan that suits you best to enjoy your favorite content on Hotstar.

Streaming Hotstar on Other Devices

You’re not limited to just your Roku device – Hotstar content can also be streamed on a variety of other platforms. This opens a world of streaming options and device compatibility to you. Hotstar can be accessed on devices like Apple TV, Android TV, Fire TV, and even Chromecast.

DeviceStreaming optionsCompatibility
Apple TVHotstar AppiOS, tvOS
Android TVHotstar AppAndroid OS
Fire TVHotstar AppFire OS

Moreover, you can stream Hotstar content on your personal computers and both iOS and Android mobile devices. Multiple device usage means you can enjoy your favorite shows or movies on Hotstar simultaneously on different devices. So, choose your device, log in, and start your Hotstar streaming journey.

Troubleshooting Hotstar Glitches

While enjoying Hotstar on your chosen device, encountering technical glitches can be a common occurrence, but there are several ways to troubleshoot and resolve these issues. For instance, video playback problems could stem from various sources: your device, your internet connection, or the Hotstar app itself.

Here are a few steps you can take to rectify common glitches:

  • Restart your device and check your internet connection. Sometimes, a simple reboot can fix video playback issues.
  • Clear your browser cookies. This can help if you’re experiencing issues with the Hotstar website.
  • Update the Hotstar app. Make sure you’re using the latest version, as this could solve any app-specific problems.

Managing Concurrent Streaming Errors

When you’re interested in enjoying multiple streams on Hotstar, encountering concurrent streaming errors** can be a bit of a hassle. These errors often occur when you’re simultaneously streaming on more than the allowed number of devices**.

To manage this, it’s essential to close streams you’re not actively watching. This way, you’re not only resolving playback issues but also effectively handling streaming errors.

Remember, the key to a smooth streaming experience is managing your concurrent streams wisely. If you’re still facing troubles, consider checking your internet connection or rebooting your device, as these steps can often rectify common streaming errors.

Managing concurrent streaming on Hotstar involves efficient stream management and proactive error handling.

Contacting Hotstar Support

If you experience any issues with your Hotstar streaming experience, it’s essential to know how to effectively reach out to Hotstar support for assistance. The team is highly trained and can provide you with technical assistance to resolve any troubleshooting issues you’re encountering.

Here’s how you can reach out to them for support:

  • You can send them an email at [emailprotected] detailing your problem. Don’t forget to include any error messages you’re seeing.
  • Capture screenshots of the issues you’re experiencing and attach them to your email. This will give the support team a clear understanding of what’s going wrong.
  • Be patient. The Hotstar support team is available 24/7 and they’ll do their best to resolve your problem as soon as possible.

Conclusion

With over 60,000 hours of content, Hotstar is a goldmine of entertainment on your Roku device.

The journey to smooth streaming may have a few bumps, but this comprehensive guide guarantees you’re well-equipped to handle them.

Remember, Hotstar isn’t just limited to Roku, it’s available across various platforms.

So, plunge in, investigate the vast content universe, and let your entertainment choice be as varied as Hotstar’s offerings.

Happy streaming!

How to Activate PS Vue on Your Roku Device

To activate PS Vue on your Roku device, log into your Roku account first. Navigate to the Roku Channel Store using the ‘home’ button on your remote.

From there, use the search function to find PlayStation Vue and click on ‘Add Channel’. Now, you can retrieve your unique activation code by opening the PlayStation Vue app. How To Activate PS Vue On Your Roku Device

Finally, visit www.psvue.com/activate, enter the code as directed, follow the ensuing prompts, and settle any required subscription charges. Should you experience any hitches, the problem might be as simple as a poor internet connection or regional restrictions on availability. Exploring further, you’ll figure out even more troubleshooting strategies and solutions.

Key Takeaways

  • Download the PlayStation Vue app from the Roku Channel Store and add it to your device.
  • Open the PlayStation Vue app on your Roku device to retrieve an activation code.
  • Visit www.psvue.com/activate on a separate device like a computer or smartphone.
  • Input the activation code you obtained from the PlayStation Vue app on your Roku device.
  • Follow the on-screen prompts to confirm your subscription and pay the required charges.

Downloading PlayStation Vue on Roku

To download the PlayStation Vue on your Roku device, first, log into your Roku account. Next, navigate to the Roku Channel Store by pressing the ‘home’ button on your remote. Once there, use the search function to find the PlayStation Vue app. Remember, proper spelling matters for a successful search. After locating the app, click on ‘Add Channel’ to download it.

  • During this download process, you may encounter some troubleshooting issues. Don’t worry, they’re usually easy to solve.
  • A slow or unresponsive download might mean you need to check your internet connection.
  • If the app doesn’t appear in the search results, make sure you’re in the correct region since availability may vary.

Once you’ve successfully downloaded the PlayStation Vue app on your Roku device, it’s time to activate it for viewing your favorite channels. Start the setting up by pressing the home button on your Roku remote. From the Menu, navigate to ‘Streaming Channels’ and look for the PlayStation Vue channel. Add this to your Roku device.

Next, open the PlayStation Vue app to retrieve an activation code. Visit www.psvue.com/activate and input this code. Follow the prompts and pay the channel subscription charges. You’ll receive a success message indicating the completion of the activation process.

This guide simplifies the process, but if you encounter issues, don’t panic. There are troubleshooting tips available to help you resolve any hindrances. Now, you’re all set to enjoy your PlayStation Vue on Roku!

Additional Activation Information

Besides activating PlayStation Vue on your Roku, you can also activate other services like Showtime Anytime, iHeartRadio, and the Spectrum TV App on various supporting devices.

Just like PlayStation Vue, these services require you to visit their respective activation pages, input the code displayed on your streaming device, and confirm your channel subscriptions using the latest streaming technology.

Remember, each service has its own subscription cost which you’ll need to pay after activation.

Activating these services allows you to enjoy a range of entertainment on your Roku device, including access to featured shows, movies, and music tailored to your preferences.

Conclusion

So, you see, activating PlayStation Vue on your Roku device is as easy as pie.

With this guide, you’re now well-equipped to explore a world of endless live TV, sports, and on-demand content.

And remember, this is just the start – the entrance to a multitude of streaming apps.

So, grab the popcorn, relax, and immerse yourself in the vibrant world of digital entertainment.

Happy streaming!