Home Blog Page 37

Well Pump Pressure Switch Not Working: Troubleshooting Guide

The Well Pump Pressure Switch is a great device, but like all electronics, it sometimes has its issues. If your Well Pump Pressure Switch is not working, take a look at this troubleshooting guide.

We’ve collected answers to the most frequent reasons you’ll see Well Pump Pressure Switch not working and explained them in plain language for easy troubleshooting.

Well Pump Pressure Switch Troubleshooting


Quick Fix

To troubleshoot a well pump pressure switch, check the power supply and switch settings, clean contacts and connections, test the pressure range, and inspect the pump for leaks or clogs.

Switch Won’t Turn On

If your well pump pressure switch won’t turn on, it may be due to tank pressure exceeding the switch’s cut-in pressure. This can be resolved by running water in other areas to lower the pressure.

To troubleshoot, start by checking the tank pressure gauge to verify it registers a minimum of 40 PSI, or the designated cut-off PSI specified for your pressure switch model. If the reading falls below this threshold, investigate the condition of your filter.

Next, inspect the pressure switch for blockages or debris around it. These can hinder its operation and prevent activation.

Gently tapping on components with a screwdriver handle can sometimes restore functionality by jarring the electrical contacts.

If this method works, the issue might be with the contact surfaces being pitted or burned, causing poor electrical conductivity.

Check the wiring for any damage or disconnections. Faulty connections can prevent the switch from receiving the necessary power to activate.

If the wiring appears fine, consider testing the contacts inside the switch using a multimeter to determine if they function correctly.

A malfunctioning pressure sensor or relay could also be at fault, requiring a thorough inspection and possibly replacement if the switch fails to respond.

Switch Won’t Turn Off

When your well pump pressure switch won’t turn off, it could be due to several factors. Here are some common issues to evaluate:

  1. Stuck Pressure Gauge: If the tank pressure hasn’t dropped below the switch’s cut-off pressure, the gauge might be stuck, preventing the switch from turning off.
  2. Clogged Pressure Sensor: A clogged pressure sensor can also prevent the switch from sensing the correct pressure levels, leading to continuous operation.
  3. Visible Damage or Debris: Inspect the switch for any visible damage or debris. Obstructions can prevent proper function and may require cleaning or replacement.
  4. Electrical Contact Issues: Manually turning off the power to the switch can help determine if the switch itself is malfunctioning. Further testing with a multimeter can reveal electrical contact issues.

Mechanical failures within the switch, such as a damaged diaphragm or bad contacts, can also lead to the inability to turn off the pump.

To troubleshoot, inspect the switch for any signs of mechanical failure and think about replacing it if necessary.

In both plumbing and HVAC applications, the pressure switch is a featured component because it directly controls safe and efficient pump operation.

Regular maintenance, including cleaning components and securing loose wiring, can prevent these issues and promote reliable operation.

Since this small but vital piece of technology determines when the pump starts and stops, keeping it in good condition is essential for long-term performance.

If you’re unsure, it’s best to consult a well pump professional for accurate diagnosis and repair.

Switch Won’t Turn On or Off

When your well pump pressure switch won’t turn on or off, it’s essential to investigate power supply issues and wiring problems.

Check for any damage or blockages in the electrical connections and make certain that the wiring is intact.

Additionally, inspect the switch’s mechanical components, such as the relay and pressure sensor, for any signs of malfunction that might be preventing the switch from functioning correctly.

Power Supply Issues

Power supply issues can prevent a well pump pressure switch from activating or deactivating by disrupting the electrical current required for operation. When troubleshooting a switch that won’t turn on or off, it’s vital to address potential power supply problems.

  1. Check the Circuit Breaker: Verify the circuit breaker associated with your well pump isn’t tripped. A tripped breaker can interrupt power to the switch, preventing it from functioning. If it has tripped, reset it and investigate why it keeps tripping.
  2. Inspect Wiring: Visible damage or disconnections in the wiring can result in power loss to the switch. Inspect all wiring connections and tighten any loose wires. Secure connections with wire connectors or electrical tape to prevent future issues.
  3. Test Voltage: Use a multimeter to test the voltage at the pressure switch. This will help determine if the switch is receiving adequate power for operation. If the voltage is low or absent, it indicates a problem with the electrical system.
  4. Consult a Professional: If power supply issues persist despite troubleshooting, consider consulting a professional to assess the electrical system and guarantee proper functionality. They can identify hidden issues and provide necessary repairs to restore the pressure switch’s operation.

Wiring Problems

Wiring problems can prevent a well pump pressure switch from activating or deactivating, often resulting from damaged, loose, or corroded connections. To troubleshoot these issues, you need to inspect the wiring for visible signs of wear or disconnection. Faulty wiring can interrupt the electrical signal to the switch, causing it to malfunction.

IssueDescriptionSolution
Damaged ConnectionsLoose or corroded connections can prevent the switch from receiving power.Inspect and tighten all connections. Use wire connectors or electrical tape to secure them.
Loose WiringOver time, vibrations and constant usage can loosen wires.Check all wiring connections and tighten any loose wires.
Corroded WiringCorrosion can disrupt the electrical signal.Clean the wiring and replace any corroded sections.

Using a multimeter to check voltage at the pressure switch can help identify if power is reaching the switch, indicating whether the issue lies within the wiring or the switch itself. In 3-wire systems, verify that the connections to the control box and pump are secure, as poor connections can lead to operational failures. Regular maintenance, including checking wiring integrity and securing any loose connections, can prevent future issues with the pressure switch not turning on or off. If you find any issues, address them promptly to guarantee the switch functions correctly and the pump operates efficiently.

Mechanical Failures

Mechanical failures in a well pump pressure switch can prevent it from turning on or off, often due to high tank pressure exceeding the switch’s cut-in pressure, leading to no activation. To diagnose and resolve these issues, you need to inspect the switch thoroughly.

Common Mechanical Failures

  1. Damaged Diaphragm: A damaged diaphragm can cause the switch to malfunction, preventing it from sensing pressure changes correctly. Inspect the diaphragm for any signs of damage or wear.
  2. Stuck Components: Stuck components within the switch can prevent the switch from turning on or off. Check for any obstructions or debris that might be causing the components to stick.
  3. Corrosion: Corrosion can weaken the internal mechanics of the switch, leading to mechanical failures. Clean the switch regularly to prevent corrosion.
  4. Pressure Adjustment Nut Issues: The pressure adjustment nut can become stuck or misaligned, affecting the switch’s ability to turn on or off. Adjust the nut carefully to guarantee proper pressure settings.

When diagnosing mechanical failures, it’s vital to inspect the switch for visible damage or debris. Blockages can obstruct its operation and interfere with the internal mechanics.

A multimeter can be used to check the relay contacts inside the switch for burning or pitting, which signifies electrical malfunctions and may necessitate replacement.

Regular maintenance, including cleaning and inspecting the switch for clogs or mechanical failures, can significantly improve its reliability and prevent operational issues.

Switch Clicks On and Off Repeatedly

When your well pump pressure switch clicks on and off repeatedly, it could indicate a clogged check valve, which prevents proper water flow and pressure stabilization.

Alternatively, a damaged tank bladder can cause rapid pressure fluctuations, leading to the switch’s erratic behavior.

To resolve this issue, inspect both the check valve and tank bladder for any blockages or damage, and consider consulting a professional for a thorough diagnosis if the problem persists.

Clogged Check Valve

A clogged check valve can lead to significant disruptions in your well system, causing the pressure switch to click on and off repeatedly as it attempts to maintain the correct pressure levels. This issue often arises from mineral buildup or debris in the check valve, which prevents proper water flow and can disrupt the pressure readings the switch relies on.

Here are some key points to take into account when dealing with a clogged check valve:

  1. Mineral Buildup: Mineral buildup is a common cause of clogs in check valves. Regularly inspecting and cleaning the check valve can help prevent this issue.
  2. Debris Accumulation: Debris such as sediment or particles can accumulate in the check valve, causing it to malfunction. Cleaning the valve regularly can prevent this.
  3. Pressure Fluctuations: A clogged check valve can lead to pressure fluctuations, which in turn cause the pressure switch to cycle on and off repeatedly.
  4. System Damage: Continuous cycling of the pressure switch due to a clogged check valve can ultimately result in damage to both the pump and the switch if not addressed promptly.

If experiencing repeated clicking of the pressure switch, it’s advisable to check and clean or replace the check valve to restore normal functionality.

Regular maintenance and inspection of the check valve are essential to prevent clogging and guarantee stable operation of the well system.

Damaged Tank Bladder

If your well pump pressure switch is clicking on and off repeatedly, a damaged tank bladder could be the culprit. A ruptured bladder fails to maintain the required air pressure, resulting in fluctuating water pressure that triggers the switch’s activation and deactivation. This rapid cycling can stress the pump and switch, leading to potential damage.

To diagnose the issue, inspect the pressure tank for signs of waterlogging. A waterlogged tank indicates that the bladder has ruptured, causing the water and air inside the tank to mix. This mixing disrupts the pressure regulation, leading to inconsistent water pressure and frequent pump cycling.

The symptoms of a damaged bladder include inconsistent water pressure, frequent pump cycling, and possible waterlogging in the pressure tank.

Regular inspection and maintenance of the pressure tank can help identify bladder issues early, preventing potential damage to the well pump and pressure switch. If you suspect a damaged tank bladder, it’s crucial to replace it to restore proper system function and avoid unnecessary wear on the pump and switch components.

Replacing the bladder guarantees that the pressure tank can maintain the required air pressure, regulating water pressure effectively and preventing the pressure switch from clicking on and off repeatedly.

Pressure Sensor Clogging

Pressure sensor clogging is a common issue in well pump systems, particularly in areas with high mineral content in the water. This clogging can lead to inaccurate pressure readings and malfunction of the pressure switch, causing the well pump to fail to activate or deactivate, resulting in inconsistent water pressure throughout the system.

Here are some key points to take into account:

  1. High Mineral Content: High mineral content in the water can cause the pressure sensor to clog, leading to inaccurate pressure readings and malfunction of the pressure switch.
  2. Regular Cleaning: Regular cleaning of the connecting tube to the pressure sensor can help improve water flow and prevent clogging issues.
  3. Inconsistent Pressure: A clogged pressure sensor may cause the well pump to fail to activate or deactivate, resulting in inconsistent water pressure throughout the system.
  4. Monitoring Water Quality: Monitoring water quality is vital to identify potential clogs in the pressure sensor early, preventing further complications in well system operations.

If cleaning doesn’t resolve the clogging issue, think about replacing the pressure switch to guarantee proper functionality and reliable water pressure regulation.

This is key for maintaining consistent and efficient operation of your well system. Regular maintenance and monitoring can help prevent these issues and ensure smooth operation of your well pump system.

Damaged Diaphragm

A damaged diaphragm in a well pump pressure switch can lead to inconsistent pressure readings, causing the pump to either run continuously or fail to activate when needed. This inconsistency can result in frequent cycling of the pump, where it turns on and off rapidly without reaching the set pressure level.

Inspecting the diaphragm for tears or wear is crucial; a compromised diaphragm can disrupt the switch’s ability to sense pressure accurately.

Symptoms of a damaged diaphragm include erratic pump operation and failure to maintain proper pressure levels. If you suspect a damaged diaphragm, inspect the pressure gauge to verify it’s registering accurate readings. A compromised diaphragm can prevent the pressure switch from functioning correctly, leading to inefficient pump operation and potential system failures.

To diagnose a damaged diaphragm, look for signs of wear or tears on the diaphragm itself. Regular maintenance and monitoring of the pressure switch can help identify diaphragm issues early, preventing more extensive damage to the well system.

Replacing a damaged diaphragm is often necessary to restore proper functionality to the pressure switch and guarantee efficient pump operation. By addressing diaphragm problems promptly, you can maintain reliable water supply and extend the lifespan of your well pump system.

Failed Connection

When troubleshooting issues with your well pump pressure switch, it’s crucial to address potential failed connections, as these can significantly impact the switch’s ability to regulate water pressure effectively.

A failed connection in a well pump pressure switch can prevent the pump from activating or deactivating properly, leading to issues such as low water pressure or constant cycling.

Troubleshooting Steps for Failed Connections

  1. Inspect Wiring: Check the wiring for visible damage or loose connections. These can disrupt the electrical signals necessary for the switch’s operation.
  2. Use a Multimeter: Use a multimeter to check for continuity in the wiring. This can help identify breaks or shorts that may indicate a failed connection.
  3. Secure Connections: Regular maintenance, including securing wire connections and checking for corrosion, can prevent connection failures and prolong the life of the pressure switch.
  4. Replace Damaged Wiring: Replacing damaged or corroded wiring and connectors is crucial to guarantee reliable operation of the well pump pressure switch and avoid system malfunctions.

Bad Contacts

Bad contacts in a well pump pressure switch can significantly impact the switch’s ability to regulate water pressure effectively. These contacts, which are vital for the switch’s operation, can wear out or corrode over time, leading to inconsistent activation and deactivation of the pump. This inconsistency can result in fluctuating water pressure or even complete system failure.

Signs of bad contacts include burning or pitting on the relay contacts. To diagnose this issue, you need to remove the pressure switch cover and inspect the internal components. If you notice any damage or corrosion, it’s important to address it promptly to prevent further system failure.

Regular maintenance can help prolong the life of the pressure switch. Cleaning the contacts with fine-grit sandpaper can remove any debris or corrosion, guaranteeing reliable operation. A multimeter can also be used to test the electrical continuity of the contacts, aiding in the identification of any failures that might prevent proper switch function.

If bad contacts are suspected and cleaning doesn’t resolve the issue, replacing the entire pressure switch may be necessary to restore proper system operation. This is particularly important to prevent system failure and maintain a consistent water supply.

Water Is Leaking From the Internal Mechanism

Water leaking from the internal mechanism of a well pump pressure switch is a significant issue that can lead to inconsistent pressure regulation and potential system failure. This leakage typically indicates a damaged diaphragm, which can cause the pressure switch to malfunction.

Inspecting for visible leaks around the switch is vital to identify whether the internal components, such as the diaphragm or seals, require replacement.

Here are some key points to take into account when dealing with a leaking pressure switch:

  1. Damaged Diaphragm: A leaking pressure switch often points to a damaged diaphragm, which can lead to inconsistent pressure regulation.
  2. Visible Leaks: Inspect for visible leaks around the switch to determine if internal components need replacement.
  3. Continuous Cycling: A leaking pressure switch can cause continuous cycling of the well pump, leading to increased wear and tear on the pump and potentially higher energy costs.
  4. Regular Maintenance: Regular maintenance, including checking for leaks and cleaning components, can help prevent water from accumulating inside the switch and extend its operational life.

If water leakage persists after cleaning and inspecting the switch, it’s advisable to replace the switch to maintain proper functionality of the well system.

Regular checks and prompt repairs are vital to prevent system failure and guarantee reliable operation of your well pump.

Frequently Asked Questions

How Do I Tell if My Well Pressure Switch Is Bad?

Check your well switch symptoms: low pressure readings, continuous clicking, or water leaks. Inspect electrical connections and pressure gauge readings. If the switch doesn’t turn off at set pressure, it’s likely bad and needs replacement.

How Do I Reset a Well Pump Pressure Switch?

To reset a well pump pressure switch, first turn off the power at the circuit breaker for safety. Locate the reset lever, typically on the side, and move it up into the start position. Hold it until the pressure gauge reads over 40 PSI, then let it return to the AUTO position. Monitor the system to confirm proper function between 40-60 PSI. If issues persist, it may indicate a deeper problem requiring inspection or replacement.

What Would Cause a Pressure Switch to Stop Working?

A pressure switch may stop working due to mechanical malfunctions, such as damaged or stuck components, or electrical issues like damaged wiring or power supply loss, leading to water supply interruptions and pressure switch failure.

Why Is My Well Pump Running but No Pressure?

Your well pump might be running but not building pressure due to a faulty pressure switch, low water levels, or wiring issues. Check the pressure gauge for a malfunction and inspect electrical connections for damage or tripped breakers.

Conclusion

To troubleshoot a well pump pressure switch, verify the tank pressure is within the switch’s setpoints and inspect for blockages or debris. Check wiring for damage and test internal contacts with a multimeter. Addressing power supply issues and mechanical failures can improve performance. If the switch still malfunctions, consider replacing it to prevent costly repairs. A professional inspection can also help diagnose issues accurately, especially if symptoms persist despite troubleshooting efforts.
Motorhome Furnace Not Working: Troubleshooting Guide

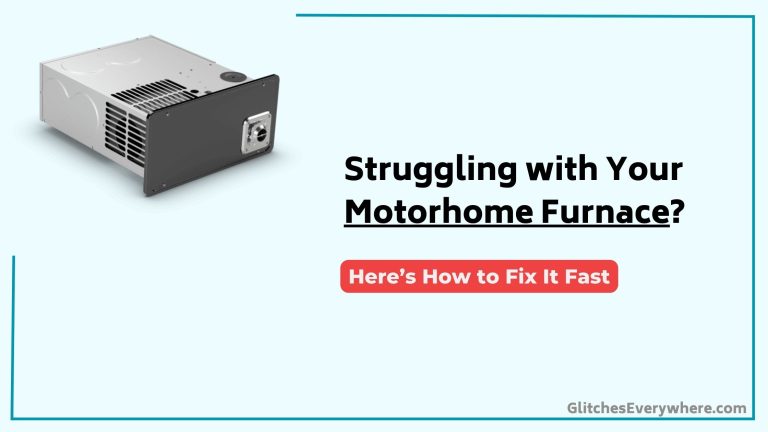
The Motorhome Furnace is a great device, but like all electronics, it sometimes has its issues. If your Motorhome Furnace is not working, take a look at this troubleshooting guide.

We’ve collected answers to the most frequent reasons you’ll see Motorhome Furnace not working and explained them in plain language for easy troubleshooting.

Motorhome Furnace Troubleshooting


Quick Fix

To troubleshoot a motorhome furnace, check the power source and thermostat settings, inspect the propane supply and connections, clean the vents and burner, and ensure the blower motor and ignition system are functioning properly.

Checking Thermostat Settings

When troubleshooting your motorhome furnace, it’s vital to start by checking the thermostat settings. Make certain the thermostat is set to the “Heat” or “Furnace” mode to activate the furnace properly and prevent it from inadvertently operating in cooling mode.

Verify that the temperature setting on the thermostat is set higher than the current room temperature to prompt the furnace to turn on.

This is significant because if the temperature setting isn’t higher than the ambient temperature, the furnace won’t engage.

Regularly check the thermostat for any signs of malfunction, such as a blank display or unresponsive buttons, which may indicate a need for battery replacement or electrical inspection. Confirm that the thermostat is properly wired and that connections are secure to prevent communication issues with the furnace.

In the HVAC world, even small wiring faults can prevent the system from functioning as expected.

If the thermostat is programmable, make certain that the heating schedule is appropriately set for the desired times and temperatures to maintain consistent heating.

This is a featured advantage in many RV setups, offering comfort and energy efficiency.

For instance, if you set the thermostat to heat mode and the temperature higher than the current room temperature, and the furnace still doesn’t turn on, check for loose electrical connections or a blown fuse. Since the thermostat relies on sensitive technology to communicate with the furnace, proper calibration and maintenance are essential.

These steps are fundamental in RV furnace troubleshooting and can help you diagnose and resolve issues efficiently.

Inspecting Battery Voltage

After verifying the thermostat settings are correct and the furnace is in the proper mode, it’s time to inspect the battery voltage. This is vital for RV furnaces, as low battery voltage can lead to electrical issues that trip fuses or prevent the furnace from operating.

Here are some key points to check when inspecting battery voltage:

  1. Check the Voltage Level: A fully charged 12-volt battery should read around 12.6 volts or higher to guarantee proper furnace operation.
  2. Monitor in Cold Conditions: In cold conditions, battery performance can drop significantly, so it’s important to monitor voltage levels regularly to prevent furnace failures.
  3. Charge or Connect to Shore Power: If the battery voltage is below 12.4 volts, consider charging the battery or connecting to shore power to make sure the furnace has sufficient power to operate.

To accurately measure the battery voltage, use a multimeter. If it reads below 12 volts, it’s a sign the battery may need replacement or charging.

Always carry spare fuses for the furnace system and check the fuse panel for blown fuses, as low battery voltage can lead to electrical issues that trip fuses.

Regularly checking battery voltage is a vital troubleshooting tip for maintaining your RV furnace’s functionality.

Examining Fuses for Blown Components

When troubleshooting your motorhome furnace, always check the fuse panel for blown fuses, as they can interrupt power and prevent operation.

Use a multimeter to test each fuse for continuity; if a fuse shows no continuity, replace it with one of the same size and type.

Keeping spare fuses on hand guarantees you can quickly address blown fuses during RV trips, maintaining uninterrupted furnace operation in cold weather.

Blown Fuses Identified

Blown fuses in the RV furnace can prevent the ignition system from receiving power, leading to a complete failure to start the furnace. Regularly inspecting the 12-volt fuse panel for any blown fuses specifically associated with the furnace is vital for ensuring proper functionality.

When you notice a blown fuse, it’s essential to address the issue promptly. Here are some key steps to take:

  1. Identify the Blown Fuse: Locate the blown fuse in the electrical panel. It should be labeled from the factory, and one should be marked for the furnace. Use needle nose pliers to remove the proper fuse and store it somewhere easy to find for reinsertion later.
  2. Check for Underlying Issues: A blown fuse may indicate underlying electrical problems, such as short circuits or faulty wiring. These issues should be diagnosed and repaired promptly to avoid further damage to the furnace components.
  3. Replace with the Correct Fuse: Always use the same size and type of fuse to avoid electrical issues or further damage to the furnace components. Keeping spare fuses on hand can help quickly resolve issues without significant downtime during cold weather or camping trips.

Fuse Replacement Steps

To examine fuses for blown components in your RV furnace system, start by locating the fuse panel, typically found near the electrical components or in a storage compartment.

Once you’ve identified the panel, use a multimeter to test each fuse for continuity. A reading of zero indicates a blown fuse that needs replacement.

Always replace blown fuses with the same type and amperage rating to prevent electrical issues or potential damage to the furnace. Keeping spare fuses on hand in your RV is vital for quick replacements during troubleshooting, minimizing downtime during trips.

After replacing a blown fuse, recheck the power supply and thermostat settings to confirm the furnace operates correctly before sealing the fuse panel.

If you encounter blown fuses, it’s important to address them promptly to avoid furnace issues. Blown fuses can disrupt the entire furnace system, leading to inefficiency or even safety hazards.

By following these steps methodically, you can diagnose and resolve blown fuses effectively, guaranteeing your RV furnace operates smoothly and safely.

Always prioritize caution when dealing with electrical components, and if unsure, consult a certified RV technician.

Electrical System Inspection

To guarantee your RV furnace operates efficiently and safely, it’s essential to inspect the electrical system, particularly focusing on the 12-volt fuse panel. Blown fuses can prevent the system from receiving power and functioning properly, so it’s imperative to identify and address these issues promptly.

  1. Inspect the Fuse Panel: Check the 12-volt fuse panel for blown fuses specifically related to the furnace. A blown fuse can indicate a problem with the electrical system, such as a short circuit or overheating.
  2. Replace Fuses Correctly: Always replace blown fuses with the same size and type to maintain safe and effective operation of the furnace’s electrical system. Using the wrong type of fuse can lead to further electrical issues.
  3. Check Connections: Inspect the fuse connections for any signs of corrosion or looseness. Poor connections can lead to intermittent power supply issues, which may cause the furnace to malfunction.

If multiple fuses are blown or if the replacement fuses continue to blow, it may indicate a deeper electrical issue that requires professional assessment.

Carrying spare fuses for emergency replacements while on the road guarantees minimal downtime in case of electrical issues with the furnace.

Regular inspections and proper maintenance are crucial to prevent such problems and make sure your RV furnace operates efficiently and safely.

Ensuring Proper Propane Supply

To guarantee proper propane supply for your motorhome furnace, first verify that the propane tank is full and the valves are fully opened to allow for gas flow.

Regularly inspect the propane lines for leaks or blockages by applying soapy water; bubbles will indicate a leak that needs immediate attention.

Additionally, check for air in the lines by lighting a stove burner to purge them before starting the furnace, and confirm that the sail switch is unobstructed and operational.

Propane Tank Levels

Guaranteeing proper propane supply is essential for the reliable operation of your motorhome furnace. Regularly checking the propane tank levels can prevent ignition failures and inconsistent heating. Here are three key methods to gauge your propane levels:

  1. Propane Gauge: Use a propane gauge installed on your tank to get an accurate reading. The gauge, usually located at the top of the tank, displays a percentage between 10 and 80. This percentage indicates the tank’s fill level, so you can calculate the remaining propane by multiplying the tank’s total capacity by this figure.
  2. Hot Water Method: If you don’t have a gauge, you can use the hot water method. Pour hot water down the side of the tank and run your hand along it until you feel a cool spot. The transition from warm to cool indicates the propane level.
  3. Remote Monitoring System: Consider installing a remote monitoring system that alerts your propane supplier when the levels are low. This guarantees automated delivery and reduces the risk of running out during essential heating periods.

Propane tanks should be filled when they reach about 20% capacity to avoid running out during cold weather.

Store the tanks in an upright position and guarantee the valves are securely closed when not in use to prevent leaks and guarantee safety.

Always inspect the propane lines for blockages or leaks to maintain proper gas flow and performance.

Gas Valve Position

StepDescription
1Check Gas Valve Position: Verify the gas valve is fully open.
2Inspect Gas Lines: Look for leaks or blockages by applying soapy water to connections. Bubbles indicate escaping gas.
3Verify Propane Tank Level: Confirm the propane tank is adequately filled. Low gas pressure can cause insufficient fuel supply.
4Check Gas Pressure Regulator: If it’s over five years old, consider replacing it as aging regulators may fail to maintain proper pressure.

To troubleshoot further, inspect the sail switch, which tells the furnace to ignite the propane. Debris between the sail and switch contact can prevent the switch from closing, indicating a faulty sail switch. Verify all other propane appliances in the RV are functioning correctly to rule out broader issues with the propane supply system. If you suspect a gas leak or serious valve malfunction, shut off the system immediately and contact a professional HVAC technician for safe diagnosis and repair.

Air Line Purging

  1. Turn off all propane appliances: Confirm that all appliances, including the stove and furnace, are turned off. This step is vital to prevent any accidental ignition and to guarantee a safe purge process.
  2. Light a stove burner: Turn on the stove and light a burner until the flame stabilizes. This indicates that air has been expelled from the propane line.
  3. Attempt to ignite the furnace: After turning off the stove, try to ignite the furnace. The reduced air in the lines should enhance the chances of successful ignition.

Regular purging of propane lines is recommended, especially after replacing tanks or during long periods of inactivity, to maintain peak furnace performance.

Additionally, always check for gas leaks using a soapy water solution around the connections after purging, as any bubbles indicate a leak that needs to be addressed.

Inspecting Airflow and Ducts

When inspecting the airflow and ducts of your motorhome furnace, it’s vital to start by checking the air filters. Inspect them regularly and clean or replace them every 1-3 months to guarantee unobstructed airflow, which is essential for efficient furnace operation. A clogged filter can significantly impede airflow, so make certain to check for dust and debris accumulation every few weeks.

Next, confirm that all ducts are free from debris and obstructions to maintain peak heat distribution throughout the RV. Conduct a monthly vacuuming of the return air compartment to prevent dust and debris accumulation that can disrupt airflow and furnace performance.

Check for any leaks or gaps in the ductwork, as these can lead to heat loss and decreased efficiency, making the furnace work harder to maintain the desired temperature. Additionally, verify that vents aren’t blocked by furniture or other items, as this can restrict airflow and result in insufficient heating within the motorhome.

Inspect the ducting at the furnace, making sure each hose is attached and hasn’t been crushed or damaged. Over time, heat ducts can become brittle and split, routing highly heated air into the wrong area.

Diagnosing Sail Switch Issues

Diagnosing sail switch issues is vital for guaranteeing your motorhome furnace operates correctly. A faulty sail switch can prevent the furnace from igniting, as it’s responsible for signaling that there’s adequate airflow for safe operation. Common symptoms include the furnace fan starting but failing to ignite intermittently or blowing cold air shortly after activation.

Here are some key points to take into account when diagnosing sail switch issues:

  1. Symptoms: The furnace fan may run for 30 seconds or so, then stop without igniting. If the sail switch is faulty, you won’t hear the igniter fire, but if it’s working correctly, you’ll hear a rapid clicking noise as the igniter attempts to ignite.
  2. Debris and Defects: Sail switch failure can occur due to debris obstructing the switch or the switch itself being defective. Thorough inspection and cleaning are often necessary to resolve the issue.
  3. Accessing the Sail Switch: Accessing the sail switch often necessitates the removal of the entire furnace, as it’s typically located on the blower fan housing with no external panel for easy access.

During inspection, it’s vital to document the wiring layout with a photo to guarantee correct reassembly after maintenance. If you suspect a sail switch issue, start by checking for debris and cleaning the switch. If cleaning doesn’t resolve the problem, think about replacing the sail switch.

Proper diagnosis and maintenance will guarantee your motorhome furnace operates efficiently and safely.

Troubleshooting Ignition Problems

After diagnosing sail switch issues, you’ll need to address ignition problems that prevent your motorhome furnace from functioning correctly. One common ignition problem occurs when the sail switch fails to close, preventing the furnace from igniting. This can be due to debris obstruction or a defective switch itself.

Inspect the sail switch for any debris that might be blocking its operation. If you find debris, clean it out thoroughly before reassembling the switch.

Confirm that the propane supply is adequate and that the tank is full to rule out low gas pressure, which can prevent ignition. A malfunctioning flame sensor can also cause the furnace to ignite briefly before extinguishing. Cleaning or replacing the flame sensor may be necessary to confirm proper function.

Additionally, inspect the furnace control board for moisture damage, as this can disrupt the ignition process and may necessitate replacement if found faulty.

Regularly check and maintain the high-temperature sensor‘s accuracy, as incorrect readings can prevent the ignition process from initiating correctly. If the furnace fan runs but the propane flame doesn’t light, check that the propane tanks are turned on and that there’s enough propane to provide the necessary British thermal units (BTUs).

If the issue persists, consider resetting the system by turning off the furnace at the thermostat and turning it back on again to allow the ignition process to restart.

Addressing Frequent Cycling Issues

Frequent cycling of a motorhome furnace can be a frustrating issue, often caused by several factors that disrupt the furnace’s ability to maintain a stable temperature. To address these issues, you need to identify and rectify the underlying causes.

1. Thermostat Placement: Make certain your thermostat is correctly positioned away from drafts, heat sources, and direct sunlight.

Inaccurate temperature readings can trigger the furnace to cycle on and off more frequently. Check for calibration issues or low battery levels, and consider upgrading to a programmable or smart thermostat if necessary.

2. Airflow Restrictions: Dirty filters, blocked ducts, or closed registers can restrict airflow, causing the furnace to overheat and shut off prematurely.

Regularly check and replace air filters every 1-3 months to guarantee proper airflow. Inspect ducts for blockages and make sure all registers are open and unobstructed.

3. Maintenance: Regular maintenance is vital in preventing frequent cycling issues.

Clean components, inspect for leaks, and verify the propane piping system is tested for leaks at least once per camping season. Properly routing ductwork and confirming return airflow are also essential for efficient furnace operation.

Frequently Asked Questions

What Is the Most Common Problem With the RV Furnace?

The most common problem with RV furnaces is insufficient heat output, often caused by blocked ducts or dirty air filters that restrict airflow. Regular furnace maintenance tips and troubleshooting techniques can help address these common furnace issues.

How Do You Reset the Furnace in an RV?

To reset the RV furnace, turn off the thermostat, disconnect power by removing the fuse or turning off the circuit breaker for 30 seconds, then restore power and confirm the thermostat is set to “Heat” mode. Inspect the sail switch for obstructions.

What Is the Most Common Furnace Failure?

The most common furnace failure in motorhomes is the pilot light not igniting, often due to gas supply problems or a faulty ignition system. Regular furnace maintenance tips include checking propane levels, ensuring proper airflow, and inspecting the sail switch for debris. Common symptoms include frequent cycling and insufficient heat output. Use a troubleshooting guide to diagnose and address these issues.

Can Hear Your Furnace Click on but It Does Not Fire Up?

If you hear your furnace click but it doesn’t fire up, check the sail switch for debris or malfunction, make certain the propane supply is open, inspect the control board for faults, and verify the high-temperature sensor is functioning correctly.

Conclusion

Investigate the thermostat settings to confirm it’s in “Heat” mode and the desired temperature is set correctly. Check the electrical system for battery voltage and blown fuses. Verify the propane supply is adequate and inspect for leaks in the gas lines. Regular maintenance like cleaning air filters and confirming proper airflow is essential. Diagnose sail switch issues and troubleshoot ignition problems. Address frequent cycling issues by checking the high-temperature limit switch and LP tank levels.

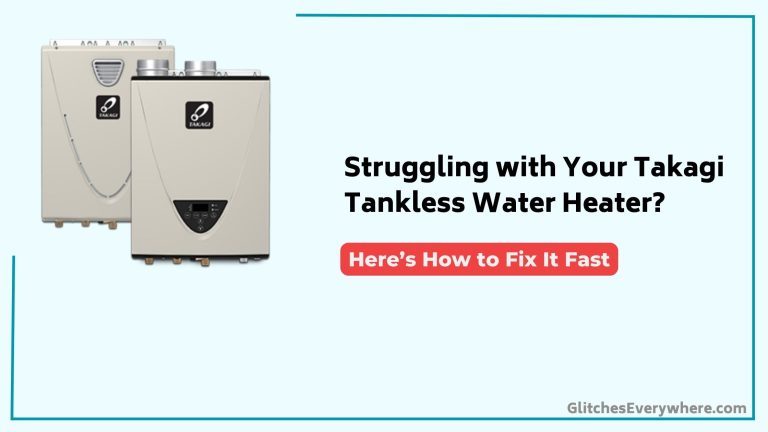
Takagi Tankless Water Heater Not Working: Troubleshooting Guide

The Takagi Tankless Water Heater is a great device, but like all electronics, it sometimes has its issues. If your Takagi Tankless Water Heater is not working, take a look at this troubleshooting guide.

We’ve collected answers to the most frequent reasons you’ll see Takagi Tankless Water Heater not working and explained them in plain language for easy troubleshooting.

Takagi Tankless Water Heater Troubleshooting

Quick Fix

To troubleshoot a Takagi tankless water heater, check the power and gas supply, ensure the water and gas valves are fully open, clean the inlet filter, inspect for error codes, and flush the unit to remove scale buildup.

Common Issues With Takagi Tankless Water Heaters

Takagi tankless water heaters are known for their efficiency and reliability, but like any appliance, they can experience common issues that affect their performance.

When you notice random loss of hot water during showers and baths, it can be quite frustrating. This issue often arises due to inadequate water flow or clogged filters. Verify that the inlet filter is clean and free from debris or scale buildup. If it’s dirty, clean or replace it to improve water flow.

Cold water spikes can occur despite temperature settings, indicating potential issues with the unit’s performance. This might be due to fluctuations in water temperature caused by varying flow rates or a “cold water sandwich” effect where cold water enters the hot water line briefly.

Adjusting the temperature settings and verifying that fixtures like showers and faucets aren’t being used simultaneously can help mitigate this issue.

Water spewing from the condenser port during operation may suggest drainage problems or blockages within the system.

In the HVAC and plumbing field, this is a featured concern that highlights the importance of routine inspections.

Regular maintenance, including cleaning filters and exhaust systems, is essential to prevent common operational issues and guarantee reliable performance.

Inconsistent performance during winter months is reported, likely due to the heater’s inability to handle cold water inflow effectively. Descale the heat exchanger if you have hard water, as mineral deposits can reduce efficiency. Like all heating technology, Takagi units require careful upkeep to deliver consistent results year-round.

Regular Maintenance Checks

Regular maintenance checks for your Takagi tankless water heater are essential to guarantee peak performance and longevity.

Start by regularly cleaning the filters and strainers to prevent blockages that can lead to operational issues and inconsistent hot water supply.

Additionally, inspect the burner and exhaust systems for lint or carbon buildup, and check the condensate line for proper installation and drainage to avoid overflow and potential damage to the unit.

Follow the guidelines in the Service and Installation Manual for detailed maintenance procedures and recommendations.

Filter Cleaning

Cleaning the filters in your tankless water heater is essential to maintain ideal performance and prevent issues like decreased efficiency and random loss of hot water.

Regularly inspecting and cleaning the filters guarantees peak water flow and heater efficiency. Start by turning off the power to your water heater to prevent any electrical hazards.

Locate the filter, typically found at the water inlet, where the cold water enters your heater. Carefully remove the cover using a screwdriver to unscrew any fasteners.

Gently take off the cover to access the filter. If there’s any resistance, refer to your Takagi manual for specific instructions.

Remove the filter and rinse it under cold water to remove any debris. For a deeper clean, soak the filter in a vinegar solution for about an hour.

After soaking, give the filter a gentle scrub with a soft brush or cloth to remove any remaining buildup. Rinse the filter again with cold water after scrubbing to wash away any loose sediment.

Reinstall the filter, making sure it’s seated correctly, and then replace the cover securing it with the screws you removed earlier.

Turn the power back on to your water heater, and you’re all set. Regular filter cleaning can prevent issues and keep your system running smoothly.

If you experience cold water spikes, it may be a sign that the filters are clogged and require immediate cleaning. Always refer to the Service and Installation Manual for detailed instructions on how to properly remove and clean the filters in your tankless water heater.

Condensate Drainage

After verifying your tankless water heater’s filters are clean and free from debris, it’s time to focus on another critical aspect of regular maintenance: condensate drainage.

Proper condensate drainage is crucial to prevent overflow and guarantee the longevity of your Takagi tankless water heater.

Here are the key steps to maintain ideal condensate drainage:

1. Inspect the Condensate Drain Line: Regularly check the condensate drain line for any signs of blockages or kinks that could impede the flow of condensate away from the heater.

Look for visible cracks or loose connections and address them promptly to prevent leaks and water damage.

2. Confirm Proper Installation: Verify that the condensate drain is sloped correctly, allowing for gravity-assisted drainage.

Improper installation can lead to misalignment and inadequate drainage, causing overflow and potential water damage.

3. Check the Condensate Neutralizer: Verify that the condensate neutralizer is properly installed and functioning.

This component helps to neutralize acidic condensate before it’s discharged, preventing corrosion and damage to the system.

4. Schedule Annual Service: Schedule annual service with a qualified technician to thoroughly clean and inspect the condensate system.

This guarantees ideal performance and reliability by catching potential issues early and preventing costly repairs.

Burner Maintenance

To guarantee your Takagi tankless water heater operates efficiently and reliably, it’s essential to maintain the burner regularly.

Regular maintenance checks of the burner are vital to prevent lint and carbon buildup, which can overwork the burner and lead to performance issues. Cleaning the burner should be done as part of an annual service to confirm peak functionality and prolong the lifespan of the tankless water heater.

Users are advised to refer to the Service and Installation Manual for detailed procedures on how to properly clean and maintain the burner.

Failure to maintain the burner can result in random loss of hot water and cold water spikes during use, especially in winter months. This can be particularly problematic if you rely on your tankless water heater for continuous hot water supply.

To perform routine burner maintenance, start by checking the gas line to verify it isn’t undersized, as this can cause inefficiencies.

Next, inspect the burner itself for any blockages or debris. If issues persist after performing routine maintenance, professional servicing is recommended. This can address blockages and other underlying problems that may be causing the issues.

Proper Installation Requirements

Proper installation of a Takagi tankless water heater requires adherence to local building codes and standards to guarantee safety and compliance.

Confirm the unit is installed in a location that allows for adequate combustion air and ventilation, particularly in environments prone to dust or chemical exposure.

Additionally, verify that the gas supply lines meet specific size requirements to guarantee adequate gas pressure for efficient operation of the tankless water heater.

Proper Venting

Proper venting is vital for the efficient operation of Takagi tankless water heaters, with sealed stainless steel vent pipes recommended for non-condensing models to prevent service problems.

Adhering to local codes regarding venting installation is fundamental to guarantee safety and compliance with regulations.

To guarantee your Takagi tankless water heater operates efficiently and safely, follow these guidelines:

  1. Use the Right Venting Material: For gas tankless water heaters, use Category 3 stainless steel gas vent pipe. PVC should be avoided due to safety concerns.
  2. Adhere to Vent Length and Bends: Manufacturers provide detailed specifications on vent length, diameter, and the number of allowable bends to optimize exhaust flow.
  3. Regularly Inspect the Venting System: Regular checks can prevent significant issues by confirming there are no blockages or improper installations affecting the heater’s performance.
  4. Optimize for Condensation: High-efficiency models require managing condensation. Adhere to manufacturer guidelines for venting configurations to address this need.

Gas Supply

Verifying the gas supply line for your Takagi tankless water heater is properly installed is vital for peak performance and safety. To start, you must confirm that the gas pressure is within the manufacturer’s recommended range. Incorrect gas pressure can lead to malfunctions and inconsistent heating. The recommended inlet gas supply pressures for Takagi tankless water heaters are typically between 4.0 in. WC (minimum) and 10.5 in. WC (maximum) for natural gas, and between 8.0 in. WC (minimum) and 14 in. WC (maximum) for propane.

Gas Supply Requirements for Takagi Tankless Water Heaters

RequirementDescription
Gas Line SizeThe gas line must meet the minimum size requirements specified in the installation manual to promote peak performance and prevent operational issues. Typically, a ¾-inch gas supply line is recommended.
Gas PressureThe gas pressure must be within the manufacturer’s recommended range. For natural gas, it should be between 4.0 in. WC and 10.5 in. WC, while for propane, it should be between 8.0 in. WC and 14 in. WC.
Regular InspectionRegular inspection of the gas supply line and connections is essential to identify any leaks or blockages that could affect the heater’s performance. This guarantees the water heaters provide endless hot water consistently.
Professional InstallationEngaging a licensed professional for installation is recommended to guarantee compliance with local codes and proper functionality of the gas supply system. This helps prevent improper operation, shortened unit life, and voiding the warranty.

Troubleshooting Error Codes

When your Takagi tankless water heater starts flashing error codes, it’s crucial to understand what each code signifies to address the issue effectively.

Error codes on Takagi tankless water heaters are indicated by flashing LED lights, each representing a specific issue that requires attention. Refer to the service manual to interpret the error codes accurately, as they provide guidance on troubleshooting steps based on the identified error.

Common error codes include those related to gas supply issues, overheating, and improper water flow, which can often be resolved through simple checks and adjustments. Regularly monitor the hi-limit switch, as clogs in the heat exchanger can lead to fault codes related to overheating.

Here are some key points to keep in mind when troubleshooting error codes:

  1. Error Code 101: Improper combustion. This could be due to blockages in the exhaust or intake, which can introduce carbon monoxide into your home. Clear any blockages found in the intake or exhaust to resolve this issue.
  2. Error Code 111: Ignition failure. This could be linked to inadequate gas supply or a bad igniter. Verify the gas supply valve is fully open and check for any damage to the igniter.
  3. Error Code 991: Dirty fan or gas manifold. A dirty tankless water heater means lesser efficiency and a greater chance for early breakdown. Call a technician to perform an inspection and cleaning.
  4. Error Code 741: The water heater doesn’t respond when the remote is used. Check for miscommunication in the Easy-Link system or verify the remote is functioning correctly.

For persistent error codes after troubleshooting, it’s advisable to contact customer service or a qualified technician for further diagnosis and repair.

Addressing Condensate Problems

Addressing condensate problems in your Takagi tankless water heater is vital to prevent operational issues and potential water damage.

To start, make certain that the condensate drainage system is properly installed and unobstructed. This means the line should be adequately sloped to prevent backups and overflow. Regular maintenance, including cleaning the burner and exhaust systems, can help reduce the risk of condensate issues by preventing buildup that may obstruct drainage.

If you notice water spewing from the condenser port, check for blocked exhaust or improper venting. These issues can contribute to excess condensate formation. Improper venting, for instance, can lead to acidic condensation that destroys the heat exchanger. Use sealed stainless steel vent pipe approved for Category III appliances to avoid this problem.

Additionally, installing a condensate neutralizer can help manage the acidity of the condensate, which is essential for protecting plumbing systems from potential damage.

Regular inspections should also be part of your maintenance routine to check for signs of clogs, leaks, and damage. Addressing any issues promptly can prevent many common problems and keep your tankless water heater running smoothly.

Preventing Operational Issues

To prevent operational issues with your Takagi tankless water heater, it’s essential to maintain a regular maintenance routine. This includes annual servicing to guarantee trouble-free performance. Here are some key steps to follow:

1. Proper Venting: Verify that your Takagi tankless water heater is vented correctly using sealed stainless steel vent pipes. Improper venting can lead to exhaust gas leaks and is unsafe.

2. Appropriate Gas Supply Line Size and Pressure: Confirm the gas supply line is sized correctly for the maximum BTU per hour rating of your heater. Incorrect sizing can lead to operational issues.

3. Monitoring Water Quality: Avoid using hard water above 7 grains per gallon, as it can damage the heat exchanger.

Also, don’t use reverse osmosis systems, as they can destroy the heat exchanger.

4. Clean Environment with Sufficient Combustion Air: Install your heater in a clean environment with sufficient combustion air to prevent temperature fluctuations and improve overall reliability.

Frequently Asked Questions

How Do You Reset a Takagi Tankless Water Heater?

To reset a Takagi tankless water heater, locate the reset button, press and hold it for 5 seconds until the LED indicators flash, then refer to the manual for troubleshooting tips to guarantee peak performance.

Why Is My Tankless Water Heater Not Getting Hot Water?

If your tankless water heater isn’t getting hot water, check for insufficient gas by verifying the pressure and gas line size. Confirm the temperature settings are correct and inspect for blockages in water supply lines or filters.

How Do I Reset My Tankless Water Heater?

To reset your tankless water heater, locate the reset button, typically on the front panel or near the power supply, and press it to restore factory settings. Confirm all safety switches, like the GFCI, are functioning. Monitor the water temperature and flow post-reset for common issues.

How Long Should a Takagi Tankless Water Heater Last?

A Takagi tankless water heater can last up to 20 years with proper maintenance, including regular cleaning and descaling, and careful installation to avoid hard water issues and environmental damage.

Conclusion

Troubleshoot your Takagi tankless water heater with precision. Regular maintenance is key: clean filters, inspect condensate drainage, and guarantee proper gas supply and venting. Address error codes like 101, 111, and 991 by identifying and resolving underlying issues. Prevent operational problems by tackling blockages and drainage issues head-on. With these steps, you’ll keep your water heater running smoothly, avoiding costly repairs and guaranteeing endless hot water.

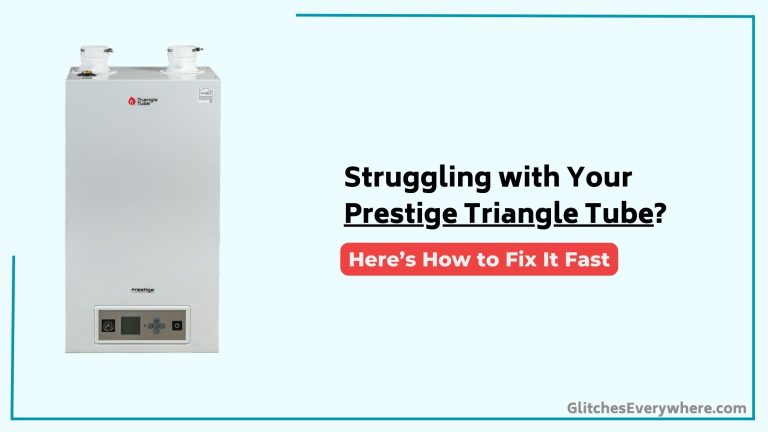
Prestige Triangle Tube Not Working: Troubleshooting Guide

The Prestige Triangle Tube is a great device, but like all electronics, it sometimes has its issues. If your Prestige Triangle Tube is not working, take a look at this troubleshooting guide.

We’ve collected answers to the most frequent reasons you’ll see Prestige Triangle Tube not working and explained them in plain language for easy troubleshooting.

Prestige Triangle Tube Troubleshooting Guide


Quick Fix

To troubleshoot a Prestige Triangle Tube, check the power supply and thermostat settings. Then, inspect the pressure gauge, bleed air from the system, and clean the heat exchanger.

Understanding Prestige Boiler Issues

When troubleshooting your Prestige condensing water boiler, it’s essential to understand the types of issues that can arise, as this will inform your approach to resolving the problem.

You’ll need to determine whether the boiler is in soft or hard lockout mode, as each requires a different reset procedure. Error codes, such as E4 or E-04, can provide valuable clues about the issue, indicating problems like power supply loss or hard lockout.

Within the HVAC industry, these error codes are a featured diagnostic aid that makes pinpointing problems much faster.

Correct polarity and grounding are vital to prevent these issues, so verifying connections is a critical step in troubleshooting.

Additionally, be aware that air in the lines can cause error codes and hard lockouts, and must be removed before resetting the boiler. Like most heating technology, the Prestige boiler depends on proper setup and maintenance to ensure reliable operation.

Identifying and Resolving Error Codes

How do you decipher the cryptic error codes displayed on your Prestige condensing water boiler‘s control module?

Your boiler’s control module display shows boiler information and can indicate soft lockout error codes, which can be diagnosed using the control module display.

Soft lockout error codes can occur due to various reasons and can be used to troubleshoot the boiler.

  1. Check the Prestige Condensing Water Boiler Service Technicians Troubleshooting Guide for a list of error codes and their meanings.
  2. Verify correct polarity and grounding to prevent error codes.
  3. Identify hard lockout error codes, such as E-04, which require immediate attention.
  4. Push the reset button after the problem has been removed, and the boiler will perform a self-check after resetting and restart if successful.

Troubleshooting and Maintenance Tips

By following the Prestige Triangle Tube Troubleshooting Guide, you’ll gain access to a wealth of servicing tips and instructions that’ll help you diagnose and resolve common issues with your condensing water boiler.

Regular system checks can help prevent problems, so perform routine tube cleaning to guarantee peak performance. Additionally, monitor water quality to prevent corrosion and scaling.

Improper water quality can lead to error codes and hard lockouts, so it’s essential to maintain good water quality. Remember to check for air in the lines, as this can also cause error codes and hard lockouts.

Power Supply and UPS Solutions

As you excavate into the Prestige Triangle Tube Troubleshooting Guide, it’s essential to ponder the power supply and UPS solutions that can make or break your condensing water boiler’s performance.

A reliable power supply is vital to prevent hard error lockout, which can be achieved by installing a UPS or adding a 50-cent electrolytic capacitor to the internal DC power supply.

When choosing a UPS, consider the following:

  1. Select a reliable option like APC Pro series UPS systems for vital applications.
  2. Be aware of manufacturer disclaimers regarding unsuitability for vital or life-supporting installations.
  3. Regular battery maintenance is essential, as internal batteries can fail in as little as 2 years.
  4. Guarantee power surge protection to prevent system destruction.

Remember to verify the grounding and polarity of incoming 120V power connections to prevent error codes.

Reset Procedures and Best Practices

You’ve taken the necessary steps to guarantee a reliable power supply for your Prestige Triangle Tube condensing water boiler.

Now, it’s vital to understand the reset protocols to avoid errors and confirm smooth operation. When faced with a hard lockout, simply press the reset button after resolving the issue, and the boiler will perform a self-check before restarting.

Be cautious, as turning the power off and on can trigger an E-04 error code. The RESET button on the MCBA control is sensitive, so use a retracted ballpoint pen tip to find the contact spot.

Hold the button for 30 seconds or more to reset the boiler. To avoid errors, follow the correct sequence and consult manufacturer representatives for personalized guidance if needed.

Frequently Asked Questions

How Do You Reset a Triangle Tube Boiler?

You reset a Triangle Tube boiler by addressing the faulty ignition system or tripped thermal switch, then pressing the reset button, following a specific sequence, or holding it for 30 seconds to initiate the self-check process, ensuring a successful boiler reset process.

What Is the Life Expectancy of a Triangle Tube Boiler?

You can expect a Triangle Tube boiler to last around 15-20 years, but with regular boiler maintenance, tube inspection, and proper water quality control, you may be able to extend its lifespan to 25 years or more.

What Is E02 on Triangle Tube?

You’re likely to encounter an E02 error code on your Triangle Tube boiler, indicating a faulty sensor issue. This error code specifically means the boiler’s sensor is malfunctioning, causing a boiler malfunction, so it’s essential to address the problem promptly to avoid further complications.

What Is the E28 Error on a Triangle Tube?

You’re dealing with an E28 error on your Triangle Tube boiler, which indicates a faulty or stuck gas valve. Consult the fault code meanings and error code explanations to diagnose the boiler malfunction, ensuring accurate diagnosis and efficient repair.

Conclusion

With the Prestige Triangle Tube Troubleshooting Guide in hand, you’ve got the power to tame even the most stubborn boiler issues. By following the guide’s expert advice, you’ll be well on your way to a trouble-free operation, where error codes are a distant memory and your system hums along like a well-oiled machine. So, take a deep breath, roll up your sleeves, and plunge into action – with this guide, you’ll be the master of your boiler’s destiny.

Rainsoft Water Softener Not Working: Troubleshooting Guide

The Rainsoft Water Softener is a great device, but like all electronics, it sometimes has its issues. If your Rainsoft Water Softener is not working, take a look at this troubleshooting guide.

We’ve collected answers to the most frequent reasons you’ll see Rainsoft Water Softener not working and explained them in plain language for easy troubleshooting.

Rainsoft Water Softener Troubleshooting


Quick Fix

To troubleshoot a RainSoft water softener, check the power supply and settings. Then, inspect the salt level and clean the brine tank. Next, check for clogs in the resin bed or drain line and ensure the bypass valve is open. Finally, run a manual regeneration cycle and test the water hardness.

Identifying Common Issues

When dealing with hard water, you’re likely no stranger to the telltale signs of mineral buildup: soap scum on shower doors, streaks on dishes, and stiff laundry.

These issues can be frustrating, but they often indicate a larger problem with your water softener. If you’re experiencing any of these symptoms, it’s likely that your water softener isn’t functioning properly.

Check for signs of wear and tear on your system, such as clogged resin beds or faulty valves. Modern water treatment technology can help improve efficiency, but even advanced systems need regular maintenance.

A malfunctioning water softener can lead to a range of problems, from skin irritation to appliance damage, so it’s important to keep up with featured system checks and servicing.

Valve Inspection and Maintenance

Every valve in your Rainsoft water softener system plays a vital role in facilitating efficient water flow and treatment.

As you inspect the valves, look for signs of wear, corrosion, or mineral buildup that can affect water filtration performance. Check the valve seats and seals for any blockages or damage that may hinder proper valve operation.

You should also inspect the valve screens and clean or replace them as needed to prevent debris from entering the system.

Regular valve maintenance is pivotal to prevent system downtime and guarantee your Rainsoft water softener continues to provide effective water treatment and filtration. By performing these checks, you’ll be able to identify and address any valve-related issues before they become major problems.

System Malfunction Diagnosis

You’ve verified your Rainsoft water softener’s valves are functioning correctly, but what if the system still malfunctions?

It’s time to diagnose the system’s overall performance. Check the system’s electrical connections, ensuring they’re secure and not damaged.

Verify the softener’s programming and settings are correct, and the system is properly sized for your household’s water demands.

Inspect the brine tank and salt levels, ensuring they’re adequate for proper regeneration.

If you’re still unsure, consult your RainSoft water conditioning system‘s manual or contact a certified technician. They can help identify the root cause of the malfunction and recommend necessary repairs or maintenance.

Water Flow and Pressure Troubleshooting

Efficiency hinges on ideal water flow and pressure in your Rainsoft water softener.

You’ll want to check the water pressure in your home, certifying it’s within the recommended range of 30-80 psi. If it’s too low, you may need to install a booster pump.

Also, inspect the water heater’s temperature and pressure relief valve to guarantee it’s functioning correctly. This valve can restrict water flow if it’s faulty or stuck.

Check the valve’s temperature setting and adjust it if necessary. You should also verify that the water softener’s bypass valve is fully open, allowing unrestricted water flow.

Error Codes and Faulty Components

When your Rainsoft water softener malfunctions, it’s essential to identify the root cause quickly to minimize downtime and prevent further damage.

Error codes displayed on the control valve can help you pinpoint faulty components or system malfunctions.

  • Check the control valve for error codes, such as EC4, which indicates a valve fault or obstruction.
  • Inspect the composite valve for signs of wear or damage, as it can cause continuous water flow to the drain.

Regular maintenance, including valve inspection and cleaning, can help prevent error codes and faulty components.

– Consult the RainSoft troubleshooting guide for step-by-step instructions on diagnosing and resolving error codes.

If you’re unsure about troubleshooting or repair, consider scheduling a free in-home consultation with a RainSoft expert to get your system up and running efficiently.

Repair and Replacement Procedures

You’ll need to perform regular valve inspections to identify potential issues before they become major problems.

During these inspections, you’ll check for signs of wear, corrosion, or damage that may require valve replacement.

Valve Inspection Procedures

The valve’s intricate mechanisms, hidden behind a protective casing, demand regular inspections to guarantee the Rainsoft water softener’s overall performance.

You’ll need to check for any signs of wear, corrosion, or blockages that could affect the system’s ability to remove minerals and reduce water hardness.

  • Inspect the valve’s O-rings and gaskets for signs of deterioration or damage, replacing them as needed to prevent leaks.
  • Verify that the valve’s timer and controller are functioning correctly, ensuring the system regenerates at the set interval.
  • Check the valve’s screens and filters for blockages, cleaning or replacing them as necessary to maintain water flow.
  • Look for signs of salt or mineral buildup in the valve, as this can impede the free water flow and reduce the system’s efficiency.
  • Verify the valve’s electrical connections are secure and not damaged, ensuring proper communication between components.

Valve Replacement Options

How does a faulty valve impact the overall performance of your Rainsoft water softener? A malfunctioning valve can lead to reduced water pressure, inconsistent water flow, and even system failure. If you’ve identified a faulty valve during your inspection, it’s essential to examine valve replacement options.

Valve TypeReplacement OptionRecommendation
Brine ValveOEM ReplacementRecommended for peak performance
Flow Control ValveAftermarket EquivalentCost-effective alternative
Metering ValveUpgraded VersionImproves system efficiency
Fill ValveOEM ReplacementGuarantees compatibility and reliability
Drain ValveAftermarket EquivalentSuitable for budget-friendly repairs

When selecting a replacement valve, consider factors like compatibility, quality, and warranty. Always refer to your Rainsoft water softener’s user manual or manufacturer’s instructions for specific guidance on valve replacement procedures.

Preventative Maintenance Strategies

You can extend the life of your Rainsoft water softener by implementing preventative maintenance strategies.

Regular valve cleaning, for instance, guarantees the system operates efficiently and prevents clogs.

Regular Valve Cleaning

Regular valve cleaning is a crucial preventative maintenance strategy for your Rainsoft water softener, as it helps prevent issues like continuous water flow to the drain.

By cleaning the valve every 6-12 months, you can maintain peak system performance and prevent the need for repair or replacement. Failure to do so can lead to reduced water softening efficiency, increased water consumption, and higher energy bills.

  • Remove foreign material that can cause valve malfunction through regular cleaning
  • Conduct a visual inspection of the valve’s front, back, and side to identify signs of corrosion, scaling, or debris buildup
  • Consult a trained Rainsoft dealer or technician, like one of our associates, for assistance with proper valve cleaning
  • Regular cleaning helps prevent continuous water flow to the drain and maintains peak system performance
  • Neglecting regular cleaning can lead to reduced water softening efficiency and increased energy bills

Schedule Maintenance Checks

In conjunction with regular valve cleaning, scheduling maintenance checks is a vital preventative maintenance strategy for your Rainsoft water softener.

By doing so, you’ll guarantee your system operates at peak levels and prevent issues like valve malfunctions and continuous water flow to the drain. RainSoft recommends scheduling checks every 6-12 months to identify and address potential problems before they cause system failures, reducing downtime and repair costs.

During these checks, technicians can inspect and clean the composite valve, verifying proper system function and efficiency. This helps extend the lifespan of your RainSoft water softener and leads to cost savings on water and energy bills.

Frequently Asked Questions

How Do I Reset My Rainsoft Water Softener?

To reset your water softener, you’ll need to initiate the reset process, which varies by model, but typically involves pressing and holding the “Reset” button for 3-5 seconds, then releasing it, and waiting for the system to reboot.

Why Does It Seem Like My Water Softener Is Not Working?

Did you know that 85% of American homes have hard water? You’re not alone if it seems like your water softener isn’t working – mineral buildup in the resin bed or pipes might be the culprit, reducing its effectiveness.

How Do I Know if My Rainsoft Water Softener Is Working?

You check if your water softener is working by monitoring water quality indicators like hardness, taste, and odor; regular maintenance and performance checks can help guarantee it’s effectively reducing mineral buildup and improving overall water quality.

Why Is My Rainsoft Water Softener Not Using Salt?

You’re experiencing salt failure, which means your water softener isn’t using salt. Check the salt level, ensuring it’s above 2-3 inches, and inspect the salt bridge for clogs. Also, verify the salt valve is functioning and the system isn’t in bypass mode.

Conclusion

As you conclude your RainSoft water softener troubleshooting journey, it’s no coincidence that a well-maintained system coincides with softer skin, longer appliance lifespan, and lower energy bills. By identifying common issues, inspecting valves, and diagnosing malfunctions, you’ve taken the first step in ensuring your system runs smoothly. With preventative maintenance strategies in place, you can rest assured that your RainSoft water softener will continue to provide benefits that coincide with your efforts to maintain it.

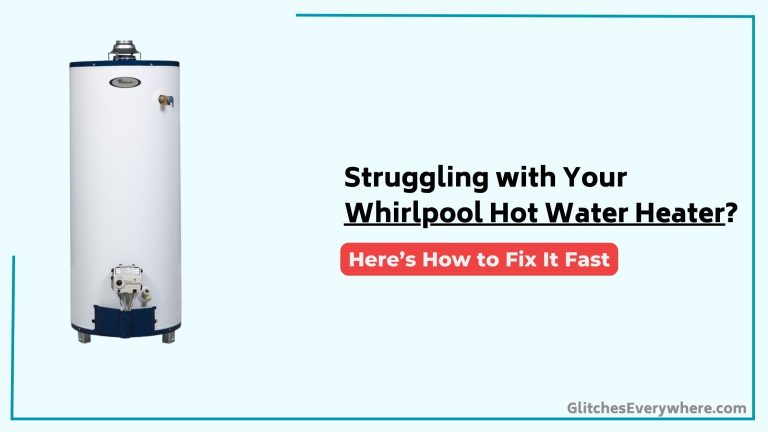
Whirlpool Hot Water Heater Not Working: Troubleshooting Guide

The Whirlpool Hot Water Heater is a great device, but like all electronics, it sometimes has its issues. If your Whirlpool Hot Water Heater is not working, take a look at this troubleshooting guide.

We’ve collected answers to the most frequent reasons you’ll see Whirlpool Hot Water Heater not working and explained them in plain language for easy troubleshooting.

Whirlpool Hot Water Heater Troubleshooting


Quick Fix

To troubleshoot a Whirlpool Hot Water Heater, check the power supply, reset the circuit breaker, verify thermostat settings, inspect for leaks, and flush the tank to remove sediment buildup.

Troubleshooting Steps Overview

When dealing with a malfunctioning Whirlpool hot water heater, a systematic approach to troubleshooting is essential to identify and resolve the issue efficiently.

You’ll want to begin by consulting the safety instructions and printed instructions that came with your water heater. These resources provide valuable guidance on troubleshooting and maintenance.

Next, identify the symptoms of the issue, such as a lack of hot water or unusual noises.

Then, methodically work through a series of checks to isolate the problem. This may involve inspecting the unit’s electrical connections, checking the temperature and pressure relief valve, and verifying that the water heater is properly installed.

Since water heating plays a critical role in your overall HVAC system, ensuring the appliance works seamlessly with modern technology is important for both efficiency and safety. By keeping up with featured maintenance practices, you can extend the lifespan of your Whirlpool hot water heater and avoid unexpected breakdowns.

Pilot Light and Ignition Issues

Your Whirlpool hot water heater’s pilot light and ignition system is responsible for producing the flame that heats the water, so it’s no surprise that issues with these components can bring your entire hot water supply to a grinding halt.

If you’re experiencing problems with the pilot light or ignition, it’s essential to address them quickly to avoid serious injury or death from gas leaks or explosions.

Check the following potential causes:

  1. Dirty or clogged pilot light orifice: Debris or dirt can block the pilot light, preventing it from functioning correctly.
  2. Faulty thermocouple: A malfunctioning thermocouple can prevent the pilot light from staying lit, which in turn affects the ignition system.
  3. Improper installation or adjustment: Misaligned or loose connections can disrupt the ignition sequence, leading to heating element failure.

Refer to the labels on the water heater for guidance on troubleshooting and maintenance procedures.

Electrical and Heating Element Problems

Two of the most critical components of your Whirlpool hot water heater are its electrical system and heating elements. To guarantee the safety of your heater and reduce the risk of electrical shocks, follow all labels and instructions carefully. When troubleshooting electrical issues, make sure the circuit breaker is turned OFF and verify the absence of power using a non-contact circuit tester or volt meter.

IssueCausesSolutions
OverheatingClogged air intake screen, faulty thermocoupleClean lint off the unit, replace thermocouple and regulator unit
Electrical issuesFaulty heating element, poor wiringReplace heating element, check internal wiring
Inconsistent heatFaulty upper heating element, air starvationReplace upper heating element, guarantee proper air supply
Reduced hot waterScale buildup, sedimentClean the heater regularly, check for sediment buildup

Remember to always follow the printed instructions and take necessary precautions when working with electrical components. Regular maintenance, such as cleaning the lint off the unit every 3 months, can help prevent overheating and electrical issues.

Common Whirlpool Water Heater Issues

Leaks, unusual noises, and inadequate hot water supply are just a few common issues you may encounter with your Whirlpool water heater.

These problems can be frustrating and even lead to a risk of property damage if left unaddressed. When you notice any of these issues, it’s essential to perform some troubleshooting to identify the root cause.

Here are three common Whirlpool water heater issues to look out for:

  1. Leaks: Check for signs of water around the base of your water heater or on the floor. Leaks can be caused by loose connections, corrosion, or faulty valves.
  2. Unusual Noises: Listen for strange sounds like banging, clanking, or gurgling coming from your water heater. These noises can indicate sediment buildup, mineral deposits, or a faulty heating element.
  3. Inadequate Hot Water Supply: If you’re not getting enough hot water, it may be due to a faulty thermostat, mineral buildup, or an undersized water heater for your household needs. Consider a new water heater installation if your current one is outdated or inefficient.

Warranty, Support, and Resources

Most Whirlpool water heaters come with a 9-year warranty, which provides a certain level of protection against manufacturing defects and faulty components.

However, be aware that warranty support can be inconsistent and unreliable. You may need to purchase parts and request reimbursement, as Whirlpool mightn’t provide RA #s for part pickup at Lowes. Additionally, you’ll be charged $5 for S&H for part delivery, so factor that into your costs.

For maintenance and troubleshooting guidance, visit the Owner Center, where you can also check your Warranty Status and find a Service Provider. If you’re concerned about recalls or settlements, research online or visit websites like Consumer Affairs for information.

Always review the Terms and Conditions of your warranty to understand your rights and obligations.

Frequently Asked Questions

How Do I Reset a Whirlpool Water Heater?

To reset your water heater, you’ll need to identify the issue first. If it’s an electrical issue, check the circuit breaker. If it’s overheating, the thermal cutoff may have tripped; wait 30 minutes to reset. Otherwise, you can restore factory defaults by pressing the reset button, which may fix a faulty thermostat.

Why Is My Whirlpool Hot Water Heater Not Heating?

You’re likely stuck with a freezing shower because your water heater’s faulty thermostat, worn out elements, or sediment buildup are blocking heat production, or maybe incorrect installation or a corroded anode rod are the culprits – investigate these common issues to get hot water flowing again!

Why Won’t My Whirlpool Water Heater Stay Lit?

You’re struggling with a water heater that won’t stay lit, which can be caused by a faulty thermocouple, pilot issues, or a disrupted gas supply. Check for ignition failure or a faulty electrode, as these common issues often prevent the heater from sustaining a flame.

What Trips the Reset Button on a Hot Water Heater?

What’s causing your hot water heater’s reset button to trip? You’ll find the culprit in faulty thermostats, loose connections, power surges, high temperatures, or faulty sensors, which can trigger the shutdown as a safety precaution to prevent further damage.

Conclusion

As you navigate the troubleshooting journey, think of yourself as a master navigator charting a course through treacherous waters. You’ve identified the symptoms, inspected the vessel, and diagnosed the problems. Now, with the right tools and knowledge, you’re ready to set sail towards a solution. With each step, you’re one wave closer to calm waters, where hot showers and peaceful minds await. By following these steps, you’ll tame the turbulent waters of your Whirlpool hot water heater, and restore warmth to your home.

Ooma Not Working: Troubleshooting Guide

The Ooma is a great device, but like all electronics, it sometimes has its issues. If your Ooma is not working, take a look at this troubleshooting guide.

We’ve collected answers to the most frequent reasons you’ll see Ooma not working and explained them in plain language for easy troubleshooting.

Ooma Troubleshooting


Quick Fix

To troubleshoot an Ooma device, check the power and internet connections, restart the device, ensure proper cable setup, update firmware, and contact support if issues persist.

Common Setup Problems

When setting up your Ooma device, you might encounter common issues that can hinder the process. First, confirm that the Ooma Telo Base Station or Phone Genie is connected to a power source and your internet router for proper functionality.

Verify that all necessary equipment, including Ethernet cables and power adapters, are properly connected and functioning before attempting to set up your Ooma device.

Access the setup interface by visiting setup.ooma.com, where you can configure your device settings and account information. If you encounter issues, check for common problems such as network connectivity, device light indicators, and verify your internet service is active.

For instance, if the Ooma logo on the front of the device is blinking red, it may indicate a connection issue with the Ooma service. Try rebooting your modem, router, and Ooma device to resolve this.

Since Ooma relies on modern VoIP technology, ensuring both hardware and internet stability is essential for smooth operation.

If persistent setup problems arise, consult the featured Ooma support articles for detailed solutions or contact the Customer Care team for assistance. They can provide tailored troubleshooting steps to help you resolve any issues quickly.

Hardware Malfunctions

If you’re experiencing issues with your Ooma device, pay attention to the light indicators on the device, as they can signal different operational statuses and problems.

Common hardware issues like connectivity problems can often be resolved by checking the physical connections and ensuring the device is powered correctly.

If you encounter persistent issues, contact the Customer Care team or refer to the troubleshooting articles on the Ooma website for assistance.

Hardware Failure Symptoms

Hardware failure symptoms in Ooma devices can manifest in several ways, including unresponsive buttons, failure to power on, or no indicator lights showing activity.

If you notice any of these issues, it’s essential to identify the problem promptly to avoid further complications. Here are some common symptoms and potential causes:

  • Unresponsive Buttons: If the buttons on your Ooma device are unresponsive, it could indicate a hardware failure. Check for physical damage such as cracks or broken ports, which can lead to malfunctions.
  • Failure to Power On: If your Ooma device won’t turn on, it might be due to a power surge or a damaged boot loader. In such cases, the device may not start properly, and you might need to reset it.
  • No Indicator Lights: If none of the lights on your Ooma device are showing activity, it could signal a more serious hardware issue. This might include a failed boot loader, which can be difficult to recover from.

To troubleshoot these issues, you should first check for any physical damage and verify all cables are securely connected.

If the problem persists, try resetting the device by unplugging all cables except the power cord and then plugging them back in.

If this doesn’t work, it might be time to contemplate replacing the device.

Troubleshooting Steps

When your Ooma device starts malfunctioning, it’s crucial to identify the problem promptly to avoid further complications. First, verify that all cables are securely connected to the Ooma device, as loose connections can lead to hardware malfunctions.

Check the device light indicators to diagnose issues; for example, a red light may indicate a power problem, while a flashing light could point to connectivity issues.

Restart the Ooma device by unplugging it for at least 10 seconds before plugging it back in, which can resolve many temporary hardware malfunctions. Make certain that the Ooma device is placed in a well-ventilated area to prevent overheating, which can disrupt its functionality.

If issues persist, consult the warranty documentation for procedures on replacing defective hardware components covered under warranty.

User experiences suggest that sometimes a simple reboot or reconnecting the Ethernet cable can resolve connectivity issues. If the device is still not functioning, try connecting the “Home” ethernet port on the back of the Telo to your computer’s ethernet port and check settings via http://setup.ooma.com.

This handy checklist can help you identify internet connectivity and other settings. If you’re experiencing trouble getting to the setup page, try using the address directly.

Warranty Replacement Process

If your Ooma device is malfunctioning, it’s vital to initiate the warranty replacement process promptly to avoid further complications. To start, gather your proof of purchase and a detailed description of the issue.

Then, contact Ooma’s Customer Care team through phone, email, or online chat. They’ll guide you through the warranty claim process and help you resolve the problem efficiently.

During the customer service experience, be prepared to provide information about your device and the problem you’re encountering. The customer service representative will likely ask for a description of the malfunction and may request that you return the defective hardware to Ooma for evaluation.

Once the defective unit is received, Ooma will process your warranty claim and provide you with replacement hardware options.

Proper maintenance of your Ooma device can help prevent malfunctions and extend its lifespan, potentially reducing the need for warranty claims.

However, if a malfunction does occur, following these steps will guarantee a smooth and efficient warranty replacement process. By acting promptly and providing necessary information, you can minimize downtime and get back to using your Ooma device without interruption.

Connectivity Issues

When you’re experiencing connectivity issues with your Ooma device, first verify that your internet connection is stable and that your modem/router is functioning properly.

Check the device light indicators on your Ooma Telo Base Station or Phone Genie; a solid blue light typically indicates a good connection, while red or flashing lights may signal problems.

If you’re still having issues, restart your Ooma device by unplugging it from power, waiting for about 10 seconds, and plugging it back in to reset the connection.

Bluetooth Connection Issues

Bluetooth connection issues can be frustrating, but they often have simple solutions. To troubleshoot these problems, start by ensuring your Bluetooth device is within 30 feet of the Ooma device for ideal connectivity and performance.

Make sure your Bluetooth device is fully charged and turned on before attempting to connect. If you’re still having trouble, restart both the Ooma device and your Bluetooth device to refresh connections and resolve minor connectivity glitches.

Next, verify that the Bluetooth feature is enabled on the Ooma device by accessing the settings through the My Ooma portal.

If you experience persistent issues, try deleting the Bluetooth pairing from both devices and re-pairing them. This step can often resolve problems related to Bluetooth device compatibility or software updates.

Additionally, be aware of potential Bluetooth signal interference from other devices in your area, which could be causing connectivity issues.

Ethernet Cable Problems

Ethernet cable problems can disrupt your Ooma device’s connectivity, causing frustration and downtime. To troubleshoot Ethernet cable issues, start by verifying that the Ethernet cable is securely connected to both the Ooma device and the router.

Check for any visible damage to the cable, such as fraying or bent connectors, which can affect performance. If you suspect the original cable might be faulty, try using a different Ethernet cable to determine if the issue lies with the cable itself.

Verify that your router is functioning properly and that other devices can connect to the internet using the same port. If your router is working correctly, the problem might be with the Ethernet cable or its connectors.

Confirm that the connectors aren’t damaged and that the cable isn’t too long, as excessive length can cause signal degradation. Restart both your Ooma device and router to refresh the network connection and resolve temporary connectivity issues.

Internet Connection Failure

If your Ooma device is experiencing internet connection failure, there are several steps you can take to troubleshoot and resolve the issue.

First, verify that all cables are securely connected and the device is powered on, as loose connections can lead to connectivity issues. Next, check the status of your internet service by connecting another device to the same network; if it’s also unable to connect, the issue may be with your internet service provider.

Verify the device light indicators on the Ooma Telo Base Station—if the “Internet” light is red or off, it indicates a problem with the internet connection. Restart your modem and router by unplugging them for at least 30 seconds before plugging them back in, as this can often resolve temporary connectivity issues.

If problems persist, access troubleshooting articles on the Ooma website for step-by-step guides tailored to specific connectivity problems.

Additionally, consider temporarily bypassing the Ooma device by connecting your router directly to your cable modem. If the internet works without Ooma, it suggests that the issue lies within the Ooma setup. You can then try changing the configuration to Cable Modem > Router > Ooma, as some users have reported success with this method.

Network diagnostics and signal interference can also be checked by accessing the Ooma setup pages and verifying that the internet port MAC address is set correctly.

Be aware that provider outages can also cause internet connection failures, so it’s a good idea to check with your provider as well.

Voice Quality Troubleshooting

When experiencing voice quality issues with your Ooma device, it’s crucial to start by checking your internet bandwidth. Ooma recommends a minimum of 1 Mbps upload and download speed for peak performance. If your internet speeds are lower, it could be causing choppy or garbled audio. Run an internet speed test to verify you’re getting the expected numbers.

Next, make sure your Ooma device is connected directly to a router rather than through a switch or hub. This can help reduce latency and boost call clarity. If you’re experiencing echo or audio delays, consider using a wired connection instead of Wi-Fi for your Ooma device. Wireless connections can introduce interference that affects voice quality.

Regularly rebooting your Ooma device can help clear temporary glitches that may affect voice quality. This is a good troubleshooting step to try.

Additionally, confirm that your network equipment, such as routers and modems, are updated with the latest firmware to improve compatibility and performance for VoIP services like Ooma.

Billing Information Updates

To update your billing information, log in to the My Ooma portal using your account credentials for secure access. Verify that all fields are filled out accurately to avoid billing errors or processing delays during the update process.

Users can also add or update payment methods, such as credit card or bank account information, within the billing section of the My Ooma portal.

When updating your billing information, it’s essential to double-check all details. This includes the payment method options available, such as credit cards and bank accounts.

Once you’ve entered the new information, save your changes. It’s advisable to confirm the changes by checking for a confirmation message or email after successfully updating your billing information. This step guarantees that the update has been processed correctly and avoids any potential issues.

If you encounter issues while updating your billing information, refer to the FAQ section or contact the Customer Care team for assistance.

Advanced Feature Configuration

To configure advanced features on your Ooma system, start by logging into the My Ooma portal using your account credentials.

Once you’re logged in, you’ll have access to a wide range of features designed to improve your call management experience.

Here are some of the advanced features you can customize to fit your needs:

  • Do Not Disturb mode: Block incoming calls during specified hours, ensuring you’re not interrupted when you’re busy or want some quiet time.
  • Instant Second Line: Make and receive simultaneous calls without needing additional lines, perfect for busy households.
  • Three-way conference calling: Merge calls to provide a seamless communication experience, ideal for group discussions or family gatherings.
  • Voicemail forwarding options: Receive voicemail messages via email or text, ensuring you never miss important calls.

Frequently Asked Questions

Why Is My Ooma Not Connecting?

Your Ooma isn’t connecting because of potential network issues or compatibility problems. Confirm all cables are secure, check indicator lights, and restart your Ooma device. Also, verify your internet service and update your Ooma firmware if necessary.

How Can I Reset the Ooma System?

To reset the Ooma system, power off the Telo, wait 15 seconds, then power it back on. When the logo flashes red, press and hold ‘Stop’ and ‘Trash’ keys until it flashes blue and amber, then release and wait for it to restart in factory settings.

Why Does My Ooma Keep Flashing Red?

If your Ooma keeps flashing red, check your internet connection, power supply, and verify the device is registered. Try rebooting your modem, router, and Ooma, and consult troubleshooting tips for device connectivity issues.

Why Are My Ooma Calls Not Coming Through?

Check your internet connection speed for call quality issues. Confirm your Ooma device is properly connected to the internet and that the network configuration is correct. Verify device compatibility and that Do Not Disturb mode is not activated.

Conclusion

If your Ooma device isn’t working, start by ensuring it’s properly connected to power and the internet. Check the light indicators for status and access the setup interface for configuration. If issues persist, restart the device, inspect cables, and verify internet bandwidth. For example, if your Ooma Telo is flashing red, try connecting it to your computer via Ethernet and checking settings at setup.ooma.com. If problems continue, consider hardware replacement and consult Ooma’s support resources for guidance on warranty claims and account management features.

MVP Garage Door Opener Not Working: Troubleshooting Guide

The Mvp Garage Door Opener is a great device, but like all electronics, it sometimes has its issues. If your Mvp Garage Door Opener is not working, take a look at this troubleshooting guide.

We’ve collected answers to the most frequent reasons you’ll see Mvp Garage Door Opener not working and explained them in plain language for easy troubleshooting.

Mvp Garage Door Opener Troubleshooting


Quick Fix

To troubleshoot an MVP Garage Door Opener, check the power source and remote batteries, inspect the safety sensors for alignment and obstructions, clean the tracks and rollers, and verify the opener’s settings and wiring connections.

Troubleshooting Common Issues

When dealing with MVP garage door openers, one of the most common issues is interference from neighboring openers, which can result in the unintended activation of doors for multiple households on the same street.

This problem often requires frequent reprogramming of codes as a temporary fix. RoMac technicians average 10 service calls per week to address these issues, indicating the persistent nature of the problem.

To troubleshoot common issues with your MVP garage door opener, start by checking the remote control. Confirm the batteries are replaced every two years, as specified in the manual.

If the remote control still doesn’t work properly, try removing the wall control wires from the overhead unit and proceed to the Power Down test. This process can help identify if the issue is related to radio frequency interference (RFI) from electrical devices in the home or surrounding environment.

Since modern technology and home appliances often generate radio signals, they can unintentionally contribute to interference. If you suspect RFI, turn off or move any devices that contain radio transmitters.

Then, one by one, turn them on and test the remote after each one. This process can help you identify the source of the interference.

If the problem persists, turn off the circuit breakers to various parts of the house, then test the garage door opener after turning each breaker back on.

This method will help narrow down which room or component is causing the issue and may highlight featured problem areas that need attention.

Remote Control Problems

Remote control problems with MVP garage door openers often stem from interference caused by neighboring devices, leading to unintended activation of the door. If your remote control isn’t working, the first step is to check the battery life. Many users have reported that simply replacing the batteries can resolve the issue.

However, if the range doesn’t improve after changing the batteries, it may be necessary to replace the remote or check for underlying interference sources.

To troubleshoot further, you should test the devices in your garage for interference. Start by removing nearby LED lights and testing the remotes. If the interference persists, proceed by unplugging all electrical devices inside the garage.

Systematically plug each one back in, testing the range of the garage door opener after each addition to identify any device that might be causing interference.

Make sure to check the infrared photo eyes on both sides of the garage door opening. These sensors may be misaligned or faulty, causing the system to fail.

Additionally, if you suspect radio frequency interference (RFI) from devices like TVs, amplifiers, or fluorescent lights, you should take steps to eliminate it. Regular maintenance and checks can mitigate remote control problems, ensuring better functionality and reducing the likelihood of recurring issues.

If none of these steps resolve the problem, it may be time to evaluate alternative garage door opener brands, such as Chamberlain, which may provide more reliable remote control performance in areas experiencing interference.

Photo Eye Misalignment

Misaligned photo eyes can cause your garage door to malfunction, leading to incomplete or failed closures.

Regularly check the sensors for proper alignment and clean the lenses to guarantee a clear infrared beam.

If the lights on the photo eyes aren’t steady, adjust or clean the sensors to restore proper functionality.

Misaligned Sensors

If your garage door won’t close, it’s essential to check the alignment of your photo eyes, as misalignment can prevent the door from operating properly. Misaligned photo eyes can cause the garage door to stop closing and reverse open, requiring you to hold the wall button for operation.

To troubleshoot, verify that the infrared photo eyes are aligned directly facing each other without any obstructions or debris.

Regular maintenance, such as cleaning the photo eyes, can help prevent misalignment issues from occurring. A quick visual inspection can often reveal misalignment, as the LED indicator lights on the photo eyes will typically show a steady glow when properly aligned. If the lights flicker or flash, it indicates that the sensors aren’t aligned correctly.

To align the photo eyes, loosen the wing nuts that hold them in place and pivot the eyes until the green light lights up solidly. Tighten the wing nuts back down to secure the alignment.

Additionally, verify that nothing is blocking the infrared beam, such as toys, tools, or bikes. Periodically wiping cobwebs, dirt, or moisture off the photo eye lenses can also help maintain proper alignment.

If misalignment issues persist, consider replacing the photo eyes to restore proper functionality of the garage door opener.

Dirty Lenses

Dirty lenses on the photo eyes of an MVP garage door opener can significantly impact its performance, often causing the door to malfunction or fail to close properly. Regularly inspecting the photo eye lenses for dirt, dust, or debris is vital for maintaining peak performance.

To clean the lenses, use a soft microfiber cloth, similar to those used for cleaning eyeglasses or screens. Avoid using harsh chemicals or paper towels, as they can scratch the delicate lens material. If the lens is still dirty, lightly moisten the cloth with water, but be cautious not to over-wet it, as excessive moisture can seep into the sensor and cause it to short.

Misalignment of the photo eyes can also occur due to vibration or impact, so it’s important to check their alignment after any disturbances. If the lenses are clean but the door still doesn’t close, the photo eyes might be misaligned. Use a level or laser level to verify both sensors are pointing directly at each other. If they aren’t aligned, loosen the wing nuts on the housing and adjust the sensors accordingly.

Keeping photo eyes clear and aligned is vital for the safety features of the garage door opener, helping to prevent accidents and damage. If cleaning and realigning the photo eyes don’t resolve the issue, consider replacing them as they may be malfunctioning.

Proper photo eye maintenance, including regular cleaning techniques and lens protection, is important for guaranteeing smooth operation and safety of your garage door system.

Interference and Signal Issues

SourceDescription
Electrical DevicesTVs, amplifiers, surge protectors, and battery charging devices can generate radio frequency interference (RFI).
AppliancesInexpensive freezers, power tools, and electric car charging stations can also cause RFI.
Fluorescent LightsThese lights can emit signals that disrupt the signal strength between the remote and the opener.
Neighboring OpenersUnintentional activation by neighboring openers, especially in densely populated areas, can cause interference.
Security SystemsMotion detectors on security lights or home alarm systems can cause RF interference.

To address these issues, start by checking and replacing the batteries in your remote control. If this does not improve the range, try removing the wall control wires from the overhead unit and proceed to the Power Down test. This involves unplugging other devices to isolate the source of interference. If interference persists, replacing the receiver logic board may be necessary to boost the opener’s performance and reduce activation conflicts. By understanding and addressing these interference sources, you can strengthen your garage door opener’s signal strength and functionality.

Battery and Power Problems

When troubleshooting battery and power issues with your MVP garage door opener, start by checking the power source to verify the unit is plugged in and the outlet is functioning properly.

Next, inspect the remote battery for any signs of drain, as a weak or dead battery can prevent operation.

If the opener still fails to respond, consider testing the circuit breaker for any tripped breakers related to the garage door unit and inspecting the wiring and connections for any signs of damage or corrosion.

Battery Drain Issues

Battery drain issues in MVP garage door openers can arise from frequent operation or interference from nearby devices, significantly reducing the remote control’s range and functionality. To address these problems, you need to implement battery longevity tips and power management strategies.

First, regularly replace the remote control batteries to mitigate power issues. Low battery levels are a common cause of operational failures in garage door openers, so verifying you replace them every two years can help prevent frequent interruptions.

Additionally, power fluctuations in your home’s electrical system can lead to battery drain, especially if the opener is connected to devices that create electrical interference. If the battery drains quickly even after replacements, consider checking the opener’s internal wiring and connections for potential faults that could affect power delivery.

Maintaining a clean and unobstructed environment around the garage door opener is also essential. Misalignment or interference from objects near the photo eyes can cause unnecessary battery drain.

Power Outage Solutions

Power outages can significantly impact the functionality of your MVP garage door opener, potentially leaving you unable to access your garage. To mitigate this issue, it’s imperative to have a backup battery system installed. This guarantees that your garage door opener remains operational during power outages, preventing the inconvenience of being unable to access your garage.

Regularly check and replace the backup battery to confirm it’s fully charged and operational. Some models may not function without power, so it’s vital to maintain the battery properly. If the opener doesn’t respond after the power is restored, inspect the power supply and connections for any damage or disconnections that may have occurred during the outage.

Consider installing a surge protector to safeguard the MVP opener’s electronic components from voltage spikes that can occur when power returns after an outage.

Additionally, familiarize yourself with the manual release procedures in case you need to operate the door manually until power is restored. By following these steps, you can guarantee that your MVP garage door opener remains functional and accessible even during power outages.

Interference Detection

Interference detection is crucial in troubleshooting the MVP garage door opener, particularly when dealing with battery and power-related issues. When you notice a limited range of your MVP garage door opener, it may indicate interference from nearby electrical devices. These devices can emit radio frequency interference (RFI) that affects remote functionality.

Key Points to Evaluate

  • Signal Strength Analysis: Check the signal strength of your remote by holding it close to the motor unit. If it works consistently close by but struggles at a distance, RFI is likely the issue.
  • Interference Sources Identification: Common culprits of interference include cable amplifiers, fluorescent lights, and older appliances. These devices can disrupt the radio signals necessary for remote activation.
  • Remote Frequency Assessment: Verify that your remote is using the correct frequency. Some garage door openers, like those from Genie, use dual frequencies (315MHz and 390MHz) to reduce the likelihood of RFI.
  • Battery Replacement: Regularly replacing batteries in remotes is a basic yet effective step in troubleshooting power-related issues. If the remote fails to operate despite a new battery, think about conducting a Power Down test by unplugging other devices to isolate potential sources of interference.
  • Logic Board Replacement: If interference problems persist after testing and battery replacements, consider consulting a professional to investigate the possibility of replacing the receiver logic board.

To resolve these issues, start by checking and replacing the batteries in the remote control.

If this doesn’t improve the range, try removing the wall control wires from the overhead unit and proceed to the Power Down test. This involves unplugging other devices in the garage to isolate potential sources of interference.

If the problem persists, it may be necessary to replace the receiver logic board in the overhead unit.

Replacing Faulty Components

When replacing faulty components in your MVP garage door opener, it’s vital to confirm compatibility by checking the model number and specifications of the parts needed. This step guarantees that the new components will function correctly with your specific model, preventing potential malfunctions or damage to other parts.

Regularly inspecting the infrared photo eyes is also essential, as misalignment or debris can cause operational failures. If issues persist, consider replacing them to maintain smooth operation.

If you’re experiencing inadequate remote control range, start by replacing the batteries in the remote. This simple step often resolves the issue, but if the problem persists, you might need to replace the receiver logic board.

Tracking the wear and tear on components over time helps you schedule timely replacements, preventing more significant malfunctions down the line. For consistent issues with the MVP opener, consider switching to a more reliable model, such as a Chamberlain belt-driven unit, to reduce the frequency of component replacements.

Frequently Asked Questions

How Do I Reset My MVP Garage Door Opener?

To reset your MVP garage door opener, locate the wall station and press the small pinhole with a straightened paper clip for six seconds until the red light turns off. Test remotes and document new codes for future reference and security.

Why Is My Garage Door Not Responding to the Button or Remote?

If your garage door isn’t responding to the button or remote, check for interference from nearby electrical devices, guarantee photo eyes are aligned and clean, and inspect electrical connectivity. Replace remote batteries or reprogram the remote if necessary.

Does Unplugging Your Garage Door Opener Reset It?

Unplugging your garage door opener can reset it, clearing temporary glitches, but it may not resolve underlying issues. Leave it unplugged for 30 seconds, then reprogram remotes and keyless entry codes for proper functionality.

Why Is My Garage Door Opener Beeping and Not Opening?

Your garage door opener is beeping and not opening likely due to misaligned infrared photo eyes or low battery power. Check sensor alignment and battery voltage; if issues persist, consult the manual or a professional technician for further diagnosis and repairs.

Conclusion

Regular maintenance and troubleshooting are essential for MVP garage door openers. Misaligned photo eyes and radio frequency interference can cause issues, while battery failures and faulty components can lead to malfunctions. Ensuring proper sensor alignment and mitigating RFI can significantly improve performance. For instance, a study found that 70% of garage door opener malfunctions are due to poor maintenance, highlighting the importance of regular checks and timely replacements.

Brother P Touch Label Maker Not Working: Troubleshooting Guide

The Brother P Touch Label Maker is a great device, but like all electronics, it sometimes has its issues. If your Brother P Touch Label Maker is not working, take a look at this troubleshooting guide.

We’ve collected answers to the most frequent reasons you’ll see Brother P Touch Label Maker not working and explained them in plain language for easy troubleshooting.

Brother P Touch Label Maker Troubleshooting


Quick Fix

To troubleshoot a Brother P Touch Label Maker, check the power supply and batteries. Then, clean the print head, ensure the tape cassette is installed correctly, and reset the device if errors persist.

Label Tape and Feeding Issues

Next, check the cutter’s position.

If it’s not properly aligned, it can prevent the tape from feeding correctly. Adjust the cutter to the correct position, ensuring it’s not obstructing the tape’s path.

If the issue persists, try cleaning the printer’s tape feed rollers.

Dirt and debris can cause issues with tape feeding. Use a soft cloth and gentle cleaning solution to wipe down the rollers.

With modern technology, even small alignment issues can affect performance, so regular maintenance is important.

Finally, test the printer by printing a label to see if the issue is resolved, and ensure the device operates at its featured performance level.

Printing and Quality Problems

Several factors can contribute to printing and quality problems with your Brother P-Touch label maker.

If you’re experiencing faded or incomplete prints, it may be due to low battery power or a dirty print head. Try replacing your batteries or cleaning the print head with a recommended cleaning solution or soft cloth.

Misaligned text on your labels can make them look unprofessional, and it’s often caused by incorrect margin settings or tape misfeed. Adjust your margin settings and verify the tape is loaded correctly and feeding straight to fix the issue.

Incorrect tape size can also cause printing problems, so check the feed roller for wear and tear and confirm you’re using the correct tape size.

Regular cleaning of the print head and tape path can help maintain consistent print quality and reduce the risk of tape jams and printing problems. By addressing these common issues, you can resolve printing and quality problems with your Brother P-Touch label maker and produce high-quality labels with ease.

Power and Connectivity Troubles

If your Brother P-Touch label maker won’t turn on or is experiencing connectivity issues, you’re likely to feel frustrated and stuck.

Don’t worry, we’ve got you covered. First, check the power adapter and verify it’s properly plugged into both the label maker and the wall outlet.

If you’re using batteries, try a quick battery change to rule out dead batteries as the culprit. If your label maker is still not turning on, it might be due to low battery. Remove the batteries and try charging them again.

Make sure the AC Adapter is functioning correctly and not damaged. If you’ve tried all these steps and your label maker still won’t turn on, it’s possible there’s an issue with the device itself. In this case, you may need to contact Brother’s customer support for further assistance.

For connectivity issues, confirm that the USB cable is securely connected to both the label maker and your computer. Restart both devices and try reconnecting to resolve the issue.

Software and Firmware Glitches

Now that you’ve ruled out power and connectivity issues, it’s time to examine software and firmware glitches that might be hindering your Brother P-Touch label maker’s performance.

A faulty printer driver can cause your label maker to malfunction. Check if you’ve installed the correct driver for your device. If you’re not sure, you can uninstall the current driver and install a new one from the Brother website.

Verify you’re running the latest firmware version, as outdated firmware can lead to issues. Incorrectly installed or outdated firmware can cause your label maker to produce poor-quality labels or not function at all.

Incorrect settings in your label maker’s software can also cause problems. Check your software settings to confirm they’re configured correctly.

If you’re still experiencing issues, try resetting the software to its default settings. Additionally, check for any software updates and install the latest version. By ruling out these software and firmware glitches, you’ll be one step closer to resolving the issues with your Brother P-Touch label maker.

Common Error Messages and Fixes

One of the most frustrating experiences with your Brother P-Touch label maker is encountering error messages that halt your labeling tasks.

Fortunately, most of these issues can be easily resolved. If you’re seeing a “Tape End or No Tape” error message, try replacing the tape cassette or check that it’s properly installed.

A “Battery Low” message can be fixed by replacing or recharging the batteries to guarantee sufficient power.

If you’re getting a “Tape Jam” error message, open the tape compartment and clear any jams, then reinstall the tape cassette correctly.

A “Cutter Error” message can be fixed by cleaning the cutter blade to remove adhesive residue and verifying proper cutting technique by pressing the cutter lever or button firmly and evenly.

Finally, a “No Tape” error message can be resolved by checking that the tape cassette is properly installed, the tape isn’t bent or damaged, and the tape exit slot is clear of debris.

Maintenance and Prevention Tips

You can significantly extend the life of your Brother P Touch label maker by following a few simple maintenance and prevention tips.

Regular cleaning routines, proper storage techniques, and battery care essentials are vital in preventing common issues and ensuring peak performance.

Regular Cleaning Routines

Frequently, neglecting regular cleaning routines can lead to poor print quality and frustrating tape jams.

To avoid these issues, you should make cleaning a part of your regular maintenance routine.

  1. Clean the print head after every few tape changes using a soft cloth and mild cleaning solution to guarantee consistent quality and reduce the risk of tape jams.
  2. Cleaning the tape path inside the label maker helps prevent tape jamming issues by removing dust and debris.
  3. Schedule regular cleaning of the label maker after every few tape changes to prevent damage and certify peak performance.

Proper Storage Techniques

Proper storage of your Brother P-Touch label maker and its accessories is just as important as regular cleaning in maintaining its performance and longevity. To guarantee maximum performance, store them in a cool, dry place away from direct sunlight and moisture.

Storage TipsWhyBenefits
Store in a cool, dry placePrevents damage from moisture and heatPreserves device and tape quality
Remove batteries when not in usePrevents corrosion and battery drainExtends battery life
Remove tape cassette when storingPrevents tape jamming and damageGuarantees smooth printing
Use high-quality, genuine Brother TZe TapesPrevents tape jamming and guarantees consistent print qualityProduces high-quality labels

When storing the label maker, make sure to remove the tape cassette and turn off the device to prevent accidental power-on and battery drain. Additionally, store the batteries in a cool, dry place to prevent corrosion. By following these proper storage techniques, you can guarantee your label maker remains in top condition and continues to produce high-quality labels.

Battery Care Essentials

Battery care is a critical aspect of maintaining your Brother P-Touch label maker’s performance and longevity.

You can’t afford to neglect your batteries, as it may lead to corrosion, leakage, and ultimately, device damage.

To guarantee your label maker stays in top condition, follow these essential battery care tips:

  1. Remove batteries when not in use: If you won’t be using your label maker for an extended period, remove the batteries to prevent leakage and corrosion.
  2. Choose high-quality batteries: Using high-quality batteries certifies longer device life and better performance.
  3. Regularly inspect and replace batteries: Check your batteries regularly for signs of wear, such as corrosion or swelling, and replace them as needed.

Additionally, store your batteries in a cool, dry place away from metal objects to prevent damage.

Avoid mixing old and new batteries or different battery types to maintain peak performance and prevent damage.

Error Occurred Using App

If you’re experiencing an error while using a mobile app with your Brother P-Touch label maker, don’t panic – it’s likely an easy fix.

To resolve the issue, follow these steps:

  1. Go to the mobile application’s settings menu and select Support, FAQs & Troubleshooting to find a solution.
  2. Verify your Label Maker is connected to your mobile device via Bluetooth (PT-D460BT) for a stable connection.
  3. Check that no devices that emit radio waves (e.g., microwave oven) are located nearby, which could interfere with the Bluetooth connection.

Additionally, make sure you’ve selected the correct device in the Brother iPrint&Label app.

If the issue persists, try resetting the internal memory to the factory settings and try again.

App Connection Troubleshooting Tips

Five common issues can prevent your Brother P-Touch label maker from connecting to your mobile app, but fortunately, most can be resolved with a few simple checks.

First, head to the mobile application’s settings menu and select Support, FAQs & Troubleshooting to find solutions to common connectivity issues.

Next, confirm your Label Maker is connected to your mobile device via Bluetooth (if you have a PT-D460BT model) and check that the automatic Bluetooth reconnection setting of another computer or mobile device isn’t enabled.

Additionally, move any devices that emit radio waves, such as microwave ovens, away from your Label Maker to avoid interference.

In the Brother iPrint&Label app, make sure your Label Maker is selected, and if necessary, reinstall the app to resolve connectivity issues.

If problems persist, try resetting your Label Maker and reconnecting to the mobile app to establish a stable connection.

Frequently Asked Questions

Why Is My Brother Label Maker P-Touch Not Working?

You’re wondering why your Brother label maker isn’t working? Check if you’ve got a battery drain issue, damaged power cord, faulty keyboard, incorrect settings, or loose connections – these common culprits might be behind the problem, and fixing them could get your label maker up and running again.

How Do You Reset the Brother P-Touch Label Maker?

Ready to reboot your trusty label maker? To reset, turn it off, then press and hold the ‘F’ and ‘BACK SPACE’ buttons while powering back on. Release when ‘1. ENG?’ appears, and your device will return to factory settings, default mode, and initial setup, ready for retry.

Why Is the Label Maker Not Printing?

You’re wondering why your label maker isn’t printing. Check for a low battery alert, faulty cartridge issue, or incorrect settings. Also, verify there’s no paper jam problem or clogged printhead issue, as these common culprits can prevent printing.

Why Is My Brother Label Maker Not Staying On?

You’re stuck in an endless cycle of frustration because your label maker won’t stay on! Check if the power button is faulty, or if there’s a loose connection causing battery drain. Don’t forget to rule out a dead battery before suspecting a faulty switch!

Conclusion

Fixing frustrations with your Brother P-Touch Label Maker is a feasible feat. By following these fault-finding formulas, you’ll faultlessly fix feeding flaws, printing pitfalls, and power predicaments. Flawless labels are within your grasp, and with regular maintenance, you’ll minimize mishaps. Master these troubleshooting tactics to maximize your maker’s mighty potential.

Freestyle Libre 3 Signal Loss: Troubleshooting Guide

The Freestyle Libre 3 Signal Loss is a great device, but like all electronics, it sometimes has its issues. If your Freestyle Libre 3 Signal Loss is not working, take a look at this troubleshooting guide.

We’ve collected answers to the most frequent reasons you’ll see Freestyle Libre 3 Signal Loss not working and explained them in plain language for easy troubleshooting.

Freestyle Libre Signal Loss Troubleshooting


Quick Fix

To troubleshoot a Freestyle Libre 3 signal loss, check the sensor placement and Bluetooth connection, restart your phone, move closer to the sensor, disable interference-causing devices, and reinstall the app if needed.

Understanding Signal Loss Alarms

When your FreeStyle Libre 3 system triggers a Signal Loss Alarm, it’s essential to understand what’s happening.

This alarm is triggered when the sensor is too far away from your smartphone (over 33 feet), Bluetooth is turned off, or there’s an error or problem with the sensor. The system automatically detects and reports signal loss, and the alarm will occur if the sensor and reader are out of range for 20 minutes.

The FreeStyle Libre 3 system provides continuous glucose monitoring using advanced technology and automatically detects signal loss, providing an alarm if the reader and sensor are out of range.

This means you’ll be alerted if there’s an issue with the connection. To restore the connection, simply move back within range (within 33 feet, unobstructed) and wait 2-4 minutes. Your system will automatically reconnect, and you’ll be able to continue monitoring your glucose levels with confidence while relying on its featured safety alerts.

Troubleshooting Common Issues

If you’re experiencing issues with your FreeStyle Libre 3 system, don’t worry – troubleshooting common problems is often a straightforward process.

  • Check your distance: If you’re getting a Signal Loss Alarm, make sure you’re within 33 feet of your smartphone.

Move closer and wait 2-4 minutes to allow the system to automatically reconnect.

  • Enable alarms: Verify alarms, including the low glucose alarm, are turned on in the app settings.

This will confirm you receive notifications when you need them.

  • Device compatibility: Check that your smartphone is compatible with the FreeStyle Libre 3 app and operating system to avoid connectivity issues.
  • Bluetooth settings: Certify Bluetooth is turned on and functioning correctly on your phone.

Try restarting your phone or toggling Bluetooth off and on to resolve connectivity issues.

  • Sensor communication: If you’re experiencing issues with your FreeStyle Libre 3 sensor, try restarting the app or turning Bluetooth off then on to restore communication.

Resolving Reader and Sensor Problems

You’ve checked your distance, enabled alarms, and verified device compatibility, but you’re still experiencing issues with your FreeStyle Libre 3 system.

Now, it’s time to focus on resolving Reader and sensor problems. If your Reader’s battery is running low, charge it to prevent signal loss alarms and reading issues.

Make sure the Reader is within its operating temperature range of 10°C to 45°C to prevent power-on issues. Also, remember to turn on the Reader before applying the sensor to prevent issues with sample application.

Check the Reader’s battery level regularly and replace the batteries if necessary.

Certify the sensor is properly applied to your skin, free of dirt, oil, hair, or sweat, to prevent skin irritation and reading issues.

If you’re using mobile devices, guarantee they’re compatible with the FreeStyle Libre 3 system and running on compatible operating systems.

Frequently Asked Questions

Why Does My Freestyle Libre 3 Keep Saying Signal Loss?

You’re frustrated with your Freestyle Libre 3 constantly saying “signal loss”? It might be due to interference issues, skin irritation, adhesive failure, or poor sensor placement. Environmental factors, wear and tear, battery depletion, water damage, sweat interference, or electromagnetic interference could also be causing the issue.

How Do I Restart a Libre 3 Sensor?

You don’t need to restart your Libre 3 sensor; it auto-reconnects when back in range. Instead, focus on ideal sensor placement, avoid water damage, and guarantee good adhesive contact to prevent issues – no factory reset required!

What to Do When the Libre 3 Sensor Is Not Working?

When your sensor isn’t working, don’t panic! Check for sensor issues, faulty devices, or user error that might cause data gaps in your continuous glucose tracking. Verify proper application and troubleshoot device malfunction to minimize system downtime and technical hiccups.

How Do I Know if My Libre 3 Sensor Is Bad?

You suspect a bad Libre 3 sensor if you experience recurring issues. Check for defects like worn adhesive, improper placement, or sensor damage. It may be a faulty batch, manufacturing defect, or user error. Has the sensor expired or is it simply worn out?

Conclusion

You’ve made it to the end of this troubleshooting journey, and miraculously, your Freestyle Libre 3 signal loss alarm has gone silent. The quiet is almost deafening, isn’t it? It’s as if the universe has finally given you a break from the constant beeping and buzzing. Take a deep breath, and savor this moment of peace, because let’s face it, you’ve earned it after traversing the twists and turns of sensor and reader woes.