Home Blog Page 39

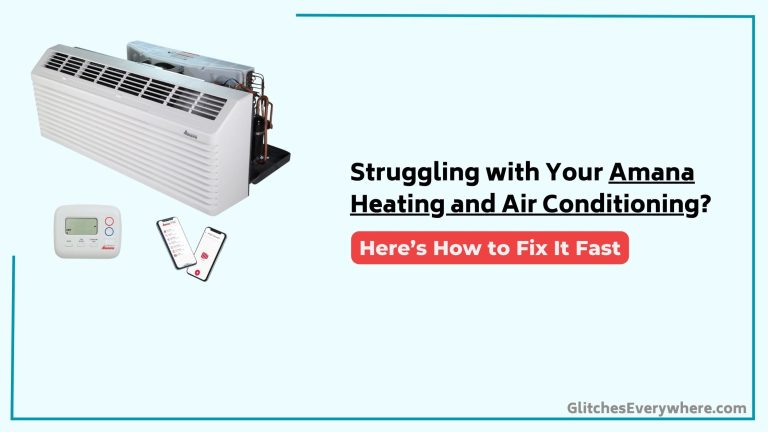
Amana Heating and Air Conditioning Not Working: Troubleshooting Guide

The Amana Heating and Air Conditioning is a great device, but like all electronics, it sometimes has its issues. If your Amana Heating and Air Conditioning is not working, take a look at this troubleshooting guide.

We’ve collected answers to the most frequent reasons you’ll see Amana Heating and Air Conditioning not working and explained them in plain language for easy troubleshooting.
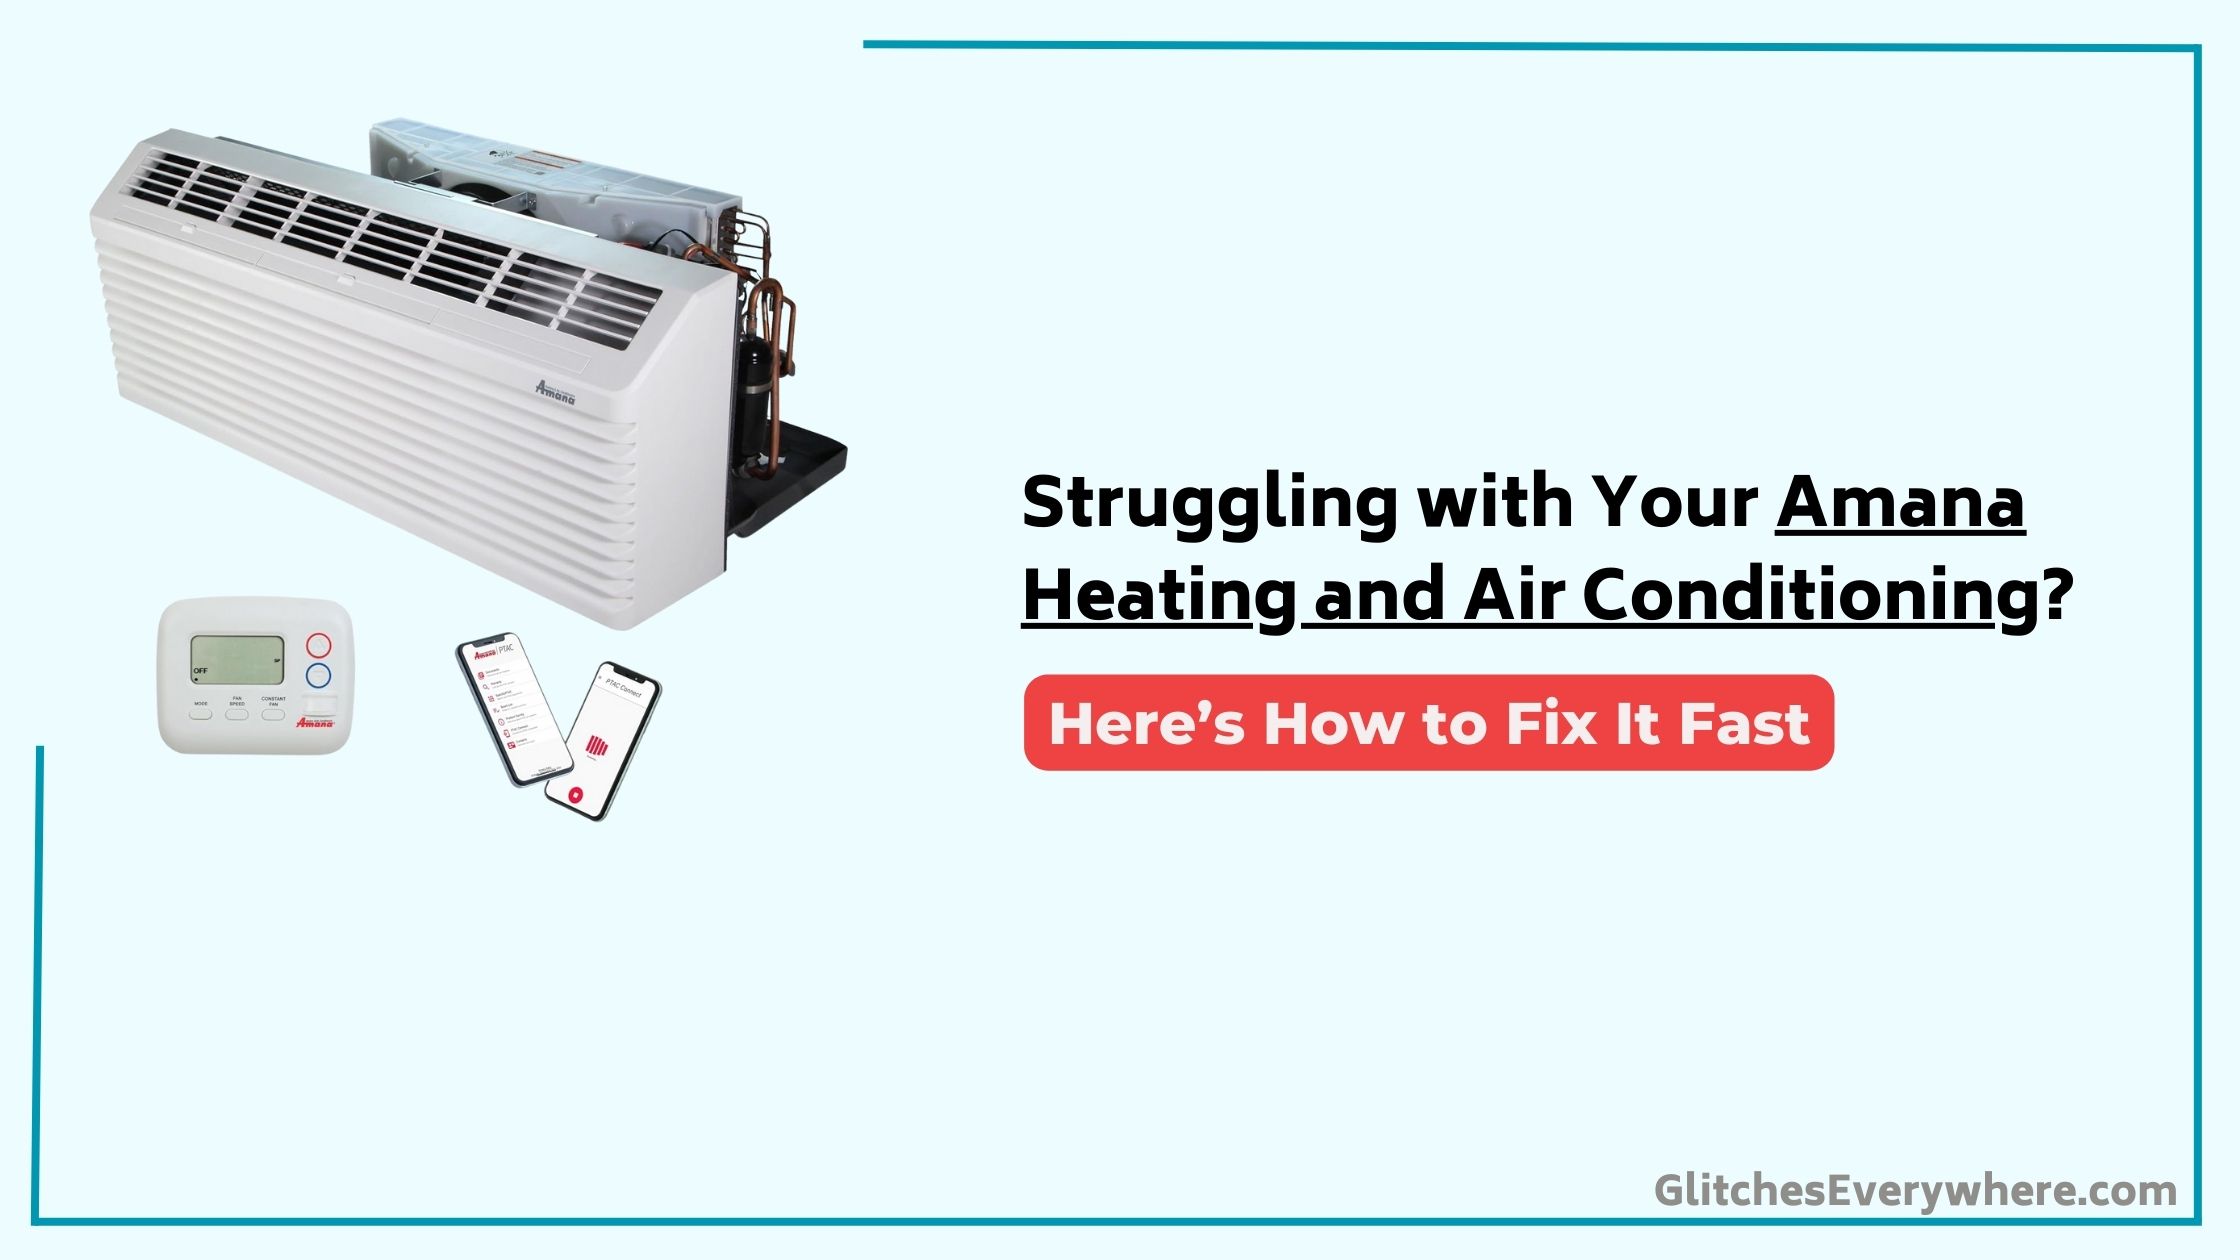
Amana Heating And Air Conditioning Troubleshooting


Quick Fix

To troubleshoot an Amana Heating and Air Conditioning unit, check the power supply, thermostat settings, and air filter. Then, inspect the condenser coils, evaporator coils, and refrigerant levels for any issues or blockages.

Amana Troubleshooting First Steps

Troubleshooting your Amana heating and air conditioning system starts with a few straightforward checks.

Begin by inspecting your air filters for dirt and debris. Clean washable filters or replace non-washable ones every 2-3 months to guarantee proper airflow.

Next, check your thermostat settings to confirm it’s set to cool/auto. Replace batteries if necessary and clean any dust around the unit.

Also, turn off the AC and check the drain pan for water buildup. Soak up any excess water and clean mold or dirt with hot water.

Inspect the drain line for clogs near the condenser, using a shop vac or warm water to clear any obstructions.

These preliminary checks can rule out quick fixes before proceeding to deeper troubleshooting steps, potentially saving you from needing an air conditioner repair or an HVAC technician visit.

Amana Air Conditioner Not Turning On

If your Amana air conditioner fails to turn on, it’s time to focus on specific checks that can help you identify and possibly fix the issue.

First, confirm the power switch on the AC compressor is turned on. Next, check your electrical box for tripped breakers and reset them if necessary.

Inspect and replace any dusty air filters, as clogged filters can restrict airflow and prevent the unit from turning on. Also, clean any debris from the outdoor unit and wash the coil with a garden hose to remove blockages.

With Amana’s featured designs, many models include advanced safety features that may shut down the system when certain issues arise.

This is part of the brand’s commitment to blending reliability with modern technology.

Finally, verify that the drain pan is free of water buildup and that the drain line is clear of clogs, as safety features may prevent the unit from turning on if there are drainage issues.

Check Thermostat Settings

To troubleshoot your Amana air conditioner, you need to check the thermostat settings.

Verify the thermostat is set to “cool” and “auto” to prevent continuous warm air circulation.

Start by confirming that the temperature setting is lower than the current room temperature and that the thermostat itself is functioning properly, including checking for dead batteries and cleaning any dust or debris that might affect its sensor accuracy.

Thermostat Functionality Check

When checking the thermostat functionality of your Amana heating and air conditioning system, start by verifying the thermostat is set to the appropriate mode. Typically, this means setting it to “cool” and “auto” to facilitate proper functioning.

Regular maintenance is also essential; for battery-operated thermostats, replace the batteries every 6-12 months to avoid malfunctions.

Key points to take into account:

  • Set the thermostat correctly: Verify it’s on “cool” and “auto.”
  • Replace batteries regularly: Every 6-12 months for consistent performance.
  • Clean the thermostat: Dust and debris can interfere with accuracy.
  • Check the outdoor unit’s fan: A non-functioning fan can prevent cooling.
  • Contact an HVAC technician: If issues persist after checking these settings.

Adjusting Temperature Settings

Adjusting the temperature settings on your Amana heating and air conditioning system is essential for initiating cooling. To guarantee your system operates correctly, follow these steps:

  • Set the thermostat to “cool” and “auto” to prevent continuous circulation of warm air when cooling is needed.
  • Replace batteries if the thermostat is not responding, as dead batteries can prevent unit activation.
  • Clean around the thermostat to maintain accurate temperature readings by removing dust and debris.
  • Adjust the temperature setting downwards to initiate cooling and check for immediate air output from the vents.
  • Confirm the outdoor unit fan is operational; if not, it may indicate an issue requiring further investigation or professional assistance.
ActionDescription
Set Thermostat ModeVerify “cool” and “auto” are selected.
Check BatteriesReplace if the thermostat is unresponsive.
Clean Thermostat AreaRemove dust and debris for accurate readings.
Adjust TemperatureLower the setting to initiate cooling.
Check Outdoor Unit FanVerify it is operational for proper cooling.

Amana Air Conditioner Blowing Warm Air

Your Amana air conditioner’s primary function is to cool your home, but if it’s blowing warm air, it’s not doing its job. To troubleshoot this issue, start by checking the thermostat settings. Confirm it’s set to “cool” and “auto,” as setting it to “on” can circulate warm air continuously.

Here are key steps to diagnose and potentially fix the problem:

  • Check the thermostat settings: Confirm it’s set to “cool” and “auto.”
  • Verify power to the compressor: Make sure the circuit breaker is functional.
  • Inspect for refrigerant leaks: Warm copper piping can indicate a refrigerant issue.
  • Clean and replace air filters: Dirty filters can block airflow and reduce cooling efficiency.
  • Consult an HVAC technician: If these checks don’t resolve the issue, professional help is needed for a thorough diagnosis and repair, including potential Air Conditioning Repair for leaking refrigerant or other complex issues with the air conditioner unit.

Amana Air Conditioner Leaking

Excessive water around your Amana air conditioner is a clear sign of a problem. If you notice puddles or dripping, turn off the unit immediately to prevent further damage to the system and your property.

The first step is to clean up any water accumulation to avoid water damage.

Next, inspect the drain pan for mold or debris, as a clogged drain pan can overflow and cause leaks. Regularly replacing dirty air filters can also help prevent airflow blockage, which may lead to freezing and subsequent leakage when the ice melts.

To repair the leak, clear any clogs in the drain line using a shop vac or warm water to guarantee proper drainage.

Common Amana AC Issues

When troubleshooting your Amana AC unit, you’ll often encounter common issues that can be easily fixed.

If your AC isn’t turning on, check your electrical box for tripped breakers and verify the power switch on your compressor is on.

Likewise, if your AC is blowing warm air or leaking, it could be due to misset thermostat settings, refrigerant leaks, or clogged drain lines, which may require professional inspection and maintenance to resolve.

AC Not Turning On

The Amana air conditioner’s failure to turn on can be a frustrating issue, but it often stems from simple, overlooked causes. Before calling an HVAC professional, you can troubleshoot the problem yourself.

Here are key steps to check:

  • Ensure the power switch on the AC compressor is turned on. This is a common oversight that can prevent the unit from operating.
  • Check the electrical box for any tripped breakers and reset them if necessary.
  • Inspect the air filters for dust or debris; clogged filters can restrict airflow and cause the system to shut down or fail to turn on.
  • Clear any debris from the outdoor unit and wash the coil with a garden hose.
  • Verify that the drain pan isn’t collecting water and that the drain line is clear.

Warm Air Issues

One of the most frustrating issues with an Amana air conditioner is when it blows warm air instead of cooling your space. If you’re experiencing this problem, start by checking your thermostat settings. Confirm it’s set to “cool” and “auto” to avoid continuous warm air circulation.

Next, inspect the compressor to verify it’s powered and functioning properly. A malfunctioning compressor can prevent the unit from cooling effectively.

Also, look for signs of refrigerant leaks, as low levels can compromise cooling efficiency. Clean or replace dirty air filters, as clogged filters can restrict airflow and cause the system to struggle in maintaining cool temperatures.

If warm air persists, consult an HVAC technician for a professional diagnosis and repair. They can identify issues with the compressor, refrigerant, or other critical components in your Amana air conditioner.

Leaking and Condensation

Condensation is a natural byproduct of air conditioning, but excessive water accumulation or dripping indicates a problem that requires immediate attention.

If your Amana air conditioner is leaking or producing excessive condensation, it’s vital to identify and address the issue promptly to prevent further damage and potential mold growth.

Key areas to inspect and maintain include:

  • Dirty air filters: Regularly clean or replace filters to guarantee proper airflow and prevent evaporator coil freezing.
  • Clogged drain line: Inspect and clean the drain line to prevent blockages that can lead to overflow.
  • Drain pan condition: Check the drain pan for rust or damage and replace it if necessary.
  • Refrigerant levels: Confirm adequate refrigerant levels to prevent coil freezing.
  • Regular maintenance: Schedule annual maintenance to prevent condensation issues and guarantee peak AC performance.

Troubleshooting Amana PTAC Units

When troubleshooting Amana PTAC units, you can utilize their built-in self-diagnostic test procedure to quickly identify faults.

To initiate this test, hold down the up and down arrow buttons simultaneously and press the “cool” button twice. This will prompt the unit to display error codes that correspond to specific issues.

Common error codes include “FP” for freeze protection mode and “C1” for indoor coil freezing.

Regular maintenance, such as cleaning air filters and checking refrigerant levels, is vital for peak performance and efficiency.

If you encounter component failures like indoor thermistor malfunctions, timely professional repair is recommended to restore functionality.

Knowing the model number of your Amana PTAC unit is important for accurate troubleshooting and locating specific parts and solutions.

Resetting Amana Air Conditioners

Resetting Amana air conditioners is a straightforward process that can often resolve minor issues and restore functionality. In order to reset your unit, start by turning off the power at the circuit breaker, waiting for about 5 minutes, and then turning the power back on to restore normal operation.

However, not all Amana air conditioners have a physical reset button. Here are key points to reflect on:

  • No Physical Reset Button: Amana air conditioners typically don’t have a physical reset button. Instead, you reset them by turning off the power and waiting.
  • Manual Reset: For some units, a manual reset involves turning off the power and waiting before turning it back on.
  • Self-Diagnostic Feature: Some units have a self-diagnostic feature activated by holding down the down and up arrow buttons while double-tapping the Cool button.
  • Float Switch Issues: If the unit has a float switch that has tripped due to water buildup, clearing any obstructions and resetting the unit can help resume operation.
  • Refer to the Manual: Always refer to the specific model’s manual for precise reset instructions and safety precautions.

Frequently Asked Questions

How Do You Reset the Heating and Air Conditioning on Amana?

To reset your Amana heating and air conditioning, turn off the power at the thermostat or circuit breaker, wait five minutes, then turn it back on. Alternatively, hold the Cool and Heat buttons while turning on the master switch.

Why Is My Amana HVAC Heat Not Working?

Thou seekest warmth, but thy Amana HVAC heat doth not work? Check thy thermostat settings to ascertain ‘heat’ is selected and the temperature is set higher than the current room temperature. Also, inspect thy air filters for dirt and debris, and consider the system’s age, as older units may require more frequent maintenance.

Why Is My Amana AC Unit Not Kicking On?

Check your Amana AC unit’s power switch and circuit breaker, confirm the thermostat is set to “cool” and “auto,” and inspect air filters for blockages. Clear debris from the outdoor unit and verify proper thermostat functionality.

Why Is My Amana Air Conditioner Not Getting Cold?

Imagine a sweltering summer day with your air conditioner blowing warm air – a nightmare. Check your thermostat settings, verify clean air filters, inspect the outdoor unit for debris, and look for signs of refrigerant leaks to boost cooling system efficiency.

Conclusion

Steering Amana heating and air conditioning troubleshooting is like solving a puzzle – each piece must fit perfectly for the whole picture to emerge. By systematically checking thermostat settings, ensuring power is on, inspecting air filters, and performing regular maintenance, you can identify and resolve common issues. Utilize built-in diagnostic tests and address specific faults to keep your Amana HVAC unit running smoothly, ensuring long-lasting efficiency and comfort in your home.
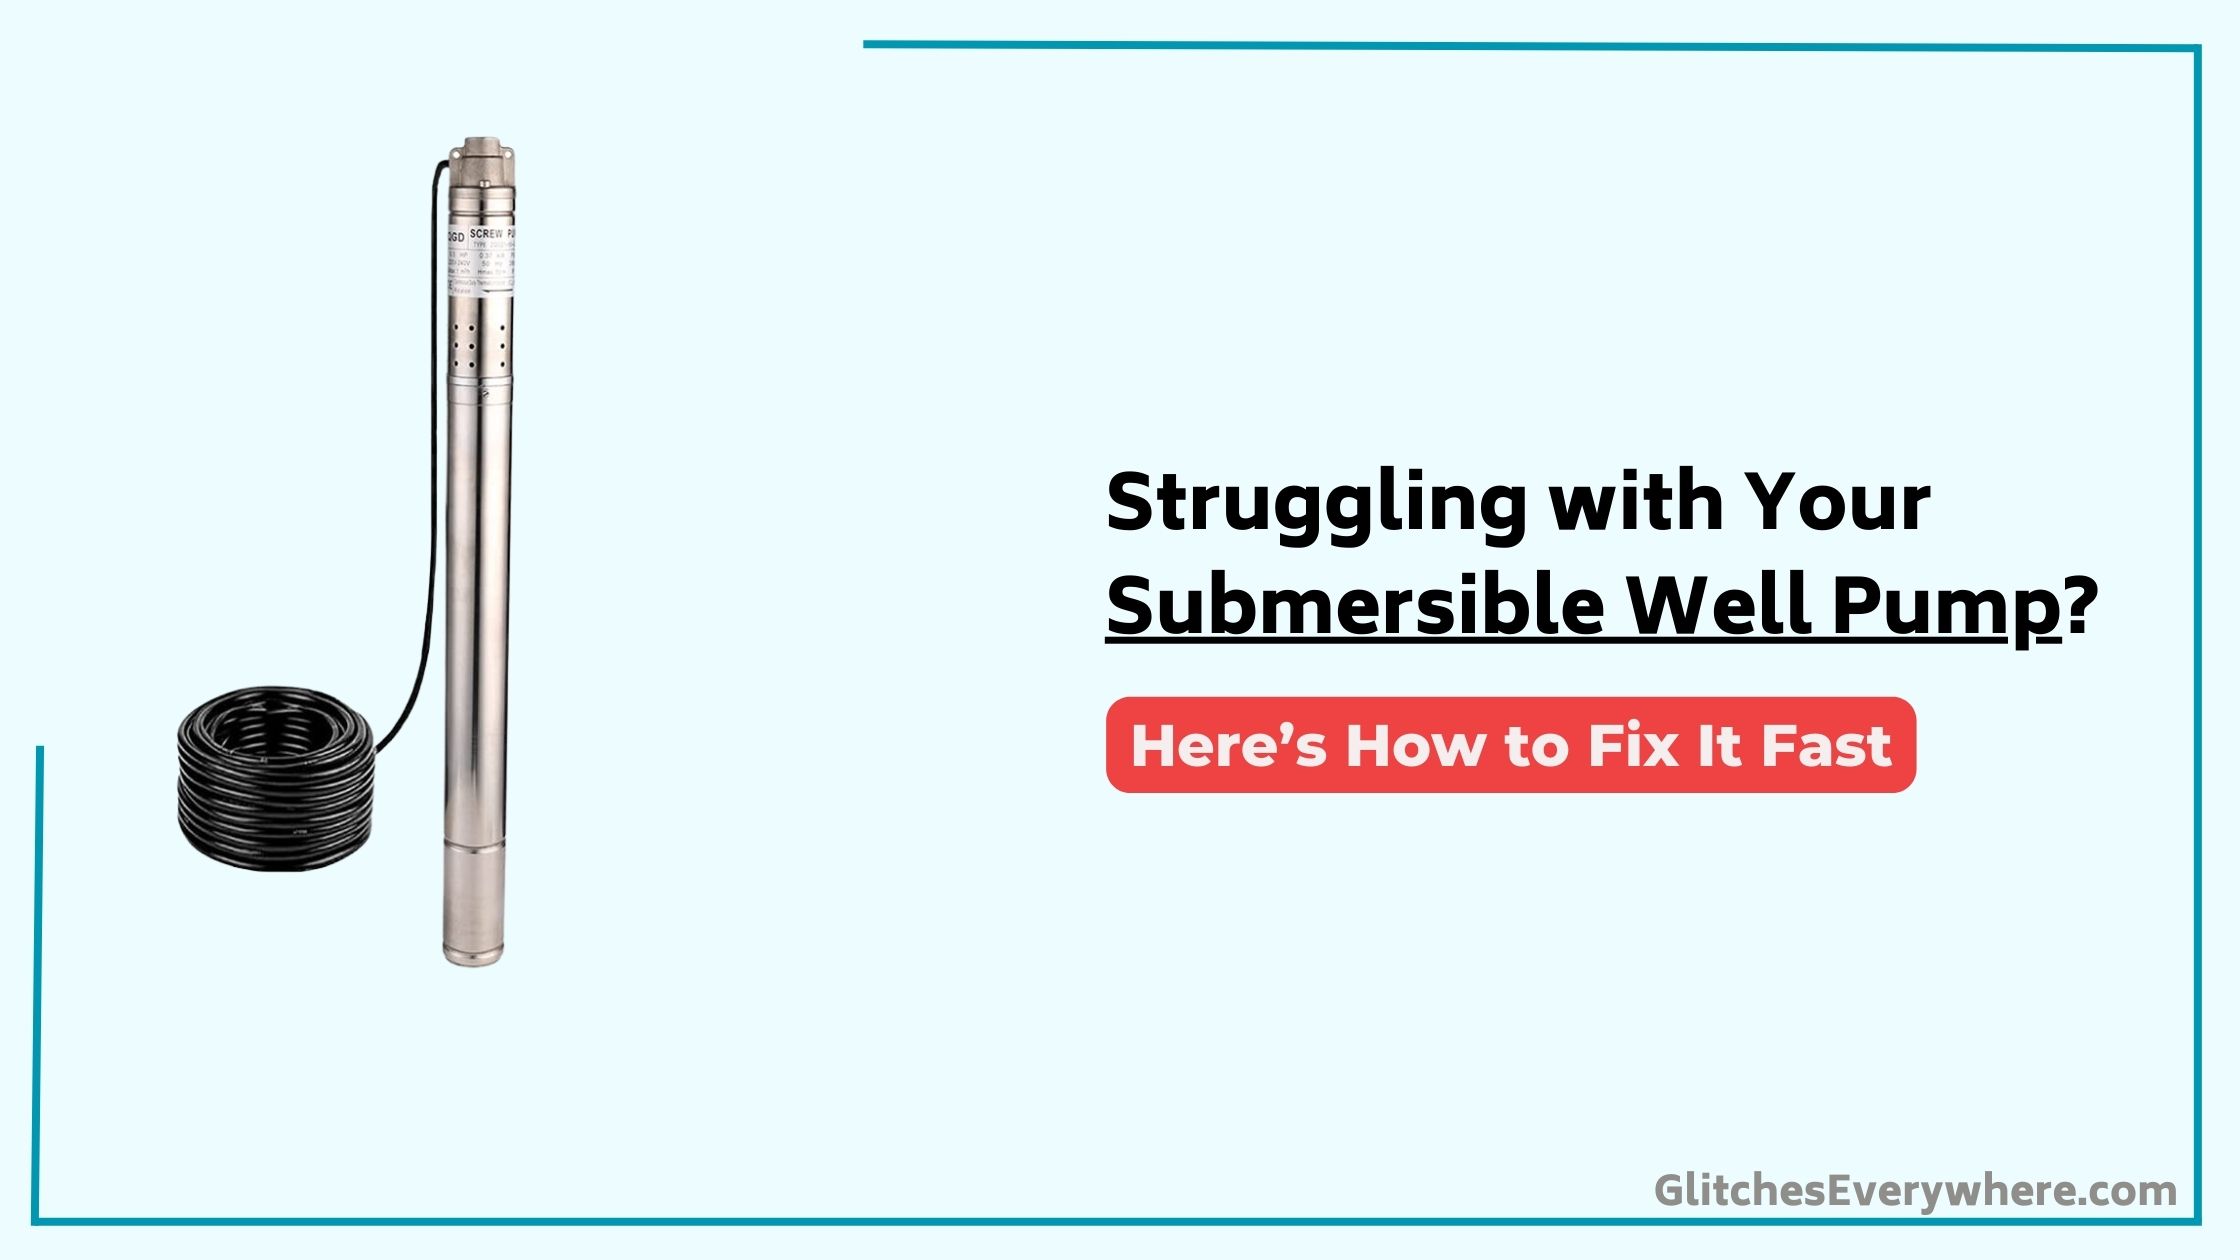
Submersible Well Pump Not Working: Troubleshooting Guide

The Submersible Well Pump is a great device, but like all electronics, it sometimes has its issues. If your Submersible Well Pump is not working, take a look at this troubleshooting guide.

We’ve collected answers to the most frequent reasons you’ll see Submersible Well Pump not working and explained them in plain language for easy troubleshooting.

Submersible Well Pump Troubleshooting


Quick Fix

To troubleshoot a Submersible Well Pump, check the power supply and circuit breaker, inspect the pump for blockages or damage, ensure the pressure switch is working, and test the pump’s voltage with a multimeter.

Pump Not Starting

When your submersible well pump fails to start, the first step is to check the power supply. Confirm it’s functioning correctly, as a faulty power supply can prevent the pump from starting.

Next, inspect the fuses and replace them if blown. A blown fuse can prevent the pump from receiving the necessary power to start.

Then, examine the cable for damage and replace it if necessary. A damaged cable can also prevent the pump from receiving the necessary power to start.

Additionally, check the stator windings for burnout, as burnt-out windings can prevent the pump from starting.

Modern pumps often come with featured safety mechanisms and advanced technology that can automatically shut down the unit when irregularities are detected, so keep this in mind during troubleshooting.

Finally, verify that the pump is properly installed and seated, as improper installation can prevent the pump from starting.

This systematic approach will help you identify and fix the issue efficiently.

Pump Starts but Stops

Your submersible well pump starting but then stopping indicates a different set of issues compared to a pump that won’t start at all.

This behavior often points to problems with the system’s ability to maintain pressure or control the flow of water.

Key issues to consider include:

  • Faulty pressure switch: A malfunctioning pressure switch can signal the pump to turn off prematurely or not turn off at all, leading to frequent starts and stops.
  • Check valve failure: A failed check valve allows water to flow back into the well, causing the pump to cycle on and off as it tries to maintain pressure.
  • Low water levels or system leaks: Insufficient water in the well or leaks in the system can also cause the pump to start and stop repeatedly.

Low Pump Output

Low pump output in a submersible well pump system often stems from issues that can be identified and addressed through systematic troubleshooting.

First, check the impeller rotation direction to guarantee it’s correct, as incorrect rotation can significantly reduce pump output.

Next, inspect and replace worn-out wear parts, such as the impeller or diffuser, as they can decrease pump efficiency and output.

Examine the discharge pipework for leaks or cracks, which can reduce pump output by allowing water to escape.

Additionally, verify that the pump is submerged in sufficient water, as inadequate submergence can reduce pump output and increase energy consumption, especially in outdoor installations where water levels fluctuate.

Finally, check the discharge head height, as a head that’s too high may require a larger pump to achieve the desired output.

Pump Noise and Vibration

When troubleshooting your submersible well pump for noise and vibration, you should first consider the possibility of impeller balance issues, which can cause uneven stress and wear on the pump’s components.

Motor bearing problems are another common culprit, often resulting from lack of lubrication, overloading, or misalignment.

Additionally, loose mounting hardware can also contribute to excessive noise and vibration, so it’s essential to inspect and tighten all fittings and mounts.

Impeller Balance Issues

Impeller imbalance is a vital issue that can significantly impact the performance and longevity of a submersible well pump.

If left unchecked, it can cause vibration and noise, leading to premature wear and potential failure. To address this, it’s essential to check the impeller balance during routine maintenance and troubleshooting.

Key factors to examine:

  • Manufacturing defects: Irregularities in the manufacturing process can lead to uneven mass distribution.
  • Wear and tear: Abrasive materials in the fluid can cause uneven wear on the impeller surface.
  • Improper installation: Misalignment or bending of the shaft can disrupt the balance.

A properly balanced impeller can reduce vibration by up to 90%, increasing pump efficiency and reducing energy consumption.

Regular checks and corrective actions are vital to maintain peak performance and extend the pump’s lifespan.

Motor Bearing Problems

Motor bearing problems are another common source of pump noise and vibration in submersible well pumps.

You’ll notice these issues when the pump’s motor bearings start to fail, causing excessive vibration and noise. This is often due to overloading, excessive wear, or contamination of the lubricating fluid.

Misalignment between the pump and motor can also lead to motor bearing failure, causing the shaft to overheat and twist off in the journal area.

Regular lubrication with oil mist, specialty oils, or grease can help prevent these problems. Additionally, ensuring proper alignment and avoiding excessive side loading can extend the life of the motor bearings and prevent costly repairs.

Proper maintenance is key to preventing motor bearing problems in your submersible well pump.

Loose Mounting Hardware

Inspecting your submersible well pump’s mounting hardware is essential to prevent excessive vibration and premature wear.

Loose mounting hardware can cause the pump to vibrate excessively, leading to potential failure. Regular inspections and tightening of all mounting bolts and screws can help prevent these issues.

To guarantee your submersible well pump operates smoothly:

  • Inspect and tighten mounting bolts and screws: Regularly check and tighten all mounting hardware to prevent loose connections.
  • Use high-quality, corrosion-resistant mounting hardware: This can help extend the life of the pump and reduce maintenance needs.
  • Check pump alignment and secure it to the well casing: Proper alignment and secure mounting are pivotal to preventing vibration and noise.

Power Supply Issues

When troubleshooting a submersible well pump, one of the critical steps is to identify and resolve power supply issues.

Start by checking the voltage at the pressure switch. Take the cover off and measure the voltage between the two screws for each leg. For a 2-wire pump, you should read 115v on each leg.

If the voltage is off, check the fuse box or breaker panel for blown fuses or tripped breakers. Also, verify the control box configuration to guarantee it’s correctly set up for your pump. Incorrect configurations can cause the motor to trip.

Additionally, certify the wire size is sufficient for the pump’s power requirements. Inadequate wire size can lead to power supply issues.

Addressing these potential problems can help you quickly identify and fix power supply issues.

Pressure Switch Problems

You’ll need to inspect your pressure switch to identify any issues that might be causing your submersible well pump to malfunction.

Common failure causes include corrosion, debris, faulty springs, bad wiring, and loose connections, which can prevent the pump from turning on or off properly.

To address these problems, you may need to repair or replace the pressure switch, a process that’s relatively quick and inexpensive, costing between $20 to $50 for parts.

Pressure Switch Inspection

Your well pump’s pressure switch is a critical component that controls the on/off cycling of the pump based on water pressure in the system.

To inspect it, you’ll need to locate the switch, usually found near the pressure tank.

  • Visual Inspection: Look for signs of wear, deformation, or damage on the switch and its connections. Check for any blockages or sediment in the tube leading to the switch.
  • Electrical Connections: Verify all electrical connections are secure and not corroded. Use a multimeter to test for continuity across the switch terminals.
  • Pressure Settings: Confirm the switch’s pressure settings are correct and not causing the pump to malfunction. Check the switch’s set and reset points to guarantee they match the system’s requirements.

Common Failure Causes

Pressure switch problems are a common cause of submersible well pump failures.

You should inspect the pressure switch regularly to identify potential issues before they escalate into major problems. Worn-out or corroded contacts can lead to intermittent or complete failure of the pump.

Incorrect installation or wiring can also cause the pressure switch to malfunction, preventing the pump from receiving the correct signal to turn on or off.

Additionally, mineral buildup or debris can jam the pressure switch, while power surges or electrical spikes can damage it. Failing to replace a faulty pressure switch can lead to more costly repairs or even complete pump failure.

Verify you check the pressure switch and the check valve to maintain proper pump operation. Regular maintenance is vital to prevent these issues.

Repair and Replacement

Faulty pressure switches are a common culprit behind submersible well pump malfunctions.

If your pump won’t start or is malfunctioning, it’s worth checking the pressure switch. Replacing a faulty pressure switch can often resolve the issue.

When replacing the pressure switch, verify proper orientation and wiring to avoid further problems.

Some key points to ponder:

  • Proper Installation: Verify the new switch is installed correctly, with all wires securely connected and labeled to avoid confusion.
  • Temporary Fixes: Filing off burned or pitted contact surfaces can be a temporary fix, but replacing the switch is usually the best solution.
  • Diagnosis: Banging on the tube below the switch to jar the electrical contacts can help diagnose a pressure switch problem. If the pump still won’t start after replacement, the pump controller may be the culprit.

Replacing the pressure switch can cost around $50-$100, depending on the type and quality of the switch. This is a relatively inexpensive fix compared to other well pump issues.

Control Panel Troubleshooting

When troubleshooting a submersible well pump, the control panel is a critical component to inspect.

You’ll need to check for any obvious signs of wear or damage, such as loose connections, burnt or melted components.

Start by verifying the voltage at the control panel to guarantee it’s within the motor’s rating.

Next, inspect the pressure switch, which is often connected to the control panel. Check for corrosion, debris, or faulty springs that could prevent the pump from turning on or off properly.

If you find any issues, you may need to replace the pressure switch or adjust its settings.

Certify all electrical connections are secure and not corroded.

If you’re unsure about any part of the process, it’s best to consult a professional for assistance.

Pump and Motor Inspection

Inspecting the pump and motor is a crucial step in troubleshooting a submersible well pump.

To guarantee the pump operates correctly, you need to check several critical components.

  • Voltage Levels: Verify that the voltage levels are within the recommended range specified in the manufacturer’s manual to prevent motor damage or failure.
  • Current Measurement: Measure the current on startup and during operation to diagnose issues with the motor, comparing the measured values to the expected values.
  • Check Valve Inspection: Visually examine the check valve by pulling the submersible well pump and inspecting the valve to certify it’s functioning correctly and not causing issues with the pump’s performance.

Additionally, use a multi-meter to test the resistance between the legs of the pump motor, comparing the measured value to the expected value.

Inspect the pump’s electrical connections to guarantee they’re secure, watertight, and not damaged.

Additional Troubleshooting Steps

ComponentSymptomsAction
Pressure SwitchIncorrect pressure settings or faulty switchInspect and adjust or replace the pressure switch
Check ValveWater backflow or failure to hold pressureInspect and replace the check valve if necessary
Electrical ConnectionsCorrosion or loose connectionsCheck and repair or replace electrical connections

These steps help you pinpoint issues that might not be immediately apparent, ensuring a thorough troubleshooting process.

Frequently Asked Questions

How to Check if a Submersible Well Pump Is Bad?

To check if a submersible well pump is bad, you’ll need to inspect electrical connections, measure voltage at the pressure switch, check resistance between the legs, and test the pump’s current on startup and during operation.

How Do You Reset a Submersible Pump?

To reset a submersible pump, you’ll need to locate the pressure switch, move the reset lever to the start position, and hold it until the pressure gauge reads over 40 PSI, then return it to the auto position.

Why Is My Submersible Motor Not Pumping Water?

“When in doubt, check the basics.” Your submersible motor isn’t pumping water likely due to low water pressure, electrical issues like blown fuses or tripped breakers, or a faulty check valve causing a vacuum that hinders pumping.

What Is the Most Common Problem of a Water Pump?

The most common problem of a water pump is that it won’t start, often due to issues like blown fuses, tripped breakers, faulty pressure switches, or corroded pipes, which can also cause low water pressure.

Conclusion

Troubleshooting a submersible well pump can be a monumental task, but it’s not insurmountable. Start by checking the power supply, inspecting fuses, cables, and stator windings for damage. Verify proper installation and seating of the pump, and check for incorrect system configuration or installation. Inspect the impeller rotation direction, wear parts, and discharge pipework for leaks or cracks. By methodically addressing these areas, you’ll be well on your way to resolving even the most stubborn issues.

Motorhome Hot Water Heater Not Working: Troubleshooting Guide

The Motorhome Hot Water Heater is a great device, but like all electronics, it sometimes has its issues. If your Motorhome Hot Water Heater is not working, take a look at this troubleshooting guide.

We’ve collected answers to the most frequent reasons you’ll see Motorhome Hot Water Heater not working and explained them in plain language for easy troubleshooting.

Motorhome Hot Water Heater Troubleshooting


Quick Fix

To troubleshoot a Motorhome Hot Water Heater, check the power supply and gas valve, inspect the thermostat settings, flush the tank for sediment, and test the ignition system for proper function.

Troubleshooting Lukewarm Water

When troubleshooting lukewarm water in your motorhome’s hot water heater, several key factors need to be examined.

First, certify that the bypass valve is fully closed. If it’s open, cold water can mix with hot water, resulting in lukewarm temperatures.

Next, check the water pressure at showerheads and outdoor showers to guarantee they’re fully open and not restricting water flow.

Also, verify that the propane tank is turned on and not empty, as this can prevent the heating element from functioning properly.

Additionally, inspect the outdoor shower knobs to guarantee they’re turned off, as leaving them on can cause hot and cold water to mix.

For RV owners, keeping the hot water system maintained is just as important as servicing HVAC units, since both directly impact comfort.

Many modern water heaters now come with featured technology like digital controls and efficiency monitoring, making troubleshooting easier and more accurate.

Power and Electrical Issues

To troubleshoot power and electrical issues with your motorhome’s hot water heater, you need to start by verifying that the shore power connection and campground pedestal breaker are functioning properly.

Validate the breaker on the pedestal is turned on and that your RV’s 120-volt breaker panel hasn’t tripped the water heater breaker. This is vital because a tripped breaker can prevent the water heater from receiving power.

Next, use a multimeter to check the heating element’s ohm reading, which should be between 9.6-10 ohms. This helps diagnose any electrical issues.

Also, confirm your RV’s power capabilities aren’t exceeded by the 120-volt heating element to avoid damaging the electrical system. If the heating element is faulty, it may require replacement by an RV electrical technician.

Lighting and Ignition Problems

Lighting and ignition problems in your motorhome’s hot water heater can be just as frustrating as power and electrical issues.

If your igniter isn’t sparking, it’s vital to identify the root cause. Start by checking the 12-volt fuse inside the RV’s electrical panel for blown fuses, as a faulty fuse can prevent the igniter from functioning properly.

Key areas to inspect include:

  • Propane Supply: Verify propane tanks have enough propane and the service valve is completely open to allow for proper gas flow to the water heater.
  • Igniter Function: Check for proper propane ignition process powered by the RV’s 12-volt battery, as a malfunctioning battery can prevent the igniter from sparking.
  • Component Integrity: Faulty gas valves, ignitors, or dirty burn chambers may require professional assistance to repair or replace.

Resetting the Water Heater

Resetting your motorhome’s water heater is a crucial step in troubleshooting and resolving issues.

If your water heater has stopped working due to a safety feature deactivation, you’ll need to reset it. For tank-style water heaters, turn the system off and back on to reset the 12-volt panel and circuit board.

For Suburban water heaters, locate the reset button in the exterior compartment and press it to reset the water heater.

However, if you find yourself repeatedly resetting the water heater, it may indicate a faulty thermostat or other issues that require professional assistance from an RV technician.

Always inspect the water heater and surrounding areas after resetting to verify there are no leaks or damage to the system. Check the electrical connections and wiring to confirm they’re secure and not damaged.

Common Water Heater Faults

Common water heater faults in motorhomes can stem from a variety of issues, ranging from simple mixing problems to complex electrical and ignition failures.

If you’re experiencing lukewarm water, it might be due to hot and cold water mixing outside the tank, which can be resolved by checking bypass handles on the water heater tank and ensuring showerheads are fully opened.

Some common faults to watch out for include:

  • Electrical Issues: Check the shore power connection, campground pedestal breaker, and 120-volt breaker panel. Measure the heating element’s ohm reading to diagnose power problems.
  • Ignition Failures: Blown fuses, insufficient propane, or faulty gas valves, ignitors, or dirty burn chambers can cause lighting and ignition issues, often requiring professional assistance.
  • Thermostat Problems: Repeated resetting of the water heater may indicate a faulty thermostat or other underlying issues. Regular maintenance and inspections can help prevent these faults.

Frequently Asked Questions

How Do I Reset My RV Hot Water Heater?

To reset your RV hot water heater, first check for loose connections, incorrect installation, or a faulty thermostat. For Suburban models, press the reset button in the exterior compartment. Otherwise, turn the system off and back on to reset the 12-volt panel and circuit board.

What Is the Most Common Cause of Water Heater Failure?

Imagine waking up to icy showers in your RV – a nightmare. The most common causes of water heater failure are faulty thermostats, corrosion issues from neglected anode rods, and sediment buildup clogging the tank.

How Do I Know if My RV Water Heater Is Gas and Electric?

To determine if your RV water heater is gas and electric, check the exterior compartment or user manual for a switch or button to toggle between modes, and look for both a propane gas line and electrical connections.

Why Does My RV Hot Water Heater Keep Tripping the Reset Button?

Your RV hot water heater’s reset button keeps tripping likely due to a faulty thermostat causing overheating issues, electrical surges from loose wiring or short circuits, or sediment build-up leading to excessive heating element strain.

Conclusion

When troubleshooting your motorhome’s hot water heater, methodically checking each component is vital. For instance, if your water heater suddenly stops working after a long shower, first verify the bypass valve is fully closed and the propane tank is not empty. Then, inspect the igniter and propane supply. If issues persist, reset the water heater according to the manufacturer’s instructions. For example, if your Suburban water heater’s ECO switch has tripped, simply pressing the reset button may resolve the issue.

Marantec Keypad Not Working: Troubleshooting Guide

The Marantec Keypad is a great device, but like all electronics, it sometimes has its issues. If your Marantec Keypad is not working, take a look at this troubleshooting guide.

We’ve collected answers to the most frequent reasons you’ll see Marantec Keypad not working and explained them in plain language for easy troubleshooting.

Marantec Keypad Troubleshooting


Quick Fix

To troubleshoot a Marantec keypad, check the battery and power connections, ensure the keypad is within range, reprogram the code following the manual, and inspect for physical damage or debris obstructing the buttons.

Troubleshooting Steps and Issues

When your Marantec keypad malfunctions, troubleshooting is often the most efficient way to identify and resolve the issue.

Start by checking the keypad’s battery level, as a dead battery can prevent the keypad from functioning properly. If the battery is fine, try entering your PIN code again, certifying you’re using the correct sequence.

If the issue persists, check the lights on the keypad to see if they’re responding to your inputs.

Next, verify that the Marantec Wireless Keyless Entry system is properly paired with your garage door opener.

Confirm the remote is working correctly by testing it separately from the keypad. If the remote functions as expected, the issue likely lies with the keypad itself.

Review the programming process to certify it was completed correctly. Many models also come with featured technology such as illuminated keys and advanced security codes, which can sometimes require a reset.

If you’ve tried all these steps and the issue remains, it may be worth consulting the user manual or contacting a professional for further assistance.

Resetting and Reprogramming Keypad

You’re now ready to reset and reprogram your Marantec keypad.

First, you’ll need to reset the defaults, which will erase all existing settings and codes.

Then, you’ll sync the keypad with your opener and enter a new PIN code to get back up and running.

Reset Defaults Now

Resetting your Marantec keypad to its default settings can be a straightforward process, but it’s essential to understand the implications of doing so.

When you reset defaults, you’ll erase all programmed PIN numbers, remote controls, and other settings. This should only be done if your keypad quit working or you’re experiencing issues that can’t be resolved through other troubleshooting methods.

To reset defaults, Press and Hold the “Learn” button until the two lights on your Marantec keypad begin flashing. Release the button, then press it again until the lights stop flashing.

Your keypad is now reset to its factory settings. If you’re unsure about how to proceed, consider contacting tech support for guidance.

Keep in mind that after resetting defaults, you’ll need to reprogram your remote to work with your Marantec garage door opener. Make sure you’re in range of a strong signal to guarantee successful programming.

It’s also a good idea to reprogram your PIN number for added security.

Sync Keypad With Opener

Now that your Marantec keypad is reset to its factory settings, it’s time to sync it with your garage door opener.

This step is vital to get your keypad working again. If your keypad isn’t working, you’ll need to sync it with the opener to restore its functionality. You may have tried working with it, but it wasn’t working so I changed to a new one, and now it’s time to set it up.

To sync your keypad with the opener, press the “Learn” button on the opener, and then press the “Learn” button on the keypad. The keypad lights should start blinking, indicating that it’s in sync mode.

Release the buttons and test the keypad by entering a code. If it’s working correctly, the garage door should open or close.

If you’re still having trouble, don’t worry. Verified Experts are available to answer people’s questions and provide expertise on-demand online right away. You can get expert tips at your fingertips to give you quick solutions to your keypad issues.

Our services have helped people in the past, and we’re confident we can help you too.

Enter New PIN Code

With your Marantec keypad synced with the garage door opener, it’s time to enter a new PIN code to complete the reprogramming process. To do this, you’ll need to reset the keypad by pressing and holding the programming button on the garage door opener unit until the indicator light starts flashing, then releasing the button. Within 30 seconds, enter a new 4-digit PIN code.

StepActionResult
1Press and hold programming buttonIndicator light starts flashing
2Release button and enter new PIN codeNew PIN code is saved
3Test the new PIN codeGarage door responds to keypad input
4Verify keypad rangeConfirm keypad is within range of garage door opener

Make sure the keypad is within range of the garage door opener unit to successfully reprogram the PIN code. If the lights on the keypad are blinking slowly, the reprogramming process may not have been successful, and you should try again. Refer to your user manual for instructions on how to resolve any issues with the new PIN code. After entering the new PIN code, test it by pressing the buttons on the keypad and verifying the garage door responds accordingly.

Common Keypad Problems and Solutions

You’ll likely encounter two common issues with your Marantec keypad: weak battery signals and programming problems.

Weak battery signals can cause your keypad to malfunction or not respond at all, while programming issues can prevent your keypad from communicating with your garage door opener.

Let’s take a closer look at these problems and examine some solutions.

Weak Battery Signals

Weak battery signals can render your Marantec keypad useless, leaving you stranded outside your garage or gate. A weak battery signal in your Marantec keypad can prevent it from functioning properly, and replacing the battery with a new one can often resolve the issue.

SymptomSolution
Weak battery signalReplace the battery with a new one
Weak battery signal despite frequent replacementsConsult the user manual or seek professional assistance
Weak battery signal due to corrosionClean the battery holder to improve signal strength

If the keypad displays a “weak battery” message despite frequent replacements, it may be a sign of a deeper problem. You may need to consult the user manual or seek professional assistance to resolve the issue. Additionally, cleaning the battery holder and ensuring it is free of corrosion can also help improve the signal strength and resolve weak battery signal issues. If the battery in the remote isn’t sending a strong enough signal to the keypad, you may need to replace the CR2032 3-volt battery. If cleaning the battery holder does not resolve the issue, it may be a sign of a faulty keypad or other underlying problem that requires professional attention.

Programming Issues

After resolving battery-related issues, it’s time to tackle programming problems that can hinder your Marantec keypad‘s performance.

Programming issues can be frustrating, but with the right guidance, you can troubleshoot and resolve them quickly.

When dealing with programming issues, it’s essential to have expert advice and technical support at your fingertips.

  1. Incorrect code entry: Make sure you’re entering the correct code, and that it matches the one programmed into the system.
  2. Code conflicts: If you’ve recently changed the code, guarantee it doesn’t conflict with other devices or systems.
  3. Keypad synchronization: Verify that the keypad is properly synced with the Marantec system to avoid programming issues.
  4. Outdated software: Check if your Marantec system’s software is up-to-date, as outdated versions can cause programming issues.

Don’t worry if you’re not a repair professional.

With on-demand expertise and quick answers, you can get remote assistance to resolve programming issues.

Garage Door Opener Troubleshooting

If your Marantec garage door opener isn’t functioning as it should, troubleshooting the issue is often the quickest way to get back to normal.

Start by checking the obvious: is the garage door opener properly plugged in and receiving power? Are the batteries in your keypad or remote control dead? Try replacing them with fresh ones to see if that resolves the issue.

If the problem persists, it’s time to dig deeper. Check the garage door opener’s settings to verify they’re correctly configured. You may need to consult your user manual or online resources for guidance.

Look for any signs of physical damage or obstruction that could be preventing the door from opening or closing properly.

As you troubleshoot, keep in mind that many Marantec garage door opener issues can be fixed with DIY solutions. You can find repair guides and tutorials online that can walk you through the process step-by-step.

Advanced Troubleshooting Techniques

Since you’ve already ruled out the obvious causes, it’s time to get more methodical in your troubleshooting approach.

Now, you’ll need to dig deeper to identify the root cause of the issue.

To take your troubleshooting to the next level, consider the following advanced techniques:

  1. Contact a Marantec expert: Reach out to a qualified specialist via telephone or email for knowledgeable answers. They’ll guide you through a verification process to identify the problem.
  2. Access online resources: Marantec’s website or online forums may have round-the-clock troubleshooting guides or FAQs that can help you resolve the issue.
  3. Consult the user manual: Re-read the user manual to guarantee you haven’t missed any critical steps or settings that could be causing the problem.
  4. Schedule a service visit: If all else fails, consider scheduling a service visit from a Marantec-authorized specialist. They’ll bring their expertise to your doorstep to diagnose and fix the issue.

Keypad Maintenance and Care

Most Marantec keypad issues can be prevented with regular maintenance and proper care.

To keep your keypad running smoothly, make it a habit to clean the battery holder and contacts regularly. This simple task can help prevent weak battery signals and improve overall performance.

You should also replace the CR2032 3-volt battery in your remote every 6-12 months to guarantee a strong signal and prevent programming issues.

To maintain the keypad’s range, keep it within 10-15 feet of the garage door opener unit and avoid placing any obstacles between the two devices.

Additionally, be mindful of the environment you’re operating in – avoid exposing the keypad to extreme temperatures, moisture, or physical damage, as this can cause malfunctions and affect its lifespan.

If you do encounter issues, try performing a reset on the keypad and reprogramming it with the garage door opener unit.

This can sometimes resolve the problem and restore proper function.

Warranty and Support Options

You’ve taken proactive steps to maintain your Marantec keypad, but despite your best efforts, issues may still arise.

If you’re experiencing problems with your keypad, it’s essential to examine your warranty and support options.

First, verify your warranty status to determine if you’re eligible for repair or replacement services.

If your warranty has expired, you can still access professional support from Marantec’s experts.

  1. Authorized Dealers: Look for licensed dealers with verified credentials to guarantee you receive high-quality repair services.
  2. Marantec’s Support Services: Reach out to Marantec’s professional support team for troubleshooting guidance or to schedule a repair.
  3. Online Resources: Consult Marantec’s website for troubleshooting guides, user manuals, and FAQs to help you resolve issues on your own.
  4. Local Repair Experts: Find local, licensed professionals with experience in Marantec keypad repair to provide personalized support to ponder.

Product Information and Resources

The Marantec M13-631 Wireless Keyless Entry System is a popular garage door opener accessory, and understanding its features and capabilities can help you troubleshoot issues and optimize its performance.

Released in 2014, this system operates on a 315MHz frequency and is compatible with various Marantec openers, including the M4500, M4500e, M4700, M4700e, M4900, M4900e, Q7500, Q7700, and Q7900, as well as the Marantec Synergy line of openers.

To program the 4-digit pin code, you’ll need a strong signal from your garage door opener remote.

If the remote’s signal is weak, you may need to replace the CR2032 3-volt battery.

You can find the M13-631 Marantec Wireless Keyless Entry programming instructions available for download as a PDF file, which provides step-by-step instructions for programming the keypad.

Additionally, you can purchase the M13-631 Keypad from the Garage Door Zone Store, which also offers helpful resources such as YouTube videos and blog posts on garage door openers and accessories.

These resources can provide valuable information to help you troubleshoot and optimize your Marantec keypad’s performance.

Frequently Asked Questions

How Do I Reset My Marantec Garage Door Keypad?

To reset your garage door keypad, try the reset sequence; if that fails, check for forgotten passwords, keypad unresponsiveness, or battery replacement needs, and address any programming issues, incorrect entries, or damage before restoring factory defaults.

Why Is My Garage Door Opener Not Responding to My Keypad?

You’re wondering why your garage door opener isn’t responding to your keypad. Check for a keypad battery issue, faulty wiring connection, or incorrect code entry. Also, consider keypad interference, garage door alignment, sensor malfunctions, remote control interference, signal strength, moisture damage, or electronic malfunction issues.

Why Is My Garage Keypad Blinking and Not Opening?

When your garage keypad blinks but won’t open, you’re left feeling frustrated. Check for a battery drain issue, faulty sensor problem, or weather interference issue. It might be a keypad malfunction, loose connection problem, incorrect code entry, or keypad battery low, faulty opener issue, keypad lockout mode, or programming error.

Why Wont My Door Keypad Work?

When you’re having trouble with your door keypad, you’re likely dealing with dead batteries, faulty wires, or a lost password. Check for key misalignment, weather damage, or obstructed sensors, and rule out weak signal, incorrect codes, physical damage, or misconfigured settings.

Conclusion

You’ve made it through the troubleshooting gauntlet, and your Marantec keypad is still on the fritz. Ironically, it’s now more frustrating than a garage door that won’t open on a rainy morning. Don’t worry, you’re not alone. If all else fails, it’s time to call in the cavalry – a professional technician or the manufacturer’s support team. With their help, you’ll be back to effortlessly opening your garage door in no time, and your sanity will thank you.

Bryant Plus 90 Furnace Not Working: Troubleshooting Guide

The Bryant Plus 90 Furnace is a great device, but like all electronics, it sometimes has its issues. If your Bryant Plus 90 Furnace is not working, take a look at this troubleshooting guide.

We’ve collected answers to the most frequent reasons you’ll see Bryant Plus 90 Furnace not working and explained them in plain language for easy troubleshooting.

Bryant Plus Furnace Troubleshooting


Quick Fix

To troubleshoot a Bryant Plus 90 Furnace, check the thermostat and power supply, ensure the air filter is clean, inspect the vent for blockages, and reset the furnace by turning it off and back on after a few minutes.

Pre-Troubleshooting Checklist

Before diving into troubleshooting your Bryant Plus 90 furnace, go through this pre-troubleshooting checklist to verify you’ve covered the basics.

First, confirm your thermostat is set correctly – check the thermostat setting to guarantee it’s calling for heat.

Next, verify the furnace filter is clean and not clogged, as a dirty filter can reduce airflow and cause issues.

Check the circuit breaker or fuse box to guarantee the breaker hasn’t tripped or a fuse hasn’t blown, which would prevent the furnace from operating.

Inspect the return air grilles and supply air registers to guarantee they’re not blocked or restricted, as this can impede airflow and cause problems.

Confirm the blower motor is working properly and not making unusual noises.

If you’ve checked all these items and the issue persists, it’s likely a more complex problem with your Bryant Plus 90 gas furnace.

At this point, you can begin troubleshooting more specific issues with your HVAC system.

Common Issues and Solutions

Several common issues can arise with your featured Bryant Plus 90 gas furnace, and being aware of these problems and their solutions can help you troubleshoot and resolve them efficiently.

For instance, if your furnace is blowing cold air throughout, it may be due to dirty filters, which can reduce furnace efficiency.

Replacing the filter monthly or bi-monthly can maintain peak performance. Inadequate heating can also be caused by a faulty igniter, which can prevent the furnace from firing. Cleaning or replacing the igniter can resolve the issue. Additionally, verify the thermostat is set correctly, and check the circuit breakers to confirm they haven’t tripped.

A faulty rollout sensor can cause the furnace to shut down, but resetting the rollout switch near the burner section can resolve the issue. Regular maintenance, such as guaranteeing the condensate drain pipes are clear and levelled, can also prevent common issues.

Thanks to modern technology, most of these problems can be diagnosed quickly, and by being proactive and addressing them, you can minimize the need for furnace repair and guarantee your Bryant Plus 90 furnace model operates effectively.

Error Codes and Faults

When you’re troubleshooting your Bryant Plus 90 furnace, error codes and faults are essential indicators of what’s gone wrong.

You’ll need to identify the specific fault code displayed on the furnace’s control board to determine the root cause of the issue. By understanding the error codes, you can diagnose issues like the Flame Rollout Fault and take corrective action to get your furnace up and running again.

Flame Rollout Fault

Your Bryant Plus 90 furnace displays a flame rollout fault when it detects an abnormal flame pattern or rollout condition, which can be triggered by a variety of factors.

This fault can cause your furnace to stop coming on, leaving you without heat. A flame rollout fault typically occurs when the inducer motor or ignitor malfunctions, causing the flame to roll out of the combustion chamber.

This can be due to a faulty circuit or thermostat issue.

When troubleshooting a flame rollout fault, you’ll need to inspect the furnace’s combustion chamber and burner assembly.

Check for signs of soot or debris buildup, which can obstruct the flame’s normal pattern. Verify the ignitor is functioning correctly and the inducer motor is operating within the specified RPM range.

If you suspect a thermostat issue, try replacing the thermostat to see if it resolves the problem.

Remember to always follow proper safety procedures when working with gas furnaces, and consider consulting a professional if you’re unsure about any aspect of the troubleshooting process.

Error Code Diagnosis

The Bryant Plus 90 furnace’s error code diagnosis is a crucial step in identifying and resolving issues that may be preventing your furnace from functioning properly.

When your furnace displays an error code, it’s essential to diagnose the problem accurately to perform the necessary repairs.

You can find the error code on your thermostat’s display or in the furnace’s control panel.

Once you have the code, consult your user manual or online resources to determine the cause of the issue.

  1. Error Code 12: This code indicates an ignition problem, which may be due to a faulty igniter, a dirty air filter, or a malfunctioning gas valve.
  2. Error Code 31: This code suggests a furnace not firing issue, potentially caused by a faulty thermostat, a blocked air filter, or a faulty furnace control board.
  3. Error Code 44: This code points to a heating system problem, possibly due to a faulty furnace limit switch, a malfunctioning gas valve, or a blocked air filter.

Furnace Maintenance Essentials

You’ll want to focus on three key areas to guarantee your Bryant Plus 90 furnace runs efficiently and trouble-free: regular filter cleaning, condensate drain maintenance, and proper thermostat settings.

Regular Filter Cleaning

Regular filter cleaning is a crucial aspect of furnace maintenance, as it directly impacts the system’s performance and longevity.

A dirty filter can lead to reduced airflow, causing your Bryant Plus 90 furnace to work harder and increasing your energy bills.

This can also result in cold spots in your home, making it less comfortable.

To safeguard your furnace is running efficiently, you should clean or replace the filter every 1-3 months, depending on usage and environmental conditions.

  1. Turn off the power: Switch off the furnace’s power supply to prevent any accidental start-ups while you’re cleaning the filter.
  2. Remove the filter: Take out the filter from the furnace and gently tap it to remove any loose dirt or debris.
  3. Clean or replace: Clean the filter with a soft brush or vacuum, or replace it with a new one if it’s damaged or excessively dirty.

Condensate Drain Maintenance

One essential aspect of maintaining your Bryant Plus 90 furnace is condensate drain maintenance, which involves verifying the condensate drain system functions properly to prevent water accumulation and related issues.

You should regularly clean the condensate drain hoses to prevent clogs and water accumulation. A clogged drain hose can cause water to accumulate in the furnace, leading to corrosion and damage to components.

Additionally, inspect and clean the p-trap and drain regularly to prevent blockages. Improper furnace installation or maintenance can also contribute to water accumulation, so confirm your furnace is installed and maintained correctly.

Failure to clean the condensate drain hoses regularly can lead to clogs and water accumulation, causing the furnace to shut down. Regular maintenance is pivotal to prevent such issues and verify your HVAC system operates efficiently.

Proper Thermostat Settings

Maintaining ideal thermostat settings is vital to guarantee your Bryant Plus 90 furnace operates efficiently and effectively.

You should program your thermostat to maintain a consistent temperature, usually between 68°F and 72°F, to optimize your furnace’s performance. This setting also helps reduce energy consumption and saves you money on your energy bills.

To guarantee proper thermostat settings:

  1. Check thermostat compatibility: Verify your thermostat is compatible with your Bryant Plus 90 gas furnace. If you’re unsure, consult with an HVAC contractor or the manufacturer’s instructions.
  2. Set the correct temperature range: Program your thermostat to maintain a consistent temperature range, avoiding extreme temperature fluctuations that can affect your furnace’s performance.
  3. Regularly inspect air filters: Dirty air filters can reduce airflow, causing your furnace to work harder and increasing energy consumption. Replace your air filters, such as pleated filters, every 1-3 months or as recommended by the manufacturer.

Remember to also check your electrical panel and verify it’s functioning correctly. If you’re still experiencing issues, consider upgrading to a smart thermostat like the Nest thermostat for better control and monitoring.

Troubleshooting Steps and Tips

Several factors can trigger issues with your Bryant Plus 90 furnace, and pinpointing the root cause is essential to effective troubleshooting.

When your furnace won’t cycle, won’t fire, or is working but blowing cold air, it’s pivotal to methodically eliminate potential causes.

Start by checking the thermostat settings, validating they’re set correctly and the battery isn’t dead. Next, inspect the switch and motor for signs of wear or malfunction.

If your Bryant 350MAV036080adka plus furnace has a faulty switch or motor, it may not function properly.

Verify that the gas supply is turned on and the valve is open.

Certify the furnace filter is clean, as a clogged filter can prevent proper airflow.

Check the furnace’s electrical connections and wiring for damage or corrosion.

If you’ve checked all these potential causes and the issue persists, it may be time to weigh professional repair.

Remember, a properly functioning Gas Furnace is pivotal for your home’s comfort and safety.

Bryant Furnace Repair Guide

As you’ve methodically ruled out potential causes for your Bryant Plus 90 furnace issue, it’s time to consult the Bryant Furnace Repair Guide for more in-depth guidance.

This comprehensive resource provides troubleshooting tips and solutions for common Plus 90 furnace problems. Before attempting any repairs, remember to turn off the furnace to guarantee your safety.

The guide covers basic maintenance tasks and troubleshooting tips for issues such as:

  1. Faulty circuit breakers: Check if the breaker has tripped or if there’s an electrical issue.
  2. Malfunctioning thermostats: Certify the thermostat is set correctly and functioning properly.
  3. Faulty blower motors or broken connecting belts: Inspect the blower motor and belts for signs of wear or damage.

Professional Assistance and Warranty

If you’ve exhausted the troubleshooting steps outlined in the Bryant Furnace Repair Guide and the issue persists, it’s likely time to contemplate seeking professional assistance from a qualified HVAC technician who can diagnose and repair your Bryant Plus 90 furnace.

A licensed technician from HVAC at Johnson Controls or a similar service provider can help identify the root cause of the problem and perform the necessary repairs. Before scheduling a service call, review your furnace warranty to see if repairs or replacements are covered.

Bryant furnaces have a 10-year standard parts limited warranty if registered within 90 days of installation, and unregistered furnaces are still covered for five years. Be sure to keep a record of maintenance and repairs for future reference, as this may be required for warranty claims or to troubleshoot recurring issues.

Regular maintenance schedules can help prevent future issues and guarantee the furnace operates efficiently and safely.

Frequently Asked Questions

Where Is the Reset Button on a Bryant Furnace?

You’ll typically find the reset button on your furnace’s circuit board, often hidden behind a removable panel or accessed through a small opening; check your model’s wiring diagram or manual for specific location and button color code details.

Why Is My Bryant Furnace Not Working?

Your furnace has gone dark, leaving you shivering in the cold. Don’t worry, it’s likely due to a faulty ignition, clogged filters, dirty sensors, or one of several other common issues like incorrect installation, insufficient power, leaky ducts, or poor maintenance.

Why Does My Bryant Plus 90 Furnace Keep Shutting Off?

You’re experiencing furnace issues where it keeps shutting off, which could be due to overheating concerns triggered by faulty sensors, ignition problems, electrical glitches, or thermostat malfunctions, so investigate these potential causes to resolve the issue.

What Is the Most Common Furnace Failure?

As you navigate the dark alleys of furnace failures, you’ll find that sensor malfunctions, often symbolized by a dimly lit LED, are the most common culprit, followed closely by electrical faults, clogged filters, and pilot issues, all of which can lead to your furnace’s demise.

Conclusion

By following the troubleshooting steps and tips outlined, you’ve taken the first vital steps in resolving common issues with your Bryant Plus 90 Furnace. Remember, regular maintenance is key to preventing future problems, so commit to routine filter changes, blower motor checks, and electrical panel inspections. Stay vigilant, and you’ll enjoy a warm and cozy home all winter long, with a furnace that runs efficiently, reliably, and safely.

Whirlpool French Door Refrigerator Ice Maker Not Working: Troubleshooting Guide

The Whirlpool French Door Refrigerator Ice Maker is a great device, but like all electronics, it sometimes has its issues. If your Whirlpool French Door Refrigerator Ice Maker is not working, take a look at this troubleshooting guide.

We’ve collected answers to the most frequent reasons you’ll see Whirlpool French Door Refrigerator Ice Maker not working and explained them in plain language for easy troubleshooting.

Whirlpool French Door Refrigerator Ice Maker Troubleshooting


Quick Fix

To troubleshoot a Whirlpool French Door Refrigerator ice maker, check the water supply and filter, ensure the ice maker is turned on, inspect for jammed ice or frost buildup, and test the door switch and ice maker components for proper functionality.

Common Ice Maker Issues

Your Whirlpool refrigerator’s ice maker can be a convenient featured function, but when it malfunctions, it can be frustrating.

One common issue is a leaky ice maker, which can cause water to accumulate in the freezer compartment. This may be due to a clogged water filter or a faulty water inlet valve.

If your Whirlpool ice maker has stopped working altogether, it’s possible that the ice maker control arm is stuck or faulty. Check if the arm is stuck in the “off” position, preventing the ice maker from functioning.

Another issue is slow ice production, which could be attributed to a faulty water inlet valve or a clogged water filter. Verify that the freezer temperature is set between 0°F and 5°F (-18°C and -15°C) for ideal ice production.

Modern technology in Whirlpool refrigerators makes troubleshooting simpler, but if your ice maker isn’t making ice, try checking these potential causes before calling a professional.

By identifying and addressing these common issues, you can get your Whirlpool refrigerator ice maker working efficiently again.

Ice Production Problems

Ice production problems in your Whirlpool French door refrigerator can be frustrating, but identifying the root cause is key to resolving the issue.

If your ice maker isn’t making ice, it’s essential to troubleshoot the water filter, water inlet valve, and freezer temperature. A clogged water filter can restrict water flow to the ice maker, resulting in little to no ice production. Make sure to replace it every 6-12 months to maintain proper function.

The water inlet valve must also be functioning correctly to supply water to the ice maker. A faulty valve can prevent ice production altogether. Additionally, guarantee the freezer temperature is set between 0-5°F for proper ice production. A temperature outside this range can affect ice maker performance.

If you’ve checked these components and the issue persists, it may be a sign of a defective or malfunctioning ice maker assembly, which may require replacement to resolve the issue. By checking these key components, you can identify and fix the root cause of your ice production problems and get your Whirlpool ice maker up and running again.

Ice Dispenser Troubleshooting

You’ve identified issues with your Whirlpool refrigerator’s ice dispenser, which can be frustrating when you need a cold drink.

Now, let’s troubleshoot the common problems: ice clumps and clogs that prevent dispensing, and a frozen auger that’s stuck and won’t turn.

Ice Clumps and Clogs

How often do clumps of ice form in your Whirlpool refrigerator’s ice dispenser, clogging it and preventing you from getting the ice you need?

This frustrating issue can be caused by a few different factors. If you notice ice clumps and clogs, check the ice tray for blockages. Remove any large chunks of ice and defrost the ice bin to guarantee proper ice flow.

Also, inspect the water line for kinks or restrictions that could be affecting ice production. If your ice maker stops working due to ice clumps, it may be a sign of a larger issue.

Check the ice level in the bin and make sure it’s not overfilled, as this can cause ice to clump together. If you’ve checked all of these potential causes and the issue persists, it may be worth investigating further to diagnose the root cause of the problem and confirm a solution.

Frozen Auger Diagnosis

The auger’s ability to rotate freely is crucial for dispensing ice properly. If the auger motor is frozen, it won’t be able to eject the cubes, resulting in an ice maker not making ice.

To troubleshoot this issue, you’ll need to diagnose the frozen auger. First, check the level of ice in the ice dispenser. If it’s overflowing, it can cause frozen ice to block the auger’s rotation.

Verify the ice maker components are at the proper temperature. If the temperature is off, it can cause the ice to freeze together, leading to a frozen auger.

Next, inspect the auger motor and surrounding area for any signs of ice buildup or moisture. If you find any, defrost the area and check if the auger motor is working correctly.

If it’s still not rotating, you may need to replace the auger motor. Consult your troubleshoot guide for specific instructions on how to access and diagnose the auger motor in your Whirlpool French door refrigerator.

Ice Quality and Quantity Issues

You’re now troubleshooting issues with the quality and quantity of ice produced by your Whirlpool refrigerator’s ice maker.

If you’re experiencing problems like overproduction, odd-tasting ice, or an ice bin that’s not filling, you’re in the right place.

Let’s delve into these common issues and find solutions to get your ice maker working properly again.

Ice Maker Overproduction

Excessive ice production can be just as frustrating as a lack of ice, especially when it affects the quality of your frozen goods.

When your Whirlpool fridge’s ice maker is overproducing, it can lead to issues like clumping, jamming, or even causing the ice maker to stop working altogether.

To troubleshoot ice maker overproduction, you need to verify your freezer temperatures are set to 0°F.

If the temperature is off, it can affect the ice maker’s performance.

Check the main components, such as the water pressure and ice maker’s electrical connections, to make sure they’re functioning properly.

If your ice maker isn’t making ice or not working at all, it might be due to a faulty water valve or a clogged water filter.

Guaranteeing these components are clean and well-maintained can help regulate ice production.

Additionally, inspect the ice maker’s settings to guarantee it’s not set to overproduce ice.

If you’ve checked all these factors and the issue persists, it may be worth consulting your user manual or contacting a professional for further assistance.

Ice Has Odd Taste

Ice production issues can be frustrating, especially when they affect the taste of your ice.

If you’re tasting ice that’s off-putting, it’s likely due to poor ice quality. One common culprit is an expired water filter, which can cause your ice to taste bad. Make sure to replace your filter every six months to prevent this issue.

Contaminated water supply lines can also affect the taste of your ice, so check and clean the lines regularly. Additionally, incorrect water filter installation can lead to poor ice quality, so verify it’s installed correctly.

Another possible cause is ice maker mold contamination, which can be resolved by cleaning and sanitizing the mold regularly.

Don’t forget to clean and maintain your refrigerator or freezer compartment regularly, as contamination in these areas can also impact ice quality. By addressing these potential causes, you can enjoy fresh-tasting ice again.

Ice Bin Not Filling

A Whirlpool refrigerator’s ice maker is only as good as its ability to fill the ice bin, so if you’re finding it’s not doing its job, it’s time to investigate.

Start by checking the ice bin’s position and confirm it’s correctly installed, as improper installation can prevent the ice maker from filling the bin. Next, verify that the control arm is in the correct position, as a mispositioned control arm can also prevent filling.

Check your ice maker settings and adjust them if necessary, as incorrect settings can affect ice production and filling of the bin.

Guarantee the freezer temperature is set between 0-5°F, as temperatures outside this range can affect ice production and filling of the bin. Inspect the water filter and replace it every 6 months, as a clogged water filter can restrict water flow and prevent the ice maker from filling the bin.

Other Common Ice Maker Problems

Your Whirlpool refrigerator’s ice maker is prone to issues beyond frozen lines and faulty water supply.

You may encounter other common ice maker problems that prevent you from getting the ice cubes you need. If your ice maker isn’t making ice, it could be due to a defective water inlet or insufficient water supply.

Check your refrigerator settings to verify the icemaker module is activated and the temperature isn’t too warm. Clogged valves and lines can also hinder ice production.

Inspect the water supply lines for kinks, twists, or blockages that might restrict water flow. If you’ve checked all these potential issues and your ice maker still isn’t working, it’s possible that the problem lies with the icemaker module itself.

In some cases, replacing the module can resolve the issue. By identifying and addressing these common ice maker problems, you can guarantee your Whirlpool refrigerator’s ice maker up and running again.

Maintenance and Repair Tips

Proper maintenance is key to keeping your Whirlpool refrigerator’s ice maker running smoothly and preventing unexpected breakdowns.

Regularly cleaning the ice maker and replacing the water filter every 6-12 months can help prevent issues and guarantee proper function. Defrosting the refrigerator regularly can also help prevent ice buildup and guarantee the ice maker operates correctly.

When troubleshooting, inspect the water inlet valve and water supply line for kinks or blockages that may be causing issues.

Additionally, check the freezer temperature and verify it’s set between 0-5°F to help the ice maker produce ice properly.

If you’re still experiencing problems, consider scheduling routine maintenance and inspections of the fridge, freezer, and ice maker to prevent unexpected breakdowns and costly repairs.

By doing so, you can identify and resolve common issues before they become major problems.

If you’re still having trouble, it may be time to call a repair service to troubleshoot and fix the issue.

Advanced Troubleshooting Techniques

The ice maker’s control module is a critical component to inspect when troubleshooting issues.

If your Whirlpool French door refrigerator‘s ice maker isn’t making ice, you’ll need to dig deeper to identify the root cause. First, make sure the freezer compartment’s temperature is set between 0°F and 5°F. If it’s not, adjust the temperature and check the ice maker again.

Next, check the water supply line and filter for blockages or mineral buildup. A clogged water filter can restrict water flow, preventing ice production.

Replace the water filter if necessary. If you’ve checked the water supply and filter, and the issue persists, you may need to repair or replace the entire ice maker assembly.

To troubleshoot further, press the reset button to restart the ice maker’s cycle. If this doesn’t work, you may need to consult your user manual or contact a professional for assistance.

Remember to always follow safety guidelines when working with electrical appliances, and consider seeking help if you’re unsure about any repair procedures.

Frequently Asked Questions

How Do I Reset My Whirlpool French Door Ice Maker?

To reset your ice maker, you’ll need to find the reset button, usually located behind the ice bucket or on the bottom of the unit. Press and hold it for 10 seconds to initiate the resetting process, which should resolve any malfunction or faulty issues.

Why Is My Whirlpool Refrigerator Ice Maker Not Making Ice?

You’re wondering why your ice maker’s not making ice? Investigate if your water supply’s faulty, pressure’s insufficient, or the filter’s clogged. Also, check for a faulty ice mold, defective thermostat, leak, incorrect installation, insufficient freezer temperature, electrical issue, or a faulty control board.

Why Is My French Door Refrigerator Not Making Ice?

You’re struggling with ice formation issues in your French door refrigerator, and it’s likely due to frozen water lines, inadequate installation, or a faulty ice maker. Check for low water pressure, clogged water filters, water supply problems, incorrect temperature settings, insufficient maintenance, or a defective control board.

Why Is My Whirlpool French Door Refrigerator Not Dispensing Ice?

Imagine frozen water stuck in your dispenser, refusing to budge. You’re not alone! Check if the Dispenser Lever is jammed, or if Ice Buildup, a Clogged Filter, or Faulty Sensor is the culprit, or if Incorrect Installation, Defrost Mode, Moisture Issues, Air Lock, or Water Supply issues are to blame.

Conclusion

As you’ve navigated the twists and turns of troubleshooting your Whirlpool French Door Refrigerator ice maker, think of yourself as a master navigator charting a course through icy waters. You’ve avoided the icebergs of clogged filters and kinked supply lines, and now you’re sailing smoothly into the harbor of frozen tranquility. With regular maintenance as your trusty compass, you’ll continue to enjoy a steady supply of crisp, clear ice, and your refrigerator will remain a chilly oasis in the desert of kitchen woes.

Aiper Seagull SE Not Working: Troubleshooting Guide

The Aiper Seagull SE is a great device, but like all electronics, it sometimes has its issues. If your Aiper Seagull Se is not working, take a look at this troubleshooting guide.

We’ve collected answers to the most frequent reasons you’ll see Aiper Seagull Se not working and explained them in plain language for easy troubleshooting.

Aiper Seagull Se Troubleshooting


Quick Fix

To troubleshoot an Aiper Seagull SE, check the battery charge and ensure the power switch is on. Then, clean the filter and impeller, inspect for debris in the water intake, and reset the device if needed.

Understanding Aiper Seagull Pro Features

Your Aiper Seagull Pro robotic pool cleaner boasts an impressive array of featured functions that make it an efficient and effective cleaning machine for your outdoor pool.

The device is equipped with advanced navigation technology, allowing it to expertly maneuver around your pool’s curves and contours. One of the most notable features is the Seagull Pro pool cleaner’s ability to detect and adapt to different pool sizes and shapes.

This is made possible by its intelligent sensors, which continuously scan the pool environment and adjust the cleaning route accordingly.

The Aiper Seagull Pro also features a sophisticated LED lighting system, which provides visual feedback on the device’s working status.

When the lights are flashing green, you know the device is working properly. This color-coded system guarantees you’re always aware of your pool cleaner’s performance.

Additionally, the lights help illuminate the pool floor, allowing the device to detect dirt and debris more effectively.

With its advanced features and sleek design, the Aiper Seagull Pro is an excellent investment for any pool owner seeking a reliable and efficient outdoor cleaning solution.

Troubleshooting Common Pool Cleaning Issues

As you enjoy the benefits of your Aiper Seagull Pro‘s advanced features, it’s inevitable that you’ll encounter occasional hiccups in its performance.

When troubleshooting common pool cleaning issues, it’s essential to identify the root cause of the problem to get your pool cleaner up and running smoothly.

Three common issues you may encounter and their possible solutions are:

  1. Lights beeping and flashing: If your Aiper Seagull Pro’s lights are beeping and flashing, it may indicate a navigation issue. Try resetting the device or checking for any obstacles that might be blocking its path.
  2. Not moving despite being fully charged: If your pool cleaner isn’t moving despite being fully charged, check the suction power and guarantee it’s set correctly. Also, inspect the pool floor for any debris that might be hindering its movement.
  3. Different color lights: If your Seagull SE pool vacuum is displaying different color lights, refer to the user manual to understand what each color indicates. This will help you identify the issue and take corrective action to verify that the problem is resolved.

Power and Charging Problem Solutions

Faulty power and charging systems can render your Aiper Seagull Pro useless, leaving your pool dirty and you frustrated.

Fortunately, you can troubleshoot and fix common power and charging issues yourself.

If your Aiper Seagull Pro isn’t turning on, check the charger and power cord for damage. Make sure they’re securely plugged in and that the outlet is working.

If you’re still having trouble, try resetting the device by pressing the power button for 10 seconds.

If your Seagull Pro is beeping and flashing, it’s trying to tell you something. Different color lights indicate different statuses.

A flashing red light usually means the device is charging, while a solid green light indicates it’s fully charged. A blue light typically indicates the device is in use, but if it’s flashing blue, there might be an issue.

If you see a solid blue light, it’s likely the device has stopped moving due to a blockage or other issue. Consult your user manual for specific guidance on interpreting these lights.

Performance and Navigation Issues Fixed

Now that you’ve verified your Aiper Seagull Pro is receiving power and charging correctly, it’s time to tackle performance and navigation issues that might be hindering its ability to clean your pool efficiently.

To guarantee your pool cleaner operates smoothly, follow these tips:

  1. Clear the pool of obstructions to prevent navigation issues caused by uneven surfaces or sensor problems.
  2. Make sure the device is fully charged before each use to avoid performance problems, as it may end its cleaning cycle when the power drops below 10%.
  3. Clean the filter tray regularly to prevent slowdowns and maintain suction power, as a clogged filter can hinder the device’s performance.

Additionally, confirm your pool has a smooth, flat floor, as the Aiper Seagull Pro is designed for such surfaces.

If the device isn’t moving, it may be due to impeller damage or blockage, water damage, or a compromised electrical component, in which case you should reach out to Aiper directly for a warranty claim.

Setup and Usage Troubleshooting Guide

You’ve got your Aiper Seagull Pro up and running, and performance issues are a thing of the past.

Now, it’s time to plunge into the setup and usage troubleshooting guide to guarantee your pool cleaner operates at its best.

First, make sure your device is fully charged before each use.

A fully charged Aiper Seagull Pro is essential for a complete cleaning cycle. If the power drops below 10%, the device may stop moving or malfunction.

Next, inspect the pool floor before use.

The Aiper Seagull Pro is designed for smooth, flat-floored pools and may not operate efficiently on bumpy or uneven surfaces.

Remove the device from the pool after each use to clean the filters, and store it in a cool, dry place away from direct sunlight to maintain its longevity.

If you notice the lights on your Aiper Seagull Pro beeping and flashing, it may indicate a malfunction in the motor or obstructions in the water inlets.

Check for these issues and troubleshoot accordingly.

As home improvement experts, we recommend following these guidelines to keep your pool and spa clean and well-maintained.

Resolving Customer Support Concerns

When operating your Aiper Seagull Pro, you expect seamless performance and efficient cleaning.

However, issues may arise, and you may need to reach out to customer support for assistance.

If your pool cleaner’s lights are beeping and flashing in different colors, it may indicate a problem.

Before contacting customer support, try troubleshooting the issue by checking the charger and verifying it’s properly connected.

  1. Pool cleaner not moving: Check if the cleaner is stuck or tangled in the pool. If not, restart the device and confirm the filter is clean.
  2. Beeping and flashing lights: Refer to the user manual to understand the light pattern’s meaning. It may indicate a blockage or low battery.
  3. Seagull SE not charging: Confirm the charger is properly plugged in and the outlet is working. Try charging the device for at least 30 minutes before use.

If none of these solutions work, you can contact Aiper’s customer support for further assistance.

They’ll help you diagnose and resolve the issue, getting your Aiper Seagull Pro back to peak performance.

Additional Resources and Maintenance Tips

Your Aiper Seagull Pro pool cleaner comes with a range of resources to help you troubleshoot and maintain your device.

You can access the Aiper Seagull Pro User Manual online, which provides detailed instructions on troubleshooting and maintenance. Additionally, support videos are available to guide you through resolving common issues, such as charging and navigation problems.

If you encounter any issues, you can also check the FAQs section for quick solutions.

To guarantee your pool cleaner continues to function at its best, regular maintenance is vital.

Make it a habit to clean the filters before they dry to maintain the vacuum’s performance and prevent movement issues. Disassembling and cleaning the impeller periodically can also help prevent movement issues.

By following these maintenance tips, you can extend the lifespan of your Aiper Seagull Pro and guarantee it continues to clean your pool efficiently.

Frequently Asked Questions

Why Is My Aiper SEagull SE Not Moving?

When your underwater drone isn’t moving, you should check for a dirty propeller, stuck wheel, or faulty motor. Also, verify you’re in the correct mode, and that the cord isn’t tangled, with sufficient power from a good battery, clean brushes, and no loose screws or clogged intake.

Why Does My Aiper Pool Vacuum Not Work?

When your pool vacuum fails, you’re left with a mess. Consider a scenario where a faulty motor or corroded terminals cause a power issue, like when Sarah’s Hayward vacuum stopped working due to a clogged filter, loose belt, or broken propeller, highlighting common issues to investigate.

How Do I Know When My Aiper SEagull SE Is Fully Charged?

When charging your device, you’ll know it’s fully charged when the charge indicator lights turn green, the power button flashes, or you receive a full charge notification; check the battery life estimates, LED light patterns, or voltage meter readings for confirmation.

How Long Can You Keep an Aiper in the Pool?

You can safely leave your Aiper in the pool for up to 2 hours, considering pool duration limits, but be mindful of battery life expectations, water temperature effects, filter cleanliness, and pool size to guarantee efficient cleaning cycles and robot durability.

Conclusion

You’ve now got the tools to troubleshoot like a pro and get your Aiper Seagull Se back on track. By following these steps, you’ll be able to cut to the chase and identify the root of the problem. Remember, an ounce of prevention is worth a pound of cure, so stay on top of maintenance to avoid issues down the line. With these tips, you’ll be swimming in clear waters in no time!

Bernina Not Working: Troubleshooting Guide

The Bernina is a great device, but like all electronics, it sometimes has its issues. If your Bernina is not working, take a look at this troubleshooting guide.

We’ve collected answers to the most frequent reasons you’ll see Bernina not working and explained them in plain language for easy troubleshooting.

Bernina Troubleshooting


Quick Fix

To troubleshoot a Bernina sewing machine, check the power supply and threading path, then clean the bobbin area and inspect the needle, tension, and feed dogs for issues.

Needle and Stitch Quality Issues


When stitching for extended periods, you may notice a decline in stitch quality, accompanied by a noisy machine.

This common issue can be resolved by changing your needle. Worn-out needles can cause poor stitch quality and machine noise, and BERNINA recommends replacing the needle after every 46 hours of stitching.

It’s essential to maintain peak sewing performance by regularly replacing your needles, as dull or worn-out needles can lead to poor stitch quality.

In the world of home appliances, even the smallest component plays a vital role, and your sewing machine is no exception. Additionally, be cautious when using titanium needles, as they can harm your machine’s hook area or needle bar if they don’t snap off.

Instead, opt for high-quality, featured needles designed for your BERNINA machine. If you’re still experiencing poor stitch quality, check your stitch length and width settings to guarantee they’re correctly configured, modern sewing technology makes it easier than ever to fine-tune for professional results.

Bobbin-Related Problems and Solutions

Your BERNINA machine’s bobbin system is a pivotal component of the sewing process, and malfunctions can lead to frustrating issues. To guarantee smooth sewing, it’s essential to maintain your bobbin system properly.

Regular cleaning and oiling of the bobbin area can prevent issues like poor stitch quality with bobbin thread showing on top of the fabric. Using the correct bobbin thread type and quality is also essential to prevent stitching problems.

ProblemCauseSolution
Poor stitch qualityIncorrect bobbin setupClean and oil bobbin area
Noise or hummingBobbin winder offCheck and adjust bobbin winder
Stitching problemsPoor quality bobbin threadUse correct bobbin thread type and quality
Bobbin-related issuesIncorrectly threaded bobbinRe-thread or replace bobbin

If you’re experiencing bobbin-related issues, try re-threading the bobbin or replacing it with a new one to resolve the problem. Remember to use the embroidery bobbin case or embroidery bobbin setting for decorative stitches, buttonholes, and embroidery.

Threading and Tension Troubleshooting

Proper threading and tension are essential to achieving ideal stitch quality on your BERNINA machine.

If you’re experiencing issues with your stitches, it’s likely due to incorrect threading or tension.

To troubleshoot, start by checking your threading.

Make sure you’re following the correct threading path for your machine, and that the thread is seated properly in the take-up lever.

If you’re still having issues, try re-threading your machine with a new spool of thread.

Some common threading and tension issues to look out for include:

  • Incorrect threading order or path
  • Inconsistent tension, causing loose or tight stitches
  • Thread not seated properly in the take-up lever
  • Using low-quality or worn-out thread
  • Failure to adjust tension for different fabric types

Machine Errors and Maintenance Tips

Machine errors can be frustrating and debilitating, but many are easily preventable with regular maintenance and troubleshooting.

By staying on top of routine upkeep, you can avoid common issues that might leave you stranded in the middle of a project.

When an error message appears on your Bernina’s LCD screen, don’t panic. Instead, take a deep breath and follow the on-screen instructions.

If the issue persists, consult your user manual or online resources for guidance. Regularly updating your machine’s software can help prevent errors, so be sure to check for updates regularly.

To keep your machine running smoothly, perform routine maintenance tasks like cleaning the bobbin area, oiling moving parts, and dusting off the exterior.

These simple tasks can prevent dust and debris from accumulating and causing issues. Additionally, keep your workspace organized and tidy to reduce the risk of tangled threads or lost parts.

Fabric and Additional Sewing Tips

When working with your Bernina, you’ll find that fabric selection and feeding issues can greatly impact your sewing experience.

You’ll want to choose fabrics that are suitable for your project and machine, taking into account factors like thread count, stretch, and texture.

Fabric Selection Tips

Selecting the right fabric for your Bernina sewing project is crucial to achieving professional-looking results.

You’ll want to choose a fabric that’s suitable for the type of project you’re working on, as well as one that’s compatible with your Bernina machine. Fabric selection can make all the difference in the quality of your finished product.

When selecting fabric, keep the following tips in mind:

  • Consider the fabric’s weight and density: Heavier fabrics may require a heavier-duty needle and thread, while lighter fabrics may require a lighter touch.
  • Think about the fabric’s texture and weave: Delicate or loose weaves may require a walking foot or Teflon foot to prevent fabric from bunching up.
  • Choose fabrics with similar stretch and give: If you’re working with stretchy fabrics, make sure to choose ones with similar stretch to guarantee a smooth, even finish.
  • Select fabrics that are easy to work with: If you’re new to sewing or working with a particular type of fabric, start with ones that are easy to handle and manipulate.
  • Test your fabric before starting your project: Run a test strip through your Bernina machine to confirm the fabric feeds smoothly and evenly.

Fabric Feeding Issues

Proper fabric feeding is essential to achieving smooth, even stitches and preventing frustrating issues like bunching, tangling, or even breaking your Bernina machine’s needle.

When you’re experiencing fabric feeding issues, it’s likely due to improper tension, incorrect presser foot pressure, or inadequate fabric guidance.

To troubleshoot fabric feeding problems, start by checking your tension settings.

If your top thread is too tight, it can cause fabric to bunch up, while a loose bottom thread can lead to tangling. Adjust your tension dials accordingly to find the ideal balance.

Next, guarantee your presser foot is set to the correct pressure for your fabric type.

Too much pressure can cause fabric to drag or bunch, while too little pressure can lead to skipped stitches.

Finally, make sure you’re using the appropriate fabric guide or walking foot to help feed your fabric smoothly through the machine.

Bernina 770 Specific Issues and Fixes

When using your Bernina 770, you may encounter specific issues that require attention.

Error messages like 1010, indicating a Main Drive Sync failure, can be resolved with simple cleaning and maintenance.

Error Messages and Solutions

One of the most frustrating experiences for Bernina 770 owners is encountering error messages that bring their sewing projects to a halt.

When you’re in the middle of a project, the last thing you want to see is an error message flashing on your machine’s screen.

But don’t panic! Many error messages on the Bernina 770 can be resolved with simple troubleshooting steps.

  • 1010 Error: Check for thread caught in the machine, clean the cutter and hook race, and consult the user manual or contact customer support if the issue persists.
  • Thread issues: Regularly clean the machine every project or every 3 hours of sewing time to prevent thread buildup.
  • Hook race issues: Use special high-viscosity oil to oil the hook race and reservoir, and refer to the user manual for recommended oiling schedules and procedures.
  • Cutter issues: Clean the cutter regularly to prevent debris buildup and guarantee smooth operation.
  • Consult the user manual: Always refer to the user manual for specific troubleshooting steps and maintenance procedures to prevent common issues with your Bernina machine and confirm proper functioning.

Machine Maintenance and Care

Six key areas require regular attention to keep your Bernina 770 running smoothly: the cutter, hook race, bobbin, needle, and thread paths.

Regular cleaning of these areas is vital to prevent errors and maintain peak performance.

You’ll need a flashlight, magnifying glass, and long tweezers to locate and remove threads causing errors in the cutter and hook race.

Remove the bobbin to free the needle and resolve the 1010 error, often caused by a tiny piece of thread caught in the machine.

Clean the machine every project or every 3 hours of sewing time to prevent errors.

Press the link and cutter button to slide the cutter out for cleaning, and remove the foot, needle, and needle plate to access the cutter for regular maintenance.

Don’t forget to oil the hook race and reservoir with special high-viscosity oil to maintain the machine and prevent issues.

By following these simple steps, you’ll keep your Bernina 770 in top condition and minimize the risk of errors.

Clean and oil your machine regularly to guarantee seamless operation and peak performance.

Foot Recognition and Dual Feed Issues

Your Bernina’s dual feed machines, including the 880, 770, 770 Plus, 780, 790, 570, and 590, rely on precise sensor readings to function correctly.

If you’re experiencing foot recognition issues, it’s likely due to lint or debris blocking the optical sensor, resulting in false readings. To resolve this, simply clean the sensor area, located directly above the foot attachment, to guarantee accurate readings.

When working with your dual feed, keep the following tips in mind:

  • Always verify the correct foot is attached before engaging the dual feed mechanism.
  • Never engage the dual feed with a C or non-D foot attached.
  • To disengage, pinch the mechanism and slide it down; to engage, slide it back up into place.
  • Pinch the dual feed and bring it straight down to engage, and slide it up for a smoother transition to avoid wear and tear.
  • Verify proper dual feed engagement before proceeding to certify errors.

Feed Dog and Thread-Related Problems

Properly functioning feed dogs and threads are essential components of your Bernina machine’s operation.

In terms of feed dogs, you need to lower them for embroidery and quilting. On Bernina 830 and 880 machines, this happens automatically, but on other models, you’ll find a button on the side to lower and raise them.

After re-engaging, don’t be alarmed if the feed dogs don’t pop up immediately; turning the hand wheel a quarter turn should help them rise before the needle reaches the fabric.

Top thread breakage can be frustrating, but it’s often caused by simple factors.

Re-threading and changing the needle, cleaning and oiling your machine, checking thread type, trying a different needle size or type, and ensuring machine maintenance and cleanliness can resolve the issue.

Using cheap or old thread can also lead to breakage and other problems, so it’s worth investing in high-quality threads promoted by your dealer.

Frequently Asked Questions

How Do I Reset My Bernina Sewing Machine?

To reset your sewing machine, you’ll need to restore it to its Factory Defaults. Press and hold the “Menu” and “Back” buttons simultaneously for 5 seconds, then release and restart your machine to complete the reset process.

How to Fix Bobbin Tension on a BERNINA?

You’re likely experiencing thread tangles due to incorrect bobbin tension. Try adjusting the bobbin case screws, ensuring they’re snug but not overtightened. If issues persist, check for lint buildup or damaged threads, and consider re-threading your machine.

Why Is My BERNINA Only Sewing Backwards?

You’re experiencing reverse-only sewing because the thread direction is likely incorrect. Check that the thread is properly seated in the take-up lever and the stitch length is set correctly, as improper settings can cause this issue.

How Often Should I Oil My Bernina Sewing Machine?

You should stick to a strict oiling schedule, oiling your Bernina every 3-4 hours of sewing time or after each project, whichever comes first, to maintain its performance and prevent issues like error messages and needle malfunction.

Conclusion

You’ve mastered the art of Bernina troubleshooting! With this guide, you’ve conquered the most intimidating machine errors, from needle and stitch quality issues to bobbin-related problems and beyond. You’ve vanquished thread breakage, false sensor readings, and the pesky 1010 error, emerging victorious with your trusty Bernina by your side. With your newfound expertise, you’ll be sewing like a pro in no time, churning out flawless garments and home decor with lightning speed and precision.

Sewage Ejector Pump Not Working: Troubleshooting Guide

The Sewage Ejector Pump is a great device, but like all electronics, it sometimes has its issues. If your Sewage Ejector Pump is not working, take a look at this troubleshooting guide.

We’ve collected answers to the most frequent reasons you’ll see Sewage Ejector Pump not working and explained them in plain language for easy troubleshooting.

Sewage Ejector Pump Troubleshooting


Quick Fix

To troubleshoot a sewage ejector pump, check the power supply and float switch, clear any clogs in the pump or discharge line, clean the pump and basin, and inspect for motor or impeller damage.

Diagnosing Common Issues

When your sewage ejector pump fails, it’s essential to identify the problem quickly to prevent further damage and unsanitary conditions.

You’ll need to troubleshoot common issues to get your pump up and running again.

Check the electrical connections and control panel for any signs of malfunction. If the pump fails to start, inspect the float switch for malfunctions or misalignment.

Modern pumps often come with featured technology that makes diagnostics easier, but even then, regular maintenance is crucial to prevent pump failure. If the water level rises, it may be a sign of a more serious issue.

Switch Failure and Replacement

A faulty float switch can be the culprit behind your sewage ejector pump’s failure to function.

This common point of failure can be easily replaced, saving you money on plumber costs. To replace the switch, you’ll need to attach the new switch cord to the pump at the same point as the old cord.

Certify the circuit breaker and GFCI outlet are checked before starting the repair. After replacement, run water for a minute to flush out dirty water and guarantee the pump is functioning properly.

With a new switch, your ejector pump should be up and running again, efficiently handling sewage and water.

Pump Won’t Start or Run

Your sewage ejector pump won’t start or run, leaving you with a serious problem on your hands.

First, check the power supply to verify it’s receiving electricity. If it is, the issue might be with the electrical components. If you’re not familiar with these components, it’s best to seek professional assistance to diagnose the underlying cause.

Sometimes, pumps won’t start due to a faulty switch or relay. If your sewage pump fails to run continuously, it may be a sign of deeper pump issues.

Identifying the root cause is vital to resolving the problem and getting your pump to run smoothly again.

Leaks, Noises, and Other Problems

Leaks, noises, and other problems can also hinder the proper functioning of your sewage ejector pump. These issues can be caused by various factors, including broken valves, cracked pipework, and malfunctioning system components.

ProblemCauses and Solutions
LeaksBroken valves, cracked pipework, failed non-return valves. Replace or repair valves and pipework.
Noises (vibrations, banging)Improperly secured pipes, malfunctioning system check valves, impellors not secured within pump casing. Secure pipes, install quieter valves.
Loud NoisesMalfunctioning float switch, electrical faults. Seek professional attention to prevent further damage.
Other ProblemsFailure to address leaks and noises can lead to burnout, bad smells, and system downtime. Regular maintenance and prompt troubleshooting are essential.

Maintenance and Prevention

Regularly checking your sewage ejector pump system can help prevent many issues from arising in the first place.

You’ll want to inspect the pump and its components for signs of wear, as a faulty pump can indicate larger problems in your wastewater management system. Pumps are essential for efficient wastewater management, and they play a vital role in preventing Common Problems.

By performing routine maintenance, you can help prevent issues before they become major problems. Pumps can encounter a range of issues, from clogs to electrical failures.

Stay on top of maintenance to guarantee your sewage ejector pump system runs smoothly and efficiently.

Frequently Asked Questions

How to Know if an Ejector Pump Is Bad?

You’ll know if an ejector pump is bad if it’s experiencing issues like a faulty motor, worn impeller, or electrical surge damage. Check for corrosion, bad bearings, or a faulty capacitor, as well as clogged intake, broken shaft, or rusted housing, which can cause excessive vibration.

Why Is My Sewage Ejector Pump Not Pumping?

You’re wondering why your sewage ejector pump isn’t pumping? It could be due to a clogged impeller, faulty motor, loose wiring, corrosion issues, old age, worn bearings, recent power outages, stuck float, faulty controller, or low voltage – all common culprits that require attention.

Can an Ejector Pump Be Repaired?

You can refurbish your ejector pump by tackling motor repairs, replacing faulty impellers, and cleaning corrosion, or opt for seal, bearing, or capacitor replacements, as well as rebalancing and electrical component troubleshooting, making repair a viable option.

Why Is My Ejector Pump Switch Not Working?

You’re stuck in a mess, wondering why your ejector pump switch isn’t working. It’s likely due to faulty wiring, loose connections, corroded terminals, a faulty relay, bad capacitor, tripped circuit, inadequate voltage, incorrect installation, worn-out contacts, or a misaligned sensor – any of which can bring your system to a grinding halt.

Conclusion

By following these troubleshooting steps, you’ve taken the first vital step in resolving sewage ejector pump issues. Remember, prompt action is key to preventing further damage and unsanitary conditions. Did you know that according to the EPA, a single sewage backup incident can cost up to $5,000 in cleanup and repairs? Stay on top of regular maintenance and inspections to avoid such costly consequences.

Pentair Intellichlor Not Working: Troubleshooting Guide

The Pentair Intellichlor is a great device, but like all electronics, it sometimes has its issues. If your Pentair Intellichlor is not working, take a look at this troubleshooting guide.

We’ve collected answers to the most frequent reasons you’ll see Pentair Intellichlor not working and explained them in plain language for easy troubleshooting.

Pentair Intellichlor Troubleshooting


Quick Fix

To troubleshoot a Pentair Intellichlor, check the power supply and salt levels, inspect the cell for calcium buildup, clean it if needed, and ensure proper flow by checking the pump and filter system.

Understanding IC-40 Troubleshooting Basics

When you first encounter an issue with your IC-40, it’s essential to understand the basics of troubleshooting this saltwater chlorine generator.

Make sure you’re starting a new troubleshooting process by checking the cell’s power and age, as a 9-year-old cell may be nearing the end of its lifespan.

One featured sign of aging is reduced chlorine output even when settings remain unchanged. Verify the flow switch is working correctly, as a faulty one can prevent all lights from functioning.

Inspect the cell’s pins for corrosion when disconnected from the power center or EasyTouch, since this pool management technology depends on proper electrical contact to run smoothly.

Identifying Cell and Flow Switch Issues

You’ve checked the basics, now it’s time to focus on the cell and flow switch.

If you’re still experiencing issues, it’s likely due to Cell Malfunctions or Switch Failures. Check for Flow Faults by ensuring the cell is getting power, indicated by the flashing red low salt light.

If the flow light never comes on, it may be a sign of a bad flow switch.

  • A bad flow switch can prevent all lights from working on the IC-40, and replacing it may be necessary.
  • The age of the cell can affect its performance, with 9 years being considered old.
  • Alternative flow switches are available from other sources, such as poolguysupply.com, as a potential cost-effective solution to the recommended Pentair replacement.

Considering Pentair IC-40 Cell Replacement

You’re considering replacing your Pentair IC-40 cell, which is a vital step in troubleshooting your Intellichlor system.

The age of your cell is a key factor, as cells over 9 years old may be nearing the end of their lifespan and experiencing performance issues.

Replacing the entire cell with a new one (part number EC-520555) can be a cost-effective solution, resolving multiple issues at once and potentially extending the lifespan of your system.

Cell Age and Performance

Nine years is a significant milestone for the IC-40 cell, marking an age where its performance may start to degrade.

As you approach this mark, it’s essential to weigh Cell Maintenance and the potential for Performance Decline due to Aging Effects.

Take a closer look at your cell’s performance and check for signs of decline.

Some common indicators include:

  • Reduced chlorine output, leading to poor sanitizing performance
  • Increased power consumption, resulting in higher energy bills
  • Frequent error codes or system malfunctions, requiring more frequent repairs

Cost-Effective Replacement Option

Considering your IC-40 cell is nearing the nine-year mark, replacing the entire unit may be a cost-effective solution to resolve multiple issues at once.

Instead of replacing individual components, like the flow switch, you can opt for a budget-friendly alternative like the Pentair IC-40 cell replacement (part number EC-520555).

This efficient upgrade can help you avoid future problems and save you money in the long run. By replacing the entire cell, you’ll be taking a proactive approach to maintaining your Pentair Intellichlor system, ensuring peak performance and extending its lifespan.

Step-by-Step Troubleshooting Steps

To troubleshoot your Pentair IntelliChlor, begin by inspecting the cell for cleanliness and ensuring it’s free of corrosion, as blockages or damage can prevent proper operation.

This is especially vital in saltwater systems, where proper chlorine levels are essential for effective pool maintenance.

  • Disconnect the cell from the power center or EasyTouch and inspect the pins for corrosion, as corroded pins can prevent the cell from functioning properly.
  • Reconnect the cell and test its operation to see if the issue persists, which can help identify if the problem lies with the cell or another component.
  • Consider replacing the flow switch or entire IC-40 cell if the issue persists, especially if it’s over 9 years old.

Exploring Alternative Flow Switch Options

As you plunge into troubleshooting your Pentair IntelliChlor, exploring alternative flow switch options can be a cost-effective way to resolve issues without breaking the bank.

Online marketplaces like poolguysupply.com offer flow switch alternatives at a lower cost than Pentair’s $188 option. Before replacing the flow switch, verify you’ve ruled out other potential issues, such as cell cleanliness and corrosion.

If you’ve confirmed the flow switch is the culprit, consider a budget-friendly solution from a third-party supplier. This could save you money compared to replacing the entire IC-40 cell, which might be a more cost-effective solution depending on the cell’s age.

Common Issues and Their Solutions

You’re likely experiencing common issues with your Pentair Intellichlor, such as cell performance problems or flow switch malfunctions.

These issues can be frustrating, but they’re often easily resolvable with the right troubleshooting steps.

Cell Performance Issues

Cell performance issues can be frustrating and affect the overall efficiency of your Pentair Intellichlor system.

To troubleshoot, start by inspecting the cell for corrosion or buildup, as its cleanliness is vital for proper operation.

You should also check the water quality and salt levels, as imbalances can impact performance.

Consider the following:

  • Check the cell’s age, as it may be nearing the end of its lifespan (around 9 years).
  • Verify the flow light is green, indicating proper flow switch function.
  • Perform regular maintenance to prevent cell performance issues and extend its lifespan, which is vital to maintain optimal system function and verify proper operation.

Flow Switch Problems

One common issue affecting Pentair Intellichlor systems is a faulty flow switch, which can prevent all lights from working on the IC-40.

You may experience faulty switch symptoms like this, especially if your cell is old, like 9 years old. Replacing the flow switch is an option, but be aware that Pentair’s replacement costs $188.

Alternatively, you can investigate more affordable switch replacement options from sources like poolguysupply.com. However, keep in mind that flow switch faults mightn’t be the only issue, and you should also consider the age and cleanliness of the cell as contributing factors, so it’s a good idea to examine other possible causes as well.

Preventative Maintenance for Optimal Performance

Regular maintenance is crucial to guaranteeing your Pentair Intellichlor IC-40 cell operates at its best.

By performing daily checkups, you’ll catch potential issues before they become major problems.

  • Perform filter cleaning regularly to prevent clogs and guarantee proper water flow
  • Inspect the cell daily for signs of corrosion or damage, and clean it as needed
  • Conduct routine salt calibration tests to verify the cell is functioning at peak performance

Advanced Troubleshooting for Persistent Problems

When persistent problems plague your Pentair IntelliChlor system, it’s time to roll up your sleeves and plunge deeper into advanced troubleshooting.

Start by analyzing the system, checking electrical issues, and verifying salt levels are within the recommended range.

If the cell is over 9 years old, consider replacing it with a new IC-40 cell, part number EC-520555, as it may be more cost-effective than replacing individual components.

Inspect the cell for cleanliness and corrosion, and check the pins on the power center or EasyTouch for corrosion.

If the problem persists, consult resources like TFP or poolguysupply.com for further guidance.

Frequently Asked Questions

How to Tell if a Pentair Salt Cell Is Bad?

You’re wondering how to tell if your salt cell is bad. Check for signs like no lights, flashing red low salt lights, or damaged connections. Inspect for cell damage, and try cleaning it. If issues persist, replace it, especially if it’s old, as it may be more cost-effective.

How Do You Reset a Pentair Salt Cell?

You’re aware that 75% of salt cell issues stem from poor saltwater maintenance. Unfortunately, there’s no specific “reset” procedure for a salt cell, but you can try cleaning it to prevent corrosion, which can help; otherwise, cell replacement, costing around $800, may be necessary, and check if it’s still under warranty coverage.

What Is the Life Expectancy of the Pentair Intellichlor IC40?

You’re wondering about the life expectancy of your IC-40 cell. Generally, it can last around 8-10 years, but factors like cell replacement, saltwater issues, and chlorine output can affect its lifespan, making regular maintenance vital to extend its life.

Why Is My Pentair Salt Cell Showing No Flow?

Imagine your saltwater pool’s circulation system coming to a standstill. When your salt cell shows no flow, it’s likely due to a faulty flow sensor, which can be caused by neglecting your cell cleaning schedule and flow sensor maintenance.

Conclusion

You’ve now got the tools to troubleshoot your Pentair Intellichlor issues like a pro. Remember, an ounce of prevention is worth a pound of cure – regular maintenance can save you from a world of hassle down the line. By following these steps, you’ll be able to identify and fix common problems, and even know when it’s time to replace the cell or flow switch. Stay on top of your IC-40’s performance, and it’ll keep your pool water sparkling for years to come.