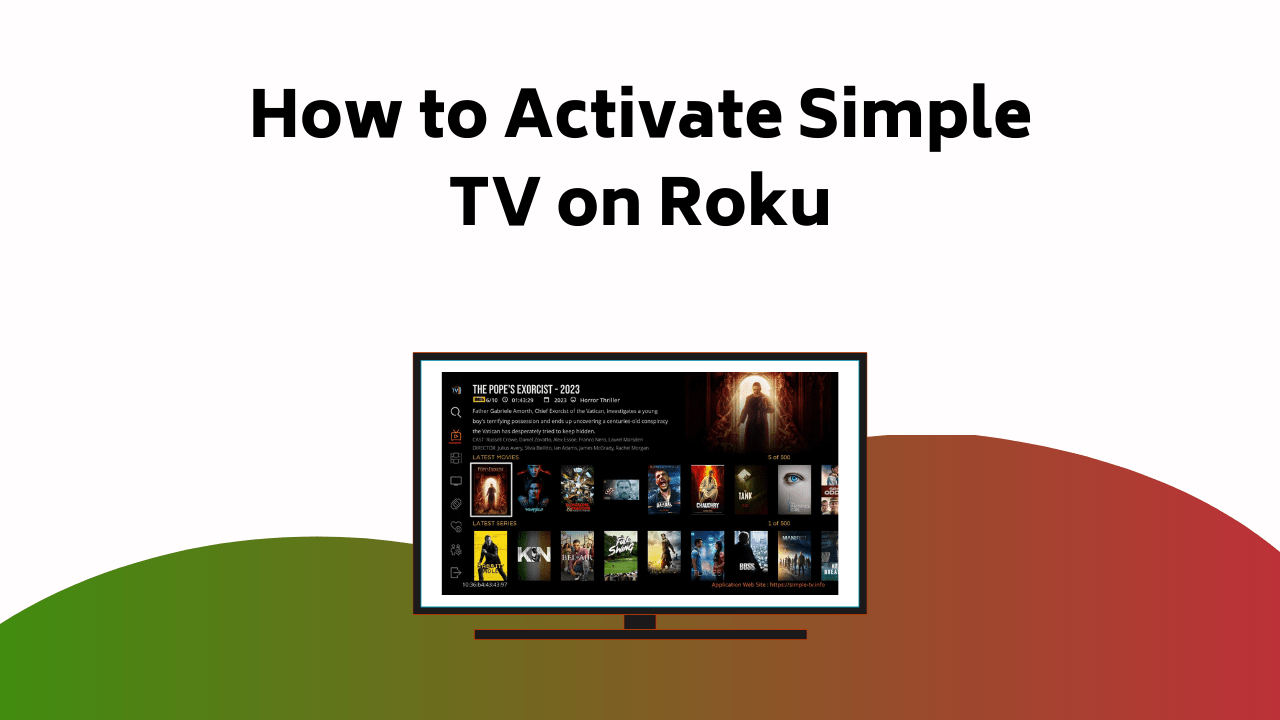
To activate Simple.TV on your Roku, first make sure your Roku device is connected to the internet. Next, download the Simple.TV app from the Roku Channel Store and launch it to get an activation code.
Visit Simple.TV/Roku on your computer or mobile device and enter the provided activation code. Voila! Your Simple.TV is activated on Roku. Remember, Simple.TV and Roku must be on the same network for you to stream saved programs. And there’s more to discover about maximizing its ultimate potentials if you stick around a little longer.
Exploring the functionality of Simple.TV, it’s crucial to understand that this over-the-air DVR system is a boon for cord-cutters, allowing you to access local TV signals, record programs, and store these recorded shows on a hard drive for later streaming on your Roku device.
You’re free to discover features like the intuitive interface that simplifies navigation.
However, you might encounter a hitch or two along the way, and that’s where troubleshooting tips come in handy.
For instance, if you’re unable to record programs, check your antenna’s signal strength.
If you’re having trouble streaming saved programs on your Roku, make sure your Simple.TV and Roku device are connected to the same network. Essentially, understanding Simple.TV’s functionality is crucial in maximizing its potential.
Activating Simple TV on Roku
Having downloaded the Simple TV app from the Roku Channel Store, you’re ready to activate it on your Roku device for immediate access to recorded and live local TV broadcasts.
This OTTservice brings convenience and flexibility right to your screen.
To start setting up, first make sure your Roku device is connected to the internet. Then, launch the Simple TV app. You’ll see an activation code displayed on your TV screen.
Now, head to Simple.TV/Roku on your computer or mobile device. Enter the activation code shown on your TV screen here. Hit ‘Activate’, and voila, your Simple TV is up and running on Roku.
If you face any issues in this process, don’t worry. With today’s technology, troubleshooting activation is simple—just repeat the steps, ensure you’ve entered the correct activation code, and you should be sorted.
Your Simple TV experience on Roku begins now.
Benefits of Choosing Roku
Now that you’ve activated Simple TV on your Roku device, let’s consider why Roku is a top choice for streaming both live and recorded content.
One of the streaming advantages of Roku is its broad device compatibility. You can use Roku on a variety of devices, from smart TVs to mobile devices and even computers. This flexibility allows you to enjoy your favorite shows and movies anywhere, anytime.
Roku also provides a seamless, user-friendly interface. Its clean design and intuitive navigation make it easy for you to find and control what you want to watch. Additionally, some Roku devices come with voice search capabilities, further enhancing user convenience.
Conclusion
So, there you have it! You’re now well-equipped to activate Simple.TV on your Roku device. With this powerful tool, your TV viewing experience will be transformed.
You’ll appreciate the convenience and unlimited access to your favorite local shows and movies. Remember, the world of streaming is at your fingertips with Simple.TV and Roku.
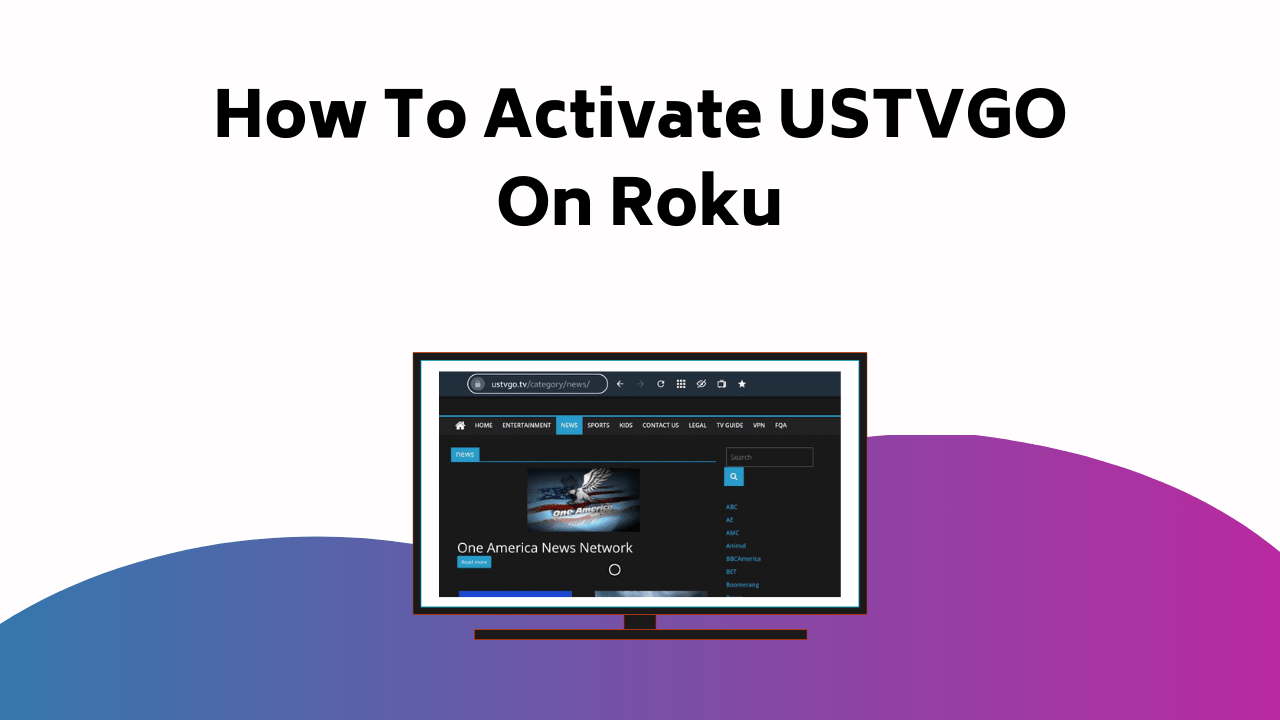
To activate USTVGO on your Roku, you’ll first need to install a reliable VPN, like NordVPN, on your device.
Make sure to connect to a U.S. server to bypass any geo-restrictions and guarantee smooth streaming. For uninterrupted viewing, check your VPN’s connection stability before accessing USTVGO.
You may also want to contemplate mirroring your Android device, with the USTVGO website pulled up, to your Roku TV. Remember, both devices need to be on the same Wi-Fi network for this. Swipe on to reveal more insight on optimizing your USTVGO experience!
To access USTVGO on your Roku device, you’ll first need to install a VPN on your device by visiting the USTVGO website.
3This step is crucial to bypass geo-restrictions and enjoy uninterrupted streaming. VPNs are a key piece of technology that enable secure and region-free access.
After setting up the VPN, connect to a US server. Now, you’re all set to explore the featured content lineup of USTVGO.
If you’re facing connectivity issues, don’t worry. Check your VPN connection to ensure it’s stable and connected to a U.S. server. Sometimes, a quick reboot is all it takes—a simple fix using today’s smart home technology.
Not satisfied with USTVGO? There’s a world of featured streaming options waiting for you. Services like Netflix, Hulu, or Amazon Prime offer vast libraries of shows and movies, powered by advanced streaming technology.
Remember, exploring is part of the streaming journey, so don’t hesitate to venture out and discover what the world of digital entertainment has to offer.
Installing VPN on Your Device
Before delving into the vast pool of content that USTVGO offers, you’ll need to install a VPN on your device, and here’s how to do it.
First, you’ll have to visit your device’s app store and search for a VPN. Choose a VPN with high ratings and reviews. Once you’ve decided on a VPN, click ‘Install’.
Once the VPN is installed, open the app and follow the instructions for setting up VPN on your device. If you encounter any issues during the setup, refer to the VPN’s troubleshooting connection issues guide, typically found within their help section.
Purchasing and Installing NordVPN
Having established the need for a VPN, let’s now focus on purchasing and installing NordVPN on your device. Visit the NordVPN website, choose your desired plan, and complete the purchase. Once done, download the NordVPN app from your device’s app store.
Steps
Action
Troubleshooting
1
Purchase NordVPN
If payment fails, try a different card
2
Download NordVPN app
If app doesn’t download, check storage
3
Install and set up NordVPN
If installation fails, restart device
Setting up NordVPN is simple; you’ll need to sign in and connect to a server. If you encounter any connection issues, NordVPN offers 24/7 support. Now, NordVPN is ready to use, ensuring a secure and unrestricted browsing experience.
Accessing USTVGO With Nordvpn
Now that your NordVPN is up and running, you can easily access USTVGO on your Android device. Remember, NordVPN plays an important role in bypassing geo-restrictions, allowing you to watch USTVGO from anywhere.
Simply open your NordVPN app and connect to a US server. This will give your device a US-based IP address, making USTVGO think you’re accessing from within the US.
You may face some hurdles along the way requiring VPN troubleshooting. Don’t worry. Check your connection and make sure your NordVPN is properly configured. If you’re still having issues, consider reaching out to NordVPN’s customer service. They’re experienced in solving such issues.
With NordVPN, you’re one step closer to enjoying your favorite US TV shows without any restrictions.
Installing NordVPN on Android Device
To enjoy unrestricted access to USTVGO on your Android device, you’ll first need to install NordVPN. Start by heading to the Google Play Store and searching for NordVPN. Once found, proceed with the installation.
After the app is installed, open it and sign in using your NordVPN credentials. If you don’t have an account yet, create one by following the app’s instructions.
Now, you’re ready to begin setting up NordVPN. Select a US server to guarantee smooth access to USTVGO. If you encounter any connection issues, NordVPN has a robust troubleshooting resource that can assist you in resolving them.
Accessing USTVGO Website on Android
Once you’re connected to a US server through NordVPN on your Android device, you’re all set to access the USTVGO website. This platform is a perfect fit for Android compatibility, allowing you to take advantage of its vast array of channels right from your phone.
Here’s a brief guide to get you streaming:
Open your browser (preferably Chrome for best performance)
Go to the USTVGO website
Choose a channel to start streaming
You’ll be impressed by the streaming quality. The interface is user-friendly, and the streaming experience is smooth. Just make sure that your internet connection is stable to maintain the streaming quality. Now, sit back and enjoy your favorite US TV channels on your Android device with USTVGO.
Mirroring Android Screen on Roku
After enjoying USTVGO on your Android, you might want to enhance your viewing experience by mirroring your screen onto your Roku-connected TV. To do this, make sure both your Android and Roku devices have the latest updates. Then, navigate to Roku’s Settings and activate screen mirroring. If you face any problems, consult screen mirroring troubleshooting guides.
On your Android, go to the Cast settings and search for your Roku device, confirming Android device compatibility. Once connected, your Android screen will mirror onto your Roku TV. Open the USTVGO app on your Android and enjoy watching on a larger screen. Remember, the success of this process heavily relies on both devices being on the same Wi-Fi network.
Conclusion
So, there you have it! Now you’re set to enjoy USTVGO on your Roku. With NordVPN on your Android and a few simple steps, your favorite U.S. channels are within reach.
Remember to keep your VPN active for smooth streaming. And don’t worry about account cancellations, we’ve got that covered too.
Enjoy your seamless USTVGO experience, and don’t forget to share your thoughts in the comments!
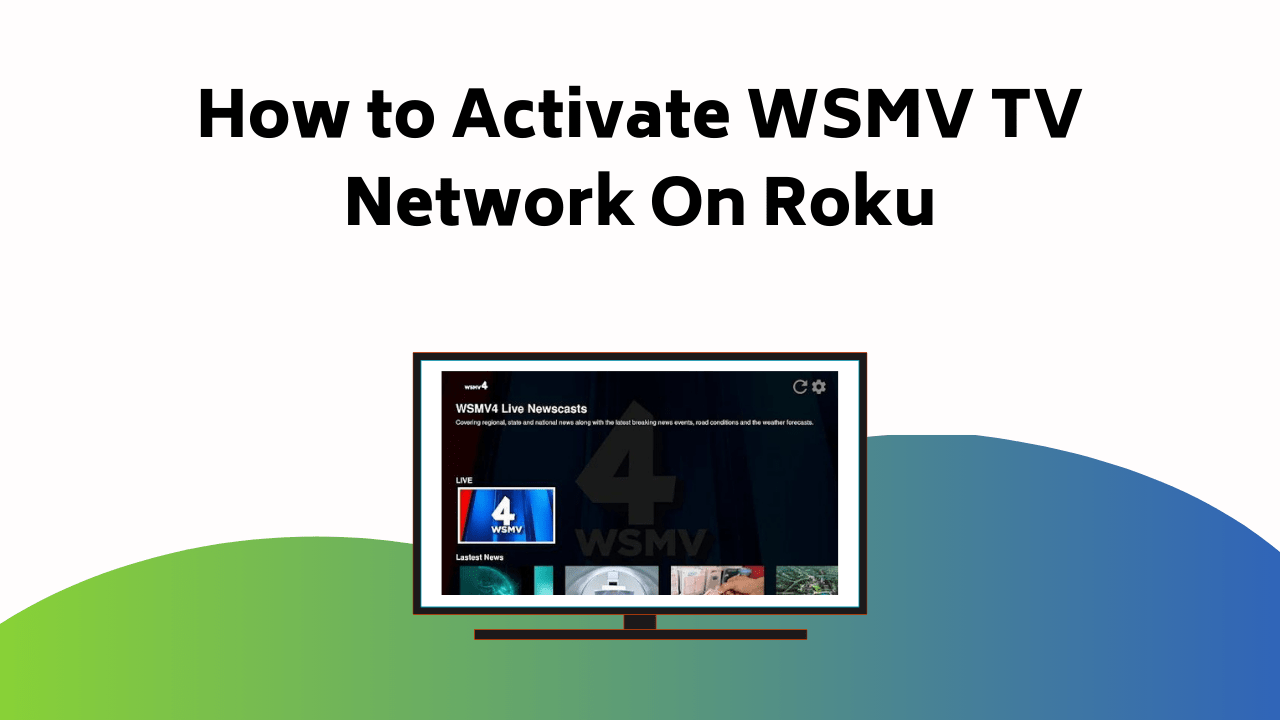
To activate the WSMV TV Network on your Roku device, first, turn on your Roku and connect it to both your TV and Wi-Fi.
Then, head to the Roku Channel Store, type in ‘WSMV TV app and add the channel. Fire up the WSMV TV app on your Roku device. A unique activation code will appear; jot it down.
On a separate device, key in this code on www.wsmv.com/activate. Finally, you’ll need a WSMV TV Network Account. Just log onto the WSMV TV Network homepage, register, and provide the needed details. Remember to craft a robust password. Stick around, there’s more you’ll find handy on how to troubleshoot any issues you might encounter along the way.
Before you can enjoy the wealth of content on the WSMV TV Network, you’ll need to properly set up and install the app on your Roku device. Start by turning on your Roku and connecting it to your TV and Wi-Fi network.
Once you’re on the home screen, navigate to the Roku Channel Store, a hub of featured streaming options powered by smart technology.
In the search bar, type ‘WSMV TV app’ and hit enter. Select the app from the search results and choose ‘Add Channel.’ If there’s a fee, you’ll be prompted to pay; otherwise, it’s free. Once installed, return to your home screen and open the app.
Don’t worry if you experience any issues during the installation. Thanks to evolving technology, there are built-in troubleshooting tips and support resources to help you resolve problems quickly.
Now you’re ready for the next step: retrieving the featured activation code to complete your setup and start streaming local news, weather, and more from WSMV.
Retrieving Activation Code
After successfully installing the WSMV TV app on your Roku device, your next task is to retrieve the activation code. Navigate to the WSMV TV app and launch it. A screen will appear displaying the unique activation code, essential to the activation process. Note this code down carefully, as any error can disrupt the entire process.
If the code doesn’t appear, don’t fret. Go to ‘Settings’ and choose ‘Get a new code’, this is one of the most effective troubleshooting tips. Once you have the code, open a web browser on a separate device. Visit the link www.wsmv.com/activate. You’ll be prompted to enter the activation code. After you’ve entered the code correctly, you’re ready for the next step.
Setting Up WSMV TV Network Account
Once you’ve entered the activation code correctly, it’s time to create your WSMV TV Network account. Follow these steps for setting up your account:
Visit the WSMV TV Network homepage on your browser.
Click on the ‘Login’ icon and select ‘Register here’.
Provide the required information, create a password and hit ‘Create Account’.
Remember, your account is key to accessing WSMV TV Network on your Roku device. If you encounter any issues while setting up your account, here are some troubleshooting tips:
Check your internet connection.
Verify the details you’re entering are correct.
Try resetting your password.
Conclusion
And there you have it! You’re now a champion at activating the WSMV TV Network on your Roku device. It’s as easy as pie, isn’t it?
Now, you can plunge headfirst into the ocean of entertainment that awaits you. Remember, if you ever feel like you’re exploring a maze when tackling technical issues, just revisit these steps. They’re your trusty compass in the vast world of Roku.
To activate your Megamixer account, first, visit megamixer.com/activate. Using the email you signed up with, find the unique activation code in your inbox or potentially in your spam/junk folder.
Once obtained, head back to the activation website, input your code and click ‘Activate’. Follow the on-screen instructions and you’ll have completed the activation process swiftly.
Keep in mind, if you encounter activation issues, Megamixer’s dedicated support will be there to assist you every step of the way. Continue on to find out more about post-activation steps and how to tackle any possible activation issues.
To start using Mega Mixer’s services, you’ll first need to navigate to their website using your preferred web browser. This initial step is important, as proper website navigation sets the foundation for your Mega Mixer experience. If you encounter any issues, don’t worry. There are troubleshooting tips available to help you get back on track swiftly.
Once you’re on the site, you’re one step closer to activating your account. However, don’t rush your way through this process.
Account security should be your top priority. If you encounter activation troubleshooting issues, Mega Mixer’s dedicated support team is just a click away.
They’re ready to assist you in ensuring that your account isn’t only activated but also secured. Remember, your security on Mega Mixer is as essential as the exciting services they offer.
Completing the Sign-Up Process
After successfully locating the Mega Mixer website, your next step is to get your account up and running through the sign-up process.
You’ll need to provide some basic information such as your full name, email, and desired password. The platform uses modern technology to ensure your personal data is securely handled throughout the process.
Once you’ve filled out the necessary details, make sure to agree to the terms and conditions before clicking ‘Create My Account.’ You’re now on your way to accessing a featured user experience designed to help you get the most out of the Mega Mixer platform.
Step
Guidance
Provide Your Details
This includes your full name, email, and desired password.
Agree to Terms
Review them carefully to guarantee your account security.
Create Your Account
Once completed, click ‘Create My Account’.
If you encounter any issues during sign-up, don’t panic. Here are some troubleshooting tips: try refreshing the page or checking your internet connection. Also, make sure that your chosen password meets the website’s security requirements.
Logging Into Your Account
Once you’ve successfully created your Mega Mixer account, logging in is a breeze with a few simple steps.
Open your web browser and navigate to the Mega Mixer homepage.
Click on the ‘Log In’ button located in the top-right corner of the page.
Enter your username and password in the designated fields and click ‘Log In’ to access your account.
Obtaining the Activation Code
Before you can fully enjoy the benefits of your Mega Mixer account, you’ll need to secure an activation code. The account verification process involves obtaining this code for activation. Once you’ve created your account, Mega Mixer will send you an email containing your unique activation code.
Here are key steps and tips:
Steps
Tips
Check your email
Make sure it’s the one you used for sign up
Find Mega Mixer’s email
Check spam/junk if not in the inbox
Note down the code
It’s unique to your account
Having trouble?
Refer to activation troubleshooting tips
Activating Your Mega Mixer Account
With your special activation code in hand, you’re now ready to activate your Mega Mixer account and access all its features. The process is simple and straightforward.
Go to megamixer.com/activate.
Enter your activation code and click ‘Activate’.
Follow the on-screen instructions to complete the activation.
During this process, keep these troubleshooting tips in mind: make sure you’re entering the code correctly, check your internet connection, and refresh the page if needed.
Remember, your account security is paramount. Create a strong password and don’t share your login details with anyone. If you encounter any issues, don’t hesitate to contact Mega Mixer’s support team for assistance.
Now, you’re all set to enjoy the features of Mega Mixer!
Post-Activation Steps
After successfully activating your Mega Mixer account, it’s crucial to take a few more steps to fully set up your profile and start utilizing the platform’s features. Begin by discovering additional features; these may include unique settings, customization options, or exclusive tools. Here’s a simple guide:
Step
Description
Step 1
Customize your profile, add a profile picture and fill out all necessary details
Step 2
Familiarize yourself with the platform, its tools and features
Step 3
Begin using the platform’s features for your projects
Reaching Out to Mega Mixers Customer Support
While you’re setting up your profile and exploring the platform, you might encounter issues that require the assistance of Mega Mixers customer support. They’re readily available to help you with any problems you may face.
There are several contact methods you could use to reach them:
Phone Support: Dial 844 2 Localista and get real-time assistance.
Email Support: Send your queries to [emailprotected]. They’re quick to respond.
Mail Support: Post your inquiries to Mega Mixer, C/O Localista Media, 2315 Lomita Blvd, Suite #203, Lomita, CA 90717.
Each method is effective, but choose what works best for you. Support troubleshooting is a part of their service, ensuring that you get the most out of your Mega Mixers account. Reach out whenever you need help.
Dealing With Activation Issues
Getting through activation issues on Mega Mixer can often be a challenge, but don’t worry, there’s plenty of support available to assist you through the process. If you’re stuck, here are some common problems and troubleshooting tips.
Common Problems
Troubleshooting Tips
Can’t find activation code
Check your email, including spam and junk folders
Activation page doesn’t load
Refresh the page, try a different browser or device
Code isn’t accepted
Double-check for errors, try again later, contact support
Conclusion
Now you’re all set! You’ve successfully navigated to Mega Mixer’s website, signed up, logged in, obtained your activation code, and activated your account.
Any concerns? Don’t hesitate to reach out to Mega Mixer’s customer support. Remember, there’s no issue too big or small for them to handle.
Enjoy the fantastic journey ahead with Mega Mixer. Here’s to unlimited mixing and connecting experiences!
To activate the GP Social App on www.gpsocialapp.com/activate, begin by opening your preferred web browser and directly heading to the specified URL. Once you’re there, you need to enter the activation code you’ve received. Ensure you have a steady internet connection throughout and review your device’s browser settings for any disruptions.
Encountering challenges during the procedure? Don’t underestimate the significance of internet stability and the importance of carefully following each step. Explore further, and you may discover a smooth activation process significantly improving your user experience.
Before you can activate the GP Social App, you’ll need to download and install it on your device, whether you’re using an Android or an iOS system.
The downloading process is simple. For Android, go to your Application Menu, tap on the Google Play app icon, search for the GP application, and tap Install. For iOS, open the App Store, look for the GP app, and tap Install.
The app is one of the featured tools designed to enhance your social experience through modern mobile technology.
Once installed, launch the app from your application menu. If you encounter issues during installation, there are troubleshooting tips available. Check your internet connection, ensure your device has enough storage space, or try restarting your device—these common fixes often resolve minor technology glitches.
If the problem persists, don’t hesitate to seek help from GP customer support, who can guide you through any featured support channels for a quick resolution.
Activating GP App on Website
Once you’ve installed the GP app on your device, you’ll need to activate it via the website, gpsocialapp.com/activate, to fully enjoy its features.
Start by opening your web browser and navigate to the said address. You’ll be prompted to enter an activation code that you’ve received upon installing the app.
If you encounter any issues during this process, don’t panic. There are troubleshooting tips available to guide you. Key among these include making sure your internet connection is stable, and your device’s browser settings allow for the activation process.
User engagement strategies are also to play here. Be sure to follow each step carefully, and don’t skip any. The aim is to guarantee a seamless activation process, enhancing your overall user experience.
Commenting and Getting Support
Following the activation of the GP app, you might find yourself needing further assistance or wanting to share your thoughts and experiences. If you’re seeking customer assistance, there are several options available to you.
GP’s in-app chat: By using this feature, you can directly connect with support representatives for real-time assistance.
Email: You can send a detailed query to their support email, and they’ll get back to you within 24 hours.
Phone: If you prefer a more personal touch, you can call the customer care number for immediate help.
For social interaction, the GP app allows you to comment on posts and engage in discussions. This way, you’re not just an app user but a member of a lively digital community.
Conclusion
So, there you have it – a simple guide to activating your GP Social App.
Worried about technical glitches? Don’t be! GP’s customer support is always ready to help troubleshoot any issues.
Now, it’s your turn to take the leap and enhance your social media game. Remember, a world of seamless digital interactions awaits you with the GP Social App. Don’t let anything hold you back.
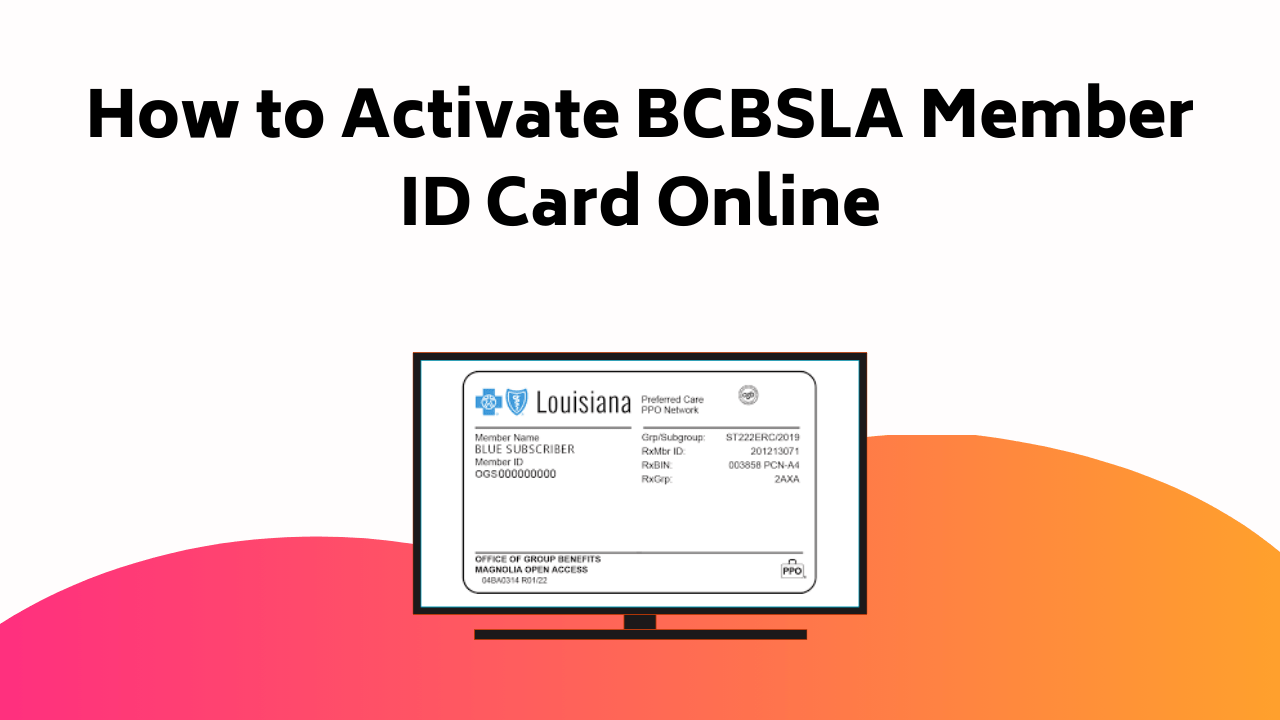
To activate your BCBSLA Member ID card, navigate to BCBSLA.Com/Activate in your web browser. You’ll need to provide specific member information like your Member ID, first and last name, date of birth, and zip code for verification.
After validation, you’ll get the chance to set up your username, password, and security questions.
Remember to review all your details for accuracy before clicking on ‘Activate Account’. Having trouble? Call their support line at 1-800-821-2753 for further assistance. Keep going, there’s plenty more to help make your activation process even smoother.
To activate your BCBSLA Member ID Card, first open a web browser on your device, be it a computer, phone, or tablet, and navigate to bcbsla.com/activate. This site is designed to be user-friendly, ensuring a smooth activation process.
However, if you encounter any issues, remember these troubleshooting tips: clear your browser’s cache and cookies, try a different browser, or reboot your device. If the problem persists, BCBSLA’s support line is available to assist you.
Entering Required Member Information
Once you’ve navigated to bcbsla.com/activate, you’ll need to enter your Member ID, First Name, Last Name, Date of Birth, and Zip Code to proceed with the activation process. This is necessary for Member ID validation.
If you face any issues during this process, don’t worry. Activation troubleshooting is available to help you out.
To make things clearer, here’s a table of the required information:
Information Required
Where to find it
Member ID
On your BCBSLA ID card
First Name
As per the records with BCBSLA
Last Name
As per the records with BCBSLA
Date of Birth
As per the records with BCBSLA
Zip Code
As per the records with BCBSLA
Ensure your entries are accurate to avoid any activation troubles.
Completing the Activation Process
After you’ve accurately entered all the necessary information, you’re just a few steps away from completing the activation process for your BCBSLA Member ID card.
On the following page, you’ll be prompted to create a username and password. Make sure to choose something secure yet memorable.
Now, set up your security questions. This will help in troubleshooting issues should you ever forget your login details.
After this, you’ll have the chance to review your information. Verify everything is correct before proceeding.
Finally, you can click ‘Activate Account’.
Congratulations! You’ve successfully activated your BCBSLA Member ID card. You’re now all set to begin exploring benefits, managing your profile, and using the various features available through your BCBSLA account.
Alternative Activation Procedure
If the standard activation process doesn’t work for you, there’s an alternative method you can use to activate your BCBSLA Member ID card. This new method involves logging onto the main BCBSLA website and selecting the option to activate your account as a new member.
Here’s a quick guide:
Step
Action
Result
1
Visit www.bcbsla.com
Opens BCBSLA homepage
2
Click ‘Log In’
Redirects to login page
3
Select ‘New member? Then, activate your account.’
Opens activation form
4
Fill up form, press ‘Next’
Completes activation
This alternative method can be handy if you’re experiencing technical issues. Remember, troubleshooting tips can be found on the help page if you encounter any problems. It’s always good to know multiple ways to achieve your goal.
Assistance With Member Account
Should you need assistance with your BCBSLA Member Account, don’t hesitate to call their activation support line at 1 800 821 2753. Their professional team is ready to help you with Member ID troubleshooting and provide account activation tips.
Let’s break down the support process:
Dial 1 800 821 2753 and patiently wait for a response.
Once connected, explain your issue clearly. Whether it’s about Member ID troubleshooting or account activation, be specific.
Follow their instructions. They’re there to help, so trust their guidance.
If needed, call back. Persistent issues may require multiple calls.
Additional Support Contact Numbers
Beyond your basic activation needs, BCBSLA offers additional support for employers, producers, and providers, making it one of the featured healthcare networks with a strong commitment to service and accessibility.
If you’re an employer requiring assistance, BCBSLA has a dedicated support line just for you. Simply dial 1-800-258-3005 to connect with a representative who can guide you through any issues, backed by the latest customer service technology for efficient resolution.
The same level of support applies to producers, this number is your direct line to the help you need, whether it’s related to enrollment, policy details, or platform navigation.
Providers, too, benefit from robust assistance. BCBSLA ensures you’re not left out by offering a separate support line. Call 1-800-216-BLUE (2853) for quick access to answers, resources, or technical help powered by reliable technology systems designed for the healthcare industry.
These featuredsupport services are in place to ensure every stakeholder—employer, producer, or provider—gets the help they need, when they need it.
Understanding the BCBSLA Member ID Card
Now that you’ve got a clear understanding of the support resources available, let’s take a closer look at the specifics of your BCBSLA Member ID Card.
Member ID: This is a unique identifier given to you when you register. It’s essential for accessing services and explaining benefits.
Group Number: This number identifies your health plan group. It’s important for determining your coverage details.
Plan Type: This part of the card identifies whether your plan is HMO, PPO, or another type.
Copay Information: This section provides details on your copay amounts for various services.
Other Useful Activation Guides
Let’s investigate some other helpful activation guides that can assist you in setting up various devices and services.
Whether you’re trying to activate a device, a new service, or troubleshoot an existing one, these guides are designed to aid you. They cover a wide range of topics, providing troubleshooting tips and activation problem-solving advice to make certain your process is as smooth as possible.
For instance, if you’re setting up your HP DeskJet All-in-One printer, you may find step-by-step instructions at 123.hp.com/setup. Likewise, if you need to activate the NBC Sports Channel, you can refer to nbc.com/activate. For help with the Spectrum TV App or Walmart MoneyCard, their respective activation guides will prove valuable.
Make sure to follow these guides for a successful activation process.
Conclusion
So, you’ve now navigated the BCBSLA activation process, a breeze right? Whether you opted for the online method or the alternative, your card is active, and your health coverage kicking.
Remember, help is just a phone call away for any sticky situations. With your activated BCBSLA Member ID Card, you’ve taken an important step in managing your health.
Now, let’s get you started on a journey of wellness and peace of mind.
To activate Avast Antivirus online, first, fire up your browser and head to avast.com/activate. Select the Avast product you’re about to activate and specify the platform you’re using. Next, proceed with the activation process by running the downloaded .exe file and enter your unique activation code.
Be sure you’ve deactivated any third-party antivirus software and checked your internet connection. Should you encounter issues, don’t hesitate to use the troubleshooting guide or contact Avast customer support. As you get deeper into the process, you’ll discover more tips and shortcuts to simplify the activation process.
To activate your Avast Antivirus product, first open your web browser and go to avast.com/activate. This is the initial step in the online activation process, powered by trusted technology that ensures secure and efficient setup.
Once the site loads, you’ll see a variety of featured Avast products. Take your time and choose the one that best meets your needs.
Whether it’s for personal protection or professional cybersecurity, Avast offers a comprehensive suite of solutions built on advanced technology.
Next, you’ll need to specify your platform, whether it’s Android, iPhone/iPad, Windows PC, Mac, or another device. This ensures full compatibility with your system, so your featured protection runs smoothly and effectively.
After selecting your product and platform, you’re ready to move on to the next step of the activation process. Keep in mind, this is just the beginning, more robust features and technology-driven protections await once activation is complete.
Downloading Avast Product
Once you’ve selected your desired Avast product and confirmed your device’s compatibility, it’s time to kickstart the download process. Visit Avast.com and choose the product that fits your needs. Make sure you’re selecting a product compatible with your device for smooth operation and less activation troubleshooting.
Click on the ‘Download’ button to initiate the process. Depending on your internet speed, this might take a few minutes. During this time, avoid running other resource-intensive applications to speed up the download.
If you encounter any issues during the download process, refer to Avast’s troubleshooting guide, which has solutions for common problems. Remember, the successful download of the product is essential for the next steps in the activation process.
Installing the Avast Product
After your Avast product has successfully downloaded, it’s time to kick off the installation process. This is a critical step before the online activation process. Here’s how you do it:
Double click on the downloaded file to initiate the installation.
Follow the on-screen instructions to progress through the installation steps.
Upon successful installation, you’ll see an Avast icon on your desktop.
Now, you might face some activation troubleshooting during the installation. Don’t worry, it’s common and can be resolved easily. Make sure you have a stable internet connection and your system meets the software requirements of Avast Antivirus. If issues persist, consider reaching out to Avast support.
Now that you’ve installed the software, you’re a step closer to activating Avast Antivirus.
Activating Avast Antivirus
Now that you’ve got the Avast software installed, let’s jump right into the activation process. Open your web browser and head to avast.com/activate. Select your Avast product and platform, then click ‘Download’. Run the .exe file and follow the instructions to install.
Once installed, double-click the product icon. Select ‘My Subscriptions’, then ‘Enter Activation Code‘. Type in your code and confirm. You’ve now activated your Avast product and can enjoy improved online security and antivirus protection.
Make sure to keep your software up to date to ensure peak security. With Avast activated, you’re taking an essential step in protecting your devices from cyber threats. Remember, safeguarding your online presence is crucial in this digital age.
Troubleshooting Avast Activation Issues
If you’re experiencing issues with Avast activation, there are several steps you can take to troubleshoot and resolve the problem. These steps involve utilizing troubleshooting techniques to identify common activation errors and applying corrective measures.
Here are a few steps you can try:
Confirm you’re entering the accurate activation code. An incorrect or mistyped code is one of the most common activation errors.
Verify your internet connection. A stable and robust connection is essential for successful activation.
Temporarily deactivate any third-party antivirus software. These can sometimes disrupt Avast’s activation process.
Contacting Avast Customer Support
Should you encounter persistent issues with Avast activation, reaching out to Avast Customer Support can provide you with the necessary assistance. They’re equipped to handle a range of issues, including activation troubleshooting. Their technical support team is available around the clock to make sure you’re able to protect your devices without interruption.
Here’s how you can get in touch with Avast Customer Support:
Method
Details
Phone
Call their toll-free hotline for immediate assistance.
Live Chat
Accessible through their website, you can chat with a support representative.
Email
Send them an email detailing the issues you’re facing.
Community Forum
Post your questions and get answers from Avast users and experts.
Additional Avast Activation Assistance
Beyond the standard support options, Avast offers additional resources to assist with your antivirus activation process. If you encounter issues during online activation, you’ll find assistance readily available.
Here’s what you can do:
Visit the Avast Support Center where you’ll find step-by-step guides and FAQs. This is your go-to for online activation troubleshooting.
Use the Avast Community Forum. It’s a platform where Avast users worldwide share solutions and ideas.
Utilize Avast’s premium tech support service. They offer real-time, one-on-one Avast activation code assistance.
Related Activation Guides for Other Products
Looking to activate other products beyond Avast Antivirus? Here’s a quick rundown of activation guides for several popular products.
For your printer setup, especially if you’ve an HP DeskJet, you’ll head to 123.hp.com/setup. This site will guide you through the process, from unboxing to connecting your printer to your network.
Now, let’s talk smart device activation. Say you’ve got a Roku and want to access iHeartRadio. You’d go to the activation site provided by iHeartRadio, enter the activation code displayed on your device, and voila! Your smart device is activated.
Remember, each smart device has a unique activation process, so always follow the instructions specific to your device and the app you’re activating.
That’s your quick guide to activating other products.
Conclusion
So there you have it – activating Avast Antivirus online is as simple as piecing together a puzzle. Each step fits neatly into the next, forming a protective shield around your online world.
It’s your digital armor, protecting 435 million users globally from cyber threats. Remember, if you hit a snag, Avast Customer Support is always ready to help.
Keep this guide handy for all your Avast activation needs and sail smoothly in the cyber sea.
To activate your Health Pays Reward Card, go to myhealthpaysrewards.com/activate. Here, you’ll need to input your member ID, birth date, and ZIP code. Subsequently, create a unique PIN to conclude the activation process. Be sure to check for correctness of your entered information to avoid common activation errors.
For any issues that arise, you can easily contact customer support via ambetterhealth.com for guidance. As you proceed with the easy-to-follow on-site instructions, you’ll discover more on how to have your card ready for use in no time.
To activate your My Health Pays Rewards Card, visit www.myhealthpaysrewards.com/activate and follow a few simple steps. The activation process uses secure technology to protect your personal information while ensuring a quick setup.
You’ll begin by entering your member ID, birth date, and ZIP code, followed by creating a unique PIN. This step ensures your account remains secure and accessible only to you. The site often highlights featured updates or program benefits, so it’s worth reviewing the homepage for any current promotions.
Be mindful of common activation errors such as incorrect data entry or temporary website issues. If you encounter problems, don’t hesitate to contact customer support—they’re trained to help resolve issues using up-to-date technology tools.
After completing the activation, you’ll receive a confirmation notification. This verification is crucial for peace of mind and ensures your card is ready to use. From there, you can start enjoying the featured benefits of the program—earning points for healthy activities and redeeming them for eligible rewards.
Always remember: accurate activation is your first step toward a smooth, secure, and rewarding experience with the help of modern technology and featured wellness perks.
Steps for Card Activation
Commencing with the activation of your My Health Pays Rewards Card, you’ll need to navigate to www.myhealthpaysrewards.com/activate on your web browser. Here’s a step-by-step guide to guide you through the process:
Click on the ‘Activate’ button on the page.
You’ll need to input your Member ID, Birth Date (in MM/DD/YYYY format), and ZIP code for Member ID verification.
Establish your unique PIN following the on-screen instructions.
Finally, conclude the activation process on the last section.
If you encounter any issues during this process, don’t worry, activation troubleshooting is a common part of the process. The main thing is to make certain that your Member ID and other information are entered correctly. If problems persist, you’ll need to contact support for further assistance.
Contacting Support for Assistance
If you’re experiencing difficulty activating your My Health Pays Rewards Card, you can contact their support team for help. The support team is available to handle any activation troubleshooting issues you may encounter.
To get in touch with them, go to the homepage at www.ambetterhealth.com, click on ‘Need Help?’ and then ‘Contact Us‘. From there, choose your state from the menu to find the support phone number and availability specific to your area.
One of the main advantages of reaching out to support is their ability to guide you through the activation process step by step. Remember, the support team is there to make sure your activation process runs smoothly, so feel free to reach out to them if you encounter any obstacles.
Key Information for Activation
Understanding the key information required for activating your My Health Pays Rewards Card can streamline the process and help avoid potential hiccups. Here’s what you need to know:
You’ll need your Member ID for verification. It’s important to keep this information handy.
The activation process involves creating a unique PIN. Make sure it’s something secure yet easy for you to remember.
If you encounter any issues during activation, don’t panic. There are activation troubleshooting resources available on the website.
If all else fails, customer support is available to assist you with activation issues.
Additional Activation Instructions
While activating your My Health Pays Rewards Card, you’ll need to follow a few additional steps to guarantee a smooth process. If you experience issues, follow these activation troubleshooting tips:
Step
Description
Support
1
Check the information entered
Make sure the Member ID, birth date, and ZIP code match with your records
2
PIN Security
Create a strong PIN and note it down securely
3
Member ID Verification
If your Member ID isn’t recognized, verify it from your health insurance card
4
Customer Service
If you’re still facing issues, reach out to customer service for assistance
5
Relax and Retry
Sometimes, a simple page refresh or trying after a while can help
Accessing the Activation Page
To access the activation page for your My Health Pays Rewards Card, you’ll need to open a web browser and navigate to www.myhealthpaysrewards.com/activate. This is the first step in the activation process overview.
Here’s a concise guide:
Once you’re on the website, locate and click the ‘Activate’ button.
You’ll then be prompted to enter your Member ID for verification. Don’t worry if you encounter any issues, as troubleshooting tips are available.
Also, make sure to input your Member ID and Birth Date accurately.
Follow the on-screen instructions to complete the activation.
Navigating the website should be straightforward. However, if you have trouble, the site offers assistance. Just remember, your Member ID verification is important in this process.
Creating Your Personal PIN
After entering your Member ID and birth date, you’ll need to create a personal PIN for your My Health Pays Rewards Card. This step is crucial in establishing your password and ensuring secure access to your benefits.
Follow the on-screen prompts carefully to establish your PIN. Remember, the more intricate your PIN is, the more secure your card will be. Make sure to jot down your PIN somewhere safe to avoid any activation troubleshooting later on.
If you encounter any issues during this process, don’t panic. There are resources available on the website to guide you through any problems you may face. Remember, your PIN is your key to accessing a world of health rewards, so set it carefully and securely.
Troubleshooting Activation Issues
Even with a carefully set PIN, you might encounter problems during the activation process of your My Health Pays Rewards Card. Don’t panic! Here are some activation troubleshooting tips to help you in resolving activation problems:
Verify Your Details: Make sure you’ve entered your Member ID, birth date, and ZIP code correctly. A small typo can cause issues.
Browser Issues: Try using a different web browser or clearing your browser’s cache and cookies.
PIN Challenges: If your PIN isn’t working, reset it and try again.
Reach Out for Support: If you’re still experiencing difficulties, contact My Health Pays Rewards Support. They’re available to assist you.
Conclusion
And there you have it! Starting your My Health Pays Reward Card is as easy as pie. Just like beginning on a healthy lifestyle journey, it starts with a simple step.
If any obstacles appear on the road, remember, the support team is just a click away.
Now, with your card started, you’re all set to start reaping your health rewards. Enjoy the fruits of your efforts and keep paving your path to wellness!
To enable YouTube on your Amazon Fire TVor Fire Stick, first power on your device and make sure it’s connected to the internet.
Then, locate and install the YouTube app from the Applications section on the Fire TV home screen. Once installed, open the YouTube app to find the activation code.
Now, launch a web browser and go to youtube.com/activate. Input the activation code from your Fire TV screen and follow the on-screen instructions to complete the activation process. If you face any issues, check for a reliable internet connection and consider restarting your device. As you progress, you’ll uncover more ways to enrich your YouTube experience.
To activate YouTube on your Amazon Fire TV, first make sure your device is turned on and connected to the internet. Navigate to the Fire TV home screen and search for the YouTube app in the Apps section.
Once located, install the YouTube app onto your Fire TV. From here, the app will display an activation code—a featured step in the process that ensures your account is properly linked.
If you encounter any issues during this setup, don’t panic. There are plenty of troubleshooting tips available.
For example, confirm that your Fire TV is connected to a stable internet connection, or try restarting your device if the app refuses to download.
Modern streaming technologyalso allows for quick updates, so checking for software updates can often resolve problems instantly.
When comparing activation methods, this one is straightforward and easy. However, there’s also an alternative route through youtube.com/activate, which relies on the same secure technology to complete the process.
Both approaches ensure a seamless experience so you can enjoy your featured streaming content without interruptions.
Youtube Activation Through Youtube.Com/Activate
If you’re looking for a different way to activate YouTube on your Fire TV, consider using the youtube.com/activate link. This approach involves a few simple steps that can assist you in bypassing common activation issues.
First, open your web browser and visit youtube.com/activate.
Next, input the activation code you received on your Fire TV screen.
Finally, follow the on-screen instructions to finish the activation.
If any youtube troubleshooting is needed, you’ll be prompted during this process. This method is generally straightforward, but in case you face any difficulties, make sure your Fire TV has a stable internet connection. Remember, the activation code is unique to your device, so ensure you input it correctly.
Alternative Activation Method for YouTube
Sometimes, you might find it more convenient to activate YouTube on your Fire TV by skipping the activation code and directly using your login credentials instead. This alternative method can be particularly useful in troubleshooting playback issues. It eliminates the need to input the activation code, speeding up the process and getting you back to creating playlists and streaming your favorite content sooner.
Simply navigate to the sign-in option on the YouTube app, enter your login details, and you’re good to go! Remember, this method requires a stable internet connection. If you’re still facing issues, make sure that your Fire TV’s software is up-to-date, clear cache, and restart the device.
Successfully activating YouTube on your Fire TV improves your viewing experience.
Skipping Activation Process
Opting for the skip activation process can expedite your YouTube setup on Fire TV, especially when you’re eager to stream your favorite content without delay. However, skipping activation might lead to some issues later on. You might miss out on personalized suggestions and won’t be able to effectively manage your subscriptions.
Here are some troubleshooting tips to keep in mind:
Verify that your Fire TV’s software is up-to-date.
Check the stability of your internet connection.
Reinstall the YouTube app if problems persist.
Skipping activation is a time saver, but it’s not without its drawbacks. Understand the potential challenges before deciding to skip. It’s all about weighing the convenience against the potential issues that might arise. Make an informed choice that aligns with your viewing preferences.
Creating a New YouTube Account
While skipping the activation process does offer immediate access to YouTube on your Fire TV, creating a new YouTube account can provide a more personalized and manageable viewing experience. However, it’s not just about personalization; account security and profile customization also play key roles in improving your YouTube experience.
Account Benefit
Description
Personalized Experience
Tailors content according to your preferences
Manageable Viewing
Allows control over watch history and recommendations
Account Security
Strengthens protection for your personal information
Profile Customization
Enables you to adjust profile settings
YouTube Community
Lets you interact with creators and other users
Details for New YouTube Account
Before establishing your new YouTube account, you’ll need to collect some essential information. This process involves multiple steps to guarantee your account security and to access new account features.
Here’s what you need to have ready:
A unique username: This identifies you on YouTube. Make sure it’s something memorable and represents you well.
A secure password: It’s important to select a strong password to protect your account from potential threats.
A recovery email: This is used if you forget your password or need to verify your account.
After setting up, you’ll have access to new account features, such as personalized recommendations and the ability to subscribe to channels. Remember, keeping your account secure is important in safeguarding your personal information and preferences.
Additional Activation Information
After you’ve successfully set up your new YouTube account, there’s more to learn about the activation process on Fire TV and Fire Stick. Not all devices are equivalent in terms of compatibility. It’s critical to confirm your Fire TV or Fire Stick is compatible with the YouTube app before starting the activation process.
If you come across any issues, don’t panic. There are numerous troubleshooting tips available. For instance, checking your internet connection, reinstalling the YouTube app, or restarting your device could solve the issue.
Conclusion
To sum up, activating YouTube on your Fire TV or Stick is as easy as pie! With this guide, you’re now equipped to access a universe of endless content.
Remember, youtube.com/activate is your gateway to this world of entertainment. So, don’t hesitate – plunge right in and investigate the vast ocean of YouTube videos.
Who knows, your next favorite binge-watch might be just a click away! Happy streaming!
To initiate Movieland TV on your Roku device, first, power on your TV and Roku, ensuring they’re connected via an HDMI cable. Press the home button on your Roku remote to access the home screen.
From there, navigate to ‘Streaming Channels’ to enter the Roku Channel Store. Click on ‘Search Channels’ and locate Movieland TV. The final step is to choose and add the Movieland TV channel to begin the activation process, a featuredaddition to your streaming lineup.
It’s straightforward and swift, and with this guide, you’re well on your way to enjoying timeless films and enthralling documentaries.
Since Movieland TV operates as an OTT platform, it brings cinematic entertainment directly to your screen without the need for traditional cable.
As you explore further, you might discover effective troubleshooting tips and learn about the impressive featured options Movieland TV has to offer, all powered by advanced streaming technology for a smooth viewing experience.
To activate Movieland.Tv on your Roku device, first make sure your TV and Roku are powered on and connected via an HDMI cable. Now, pick up your Roku remote and press the home button. This action will lead you to the home screen. From there, navigate to ‘Streaming Channels‘ to access the Roku Channel Store.
Next, click on ‘Search Channels‘. Here’s where you’ll look for Movieland.Tv. Type it in, select it from the list that appears, and choose ‘Add Channel‘. This action begins the activation process. It’s as simple as that!
The Perks of Movieland.Tv
Once you’ve activated Movieland.Tv on your Roku device, you’ll uncover a wealth of movie genres to investigate, from timeless films and Westerns to action-packed adventures and laugh-filled comedies. This extensive library of cinematic treasures is at your fingertips, ready to be discovered and enjoyed.
Here’s a glimpse of what you’ll get with Movieland.Tv:
Perks
Description
Variety
Various movie genres including classics, Westerns, action, and comedy
Timeless Films
Delve into a collection of ageless classics
Convenience
Watch your favorites anytime on Roku
Affordable
Premium content at just $29.95/month
Embrace the joy of uncovering new films or revisiting beloved classics. With Movieland.Tv, you’ll never run out of entertainment options. Activate it on your Roku today and let the movie magic begin.
Impressive Features of Movieland.Tv
Exploring the remarkable features of Movieland.Tv, you’ll discover a wealth of vintage and classic films, monthly content updates, and access to documentaries by notable creators, all accessible on your Roku device at a reasonable monthly rate.
Imagine immersing yourself in the golden era of Hollywood with a vast selection of vintage films. You’ll appreciate the intricate storytelling and timeless performances that these classics offer.
Along with these, Movieland.Tv constantly refreshes its catalogue with monthly updates, ensuring you’ll never run out of content to enjoy. Moreover, the platform provides a unique showcase of classic documentaries from esteemed creators, offering an in-depth exploration into various intriguing subjects.
All these features make Movieland.Tv an irresistible addition to your Roku.
Addressing Common Movieland.Tv Questions
While you’re enjoying the impressive features of Movieland.Tv on your Roku, you might encounter a few questions or issues regarding the use and setup of this channel.
First off, subscription pricing can be a concern. It’s important to note that Movieland.Tv offers an affordable monthly subscription, ensuring unlimited access to classic films and documentaries.
Next, you might wonder about the installation process. Don’t worry, it’s straightforward. From your Roku’s home screen, navigate to ‘Streaming Channels’, then ‘Search Channels’. Search for Movieland.Tv, select it, and click ‘Add Channel’. And voila, you’ve completed the installation process.
Diverse Content on Movieland.Tv
With Movieland.Tv on your Roku, you’ll have access to a vast library of films spanning multiple genres such as horror, drama, and comedy. You’ll uncover a goldmine of content that will definitely keep you entertained for hours on end.
Vintage Movies: You’ll be treated to a wide range of vintage movies, from timeless gems to rarely seen masterpieces.
Documentary Assortment: An impressive documentary assortment is available, giving you a chance to delve into various topics in depth.
Genre Variety: Whether you’re a fan of heart-pounding thrillers, romantic dramas, or side-splitting comedies, there’s something for everyone.
Frequent Updates: The platform regularly updates its library, ensuring you never run out of exciting content to watch.
Embrace the variety of content that Movieland.Tv offers and enhance your viewing experience on Roku.
Understanding Movieland.Tv Subscription
Now that you’re familiar with the various content on Movieland.Tv, let’s talk about how you can access this abundance of films with a Movieland.Tv subscription. This cost-effective subscription, priced at just $29.95/month, allows you to explore a diverse movie collection covering classic movies, Western films, action, and comedy genres.
The subscription perks don’t end there. You’ll also gain entry to popular movies like ‘Gone with the Wind’ and ‘Ben Hur’, as well as documentaries from acclaimed creators like John Wayne.
To activate your subscription, turn on your Roku device and TV. Navigate to Streaming Channels, access the Roku Channel Store, and search for Movieland.Tv. Select it and add the channel. Voila! You’ve just accessed a wealth of cinematic delight!
Troubleshooting Movieland.Tv Issues
Should you come across any issues while using Movieland.Tv on your Roku device, there are a few troubleshooting steps you can take to resolve them. Here are some Roku troubleshooting tips that might help:
Check Your Internet Connection: Make sure your device is properly connected to the internet. A weak signal can prevent streaming channels from working correctly.
Update Your Roku Device: Keeping your Roku device updated can fix potential bugs that may cause issues.
Reinstall Movieland.Tv: If the problem persists, try uninstalling and reinstalling the Movieland.Tv channel.
Contact Support: If all else fails, reach out to Roku or Movieland.Tv’s customer support for assistance.
Exploring Movieland.Tvs Movie Library
Discover Movieland.Tv’s extensive movie collection on your Roku device, where you’ll uncover a plethora of timeless films and documentaries from acclaimed filmmakers.
With an impressive movie selection, the channel offers a diverse genre variety to satisfy your cinematic cravings. Whether you’re a fan of classic romance, action-packed westerns, or insightful documentaries, there’s something for everyone.
From blockbusters like ‘Gone with the Wind’ to acclaimed documentaries by creators such as John Wayne, Movieland.Tv’s library keeps you entertained. The platform updates its content monthly, ensuring fresh and engaging content is always at your fingertips.
Conclusion
And there you have it! Activating Movieland.Tv on your Roku is as simple as pie. Now, you’re ready to investigate a world of vintage cinema, thrilling westerns, and engaging documentaries.
Just like a seasoned film critic, you can navigate, select, and enjoy classic movies with ease. Remember, if you encounter any issues, our troubleshooting tips are here to help.
So, grab your popcorn and immerse yourself in the fascinating world of Movieland.Tv on Roku. Happy viewing!